June 2018

Coconut Brioche with Chocolate Chunks {Easy, Dairy-Free}

The day before my last trip, I wanted to make some brioche to take to the airport (When traveling with kids you just have to be creative) but I realized I didn’t have butter or milk as the original recipe call. I thought, why not to substitute those ingredients with coconut milk and coconut oil and make a brioche with coconut flavor? I love coconut so the answer was “Let’s do it!”. Let me show you how how to make Coconut Brioche with Chocolate Chunks.

Want more coconut + chocolate flavor in your life? Check out Vegan Chocolate Ganache Ice Cream & Vegan Chocolate Chunks Cookies

Ingredients & Tools

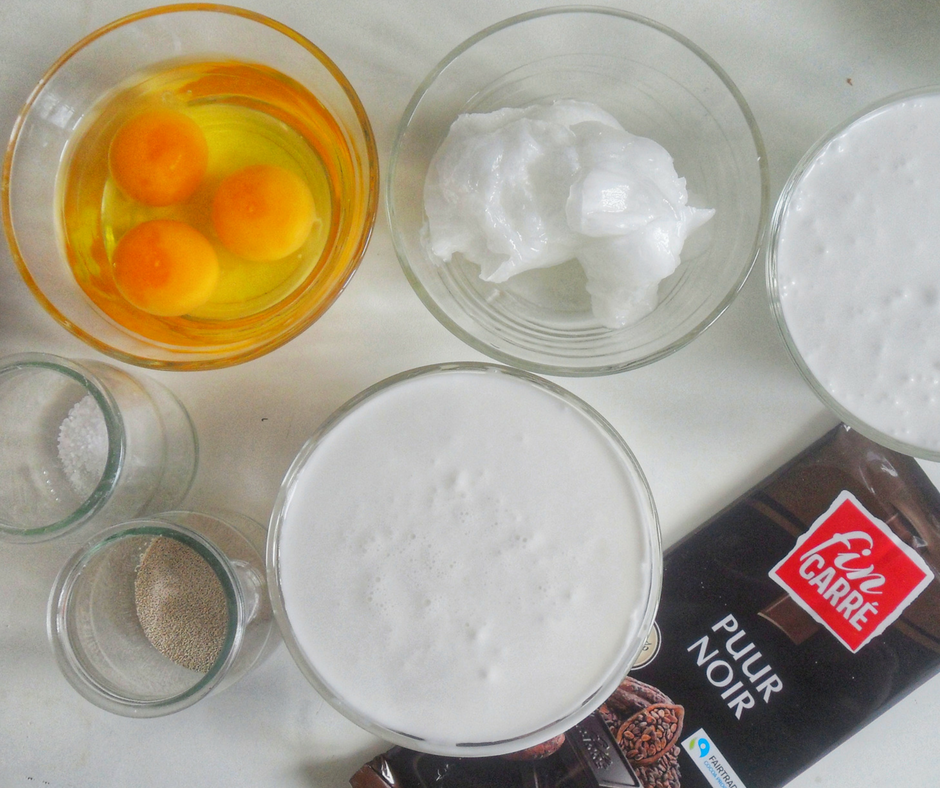
For this recipe you will need: bread flour, yeast, sugar, salt, coconut milk, coconut oil and some chocolate.
Bread baking is a therapy for me; specially when I knead the dough by hand. But because we are talking about coconut brioche and this dough can be super sticky, you’ll need a stand mixer.

I haven’t made this specific recipe by hand, but as soon as I do I will post an update. Let me know if you do it first!

Bread flour, Yeast & Chocolate

The most important ingredient here is the bread flour. Bread flour is very different from other flours (aka. all purpose, cake flour, etc) because it has a higher protein contain (gluten) which means that once you have mixed the dough, and the fermentation process begins, your dough will be more stable and trap more air, resulting in a better crumb and fluffy bread.

You’ll also need yeast. For this recipe I used instant yeast that is widely available in the supermarket. The difference between “instant” and “dry yeast” is simple: you don’t need to proof instant yeast in warm liquid, you can add it directly to your flour. On the other hand, dry yeast (aka: granulated dry yeast) needs proofing in warm water that helps to activate and dissolve the bigger granules.  Instant yeast is usually also marketed as rapid rise yeast. 

Keep in mind that there is another type of yeast, most commonly used by professional bakers which is called baker’s yeast and this is usually sold in blocks. If by any chance you have baker’s yeast at hand, you can use that, just triple the amount of yeast called in the recipe and, dissolve it in a tiny bit of warm coconut milk, before adding to the dry ingredients.

I personally love dark chocolate (74%) and is what I used for this recipe to balance the little sweetness of the bread, but feel free to use whatever chocolate you like (semi sweet, milk chocolate or even white)

Dry ingredients: Bread flour, sugar, salt & instant yeast.

Liquids: Coconut milk, Eggs & Coconut Oil

For this Coconut Brioche I substitute the milk in the original recipe with coconut milk. Because I wanted a more strong coconut flavor, I also added Unrefined (Extra Virgin) Coconut Oil. I guess you can use the refined version of coconut oil, but in that case I will add some coconut flavoring.

Because fats in the coconut milk tend to solidify when cooled, warm the milk a little in the microwave or stovetop and then cool to room temperature, before adding to your dry ingredients. The same applies to the coconut oil. Weight it and leave at room temperature until has a spreadable consistency. You don’t want the coconut oil to be hard or melted.

Eggs should also be a room temperature.

Liquids in: lukewarm coconut milk and eggs

Mixing & Kneading

Once you start mixing the ingredients you will see the dough foming into a hot mess. Don’t worry. At this point the main goal is to incorporate dry and wet ingredients the best that you can. Make sure to use an spatula to mix in any dry flour that may be at the bottom of the bowl and continue to mix on low speed until there is no big lumps of dry flour.

Add the coconut oil, and knead for 5 to 7 minutes, until you have a silky smooth beautiful dough.

Liquids mixed in, before coconut oil.
Coconut mixed in. Dough ready for bulk fermentation.

Once the coconut oil is mixed in and the dough is kneaded, I added some chocolate chunks but forgot to take the pic. Arrg! Add the chunks and pulse for a few times until the chocolate is incorporated.

Bulk fermentation & Shaping

Transfer this baby dough to a lightly oil bowl, cover in plastic wrap and let it rest for at least one hour, or until is double in size.

Ready to Roll!

The bulk fermentation can also be achieved in the fridge, it will just take a little longer for the dough to double in size; but this comes in handy if you need to go out for an hour or two. I don’t recommend more than that because the dough can suffer and deflate.

Once the bulk fermentation is done, punch the dough and start dividing the dough into your different baking pans.

From this dough I’ve got 1 medium loaf (500 gr) and 22 buns (30 gr)

Once you divide the dough, brush some egg wash and, you can also sprinkle the top with some fine shredded coconut (optional).

Don’t make the same mistake I did of preparing my muffin tin with paper cups because I was out of baking paper. That went so horribly wrong! They stuck to the bottom of the buns and were a complete pain to peel off. Avoid the pain by greasing your pan generously.

Second fermentation & Baking

Your loaf and buns are ready for the final fermentation and then baking.

Cover the pans with a light wet towel and let rest until double in size. As in bulk fermentation, this can vary depending on the weather and your kitchen temperature, but it should be around 1 hour. If so, Once the dough has rested for 40 minutes, turn on the oven to 180°C (350°F) so that it can reach the correct temperature by the time the dough is ready to bake.

The loaf is ready after 30-35 minutes and the buns in 20-25 minutes, or when the top is golden brown and the bread has registered an internal temperature of 85°C-88°C (185°F-190°F).

You did it! You are now ready to devour your homemade Coconut Brioche with Chocolate Chunks!

If you have any question regarding this recipe let us know in the comments section below. We love to hear from you!

Finally, don’t be shy and show your Coconut Brioche with Chocolate Chunks on instagram with the hashtag #sisterblissdiary. If you love this recipe don’t forget to follow on instagram and pinterest to keep up with our lastest recipes, and of course, share with your friends and family! It really means a lot to us!

Happy Baking! ?


Coconut Brioche with Chocolate Chunks {Easy, Dairy-Free} Read More »

Classic Hummus with Homemade Tahini {Vegan, GF}

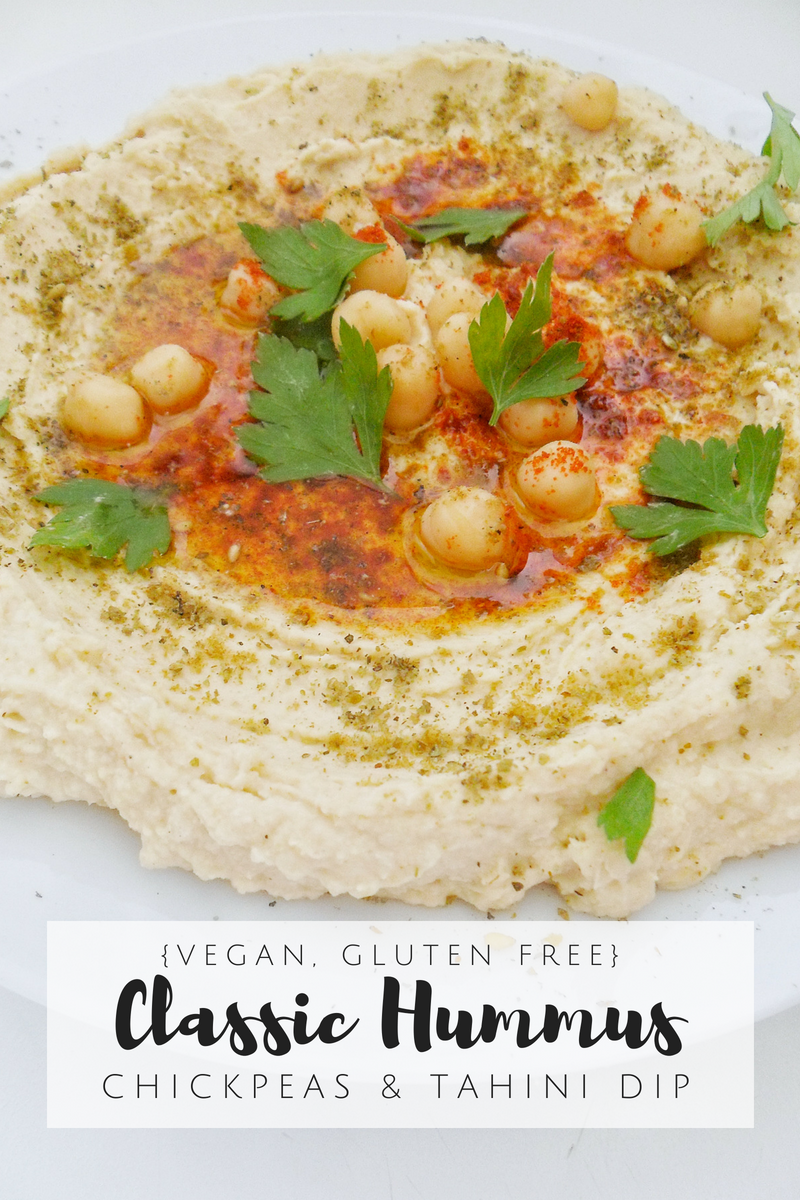
Hey, there lovelies! Today I want to share with you my recipe for classic hummus. Super easy to make, thick and creamy. Will be the perfect match for anything you eat with spread!

Hummus: Simple yet exquisite

Apparently hummus is “the spread” of the century because is everywhere, and of course, there are reasons for that: It is so easy to make, ingredients are easy to find no matter where you live, it is creamy, it is vegan, has no gluten, dairy or added sugars, I mean… if glory has flavor, it will probably be hummus.

When I tried hummus for the first time I was hooked. I loved the creamy, thick and with simple ingredients. I wanted to do it right away, but well, we didn’t have internet back then, and the recipe I found forgot to mention the tahini (sesame paste) so I ended up with chickpeas puree. Still a good, but not hummus.

At that time we didn’t have internet at our fingertips as we do now so I just kept changing my ratios of garlic, oil and lemon hoping that some hummus will came out, but obviously that didn’t work.

I was about to give up on hummus when I was in my college library one day during my free time, which I used to explored every cookbook and culinary art book I could find there, and I saw this eye-catching book with a title I don’t recall. I randomly chose a page and started reading. In a few minutes I read something like this: “Tahini or Tehina, a sesame paste used to make hummus and other middle eastern recipes“, and my eyes lit! I went excited to the supermarket to find this “weird” ingredient, and after a couple of visits I found it!… so crazy expensive for my broken college student pocket so I decided to make my own.

Ingredients & How-to

Tahini (Sesame paste)

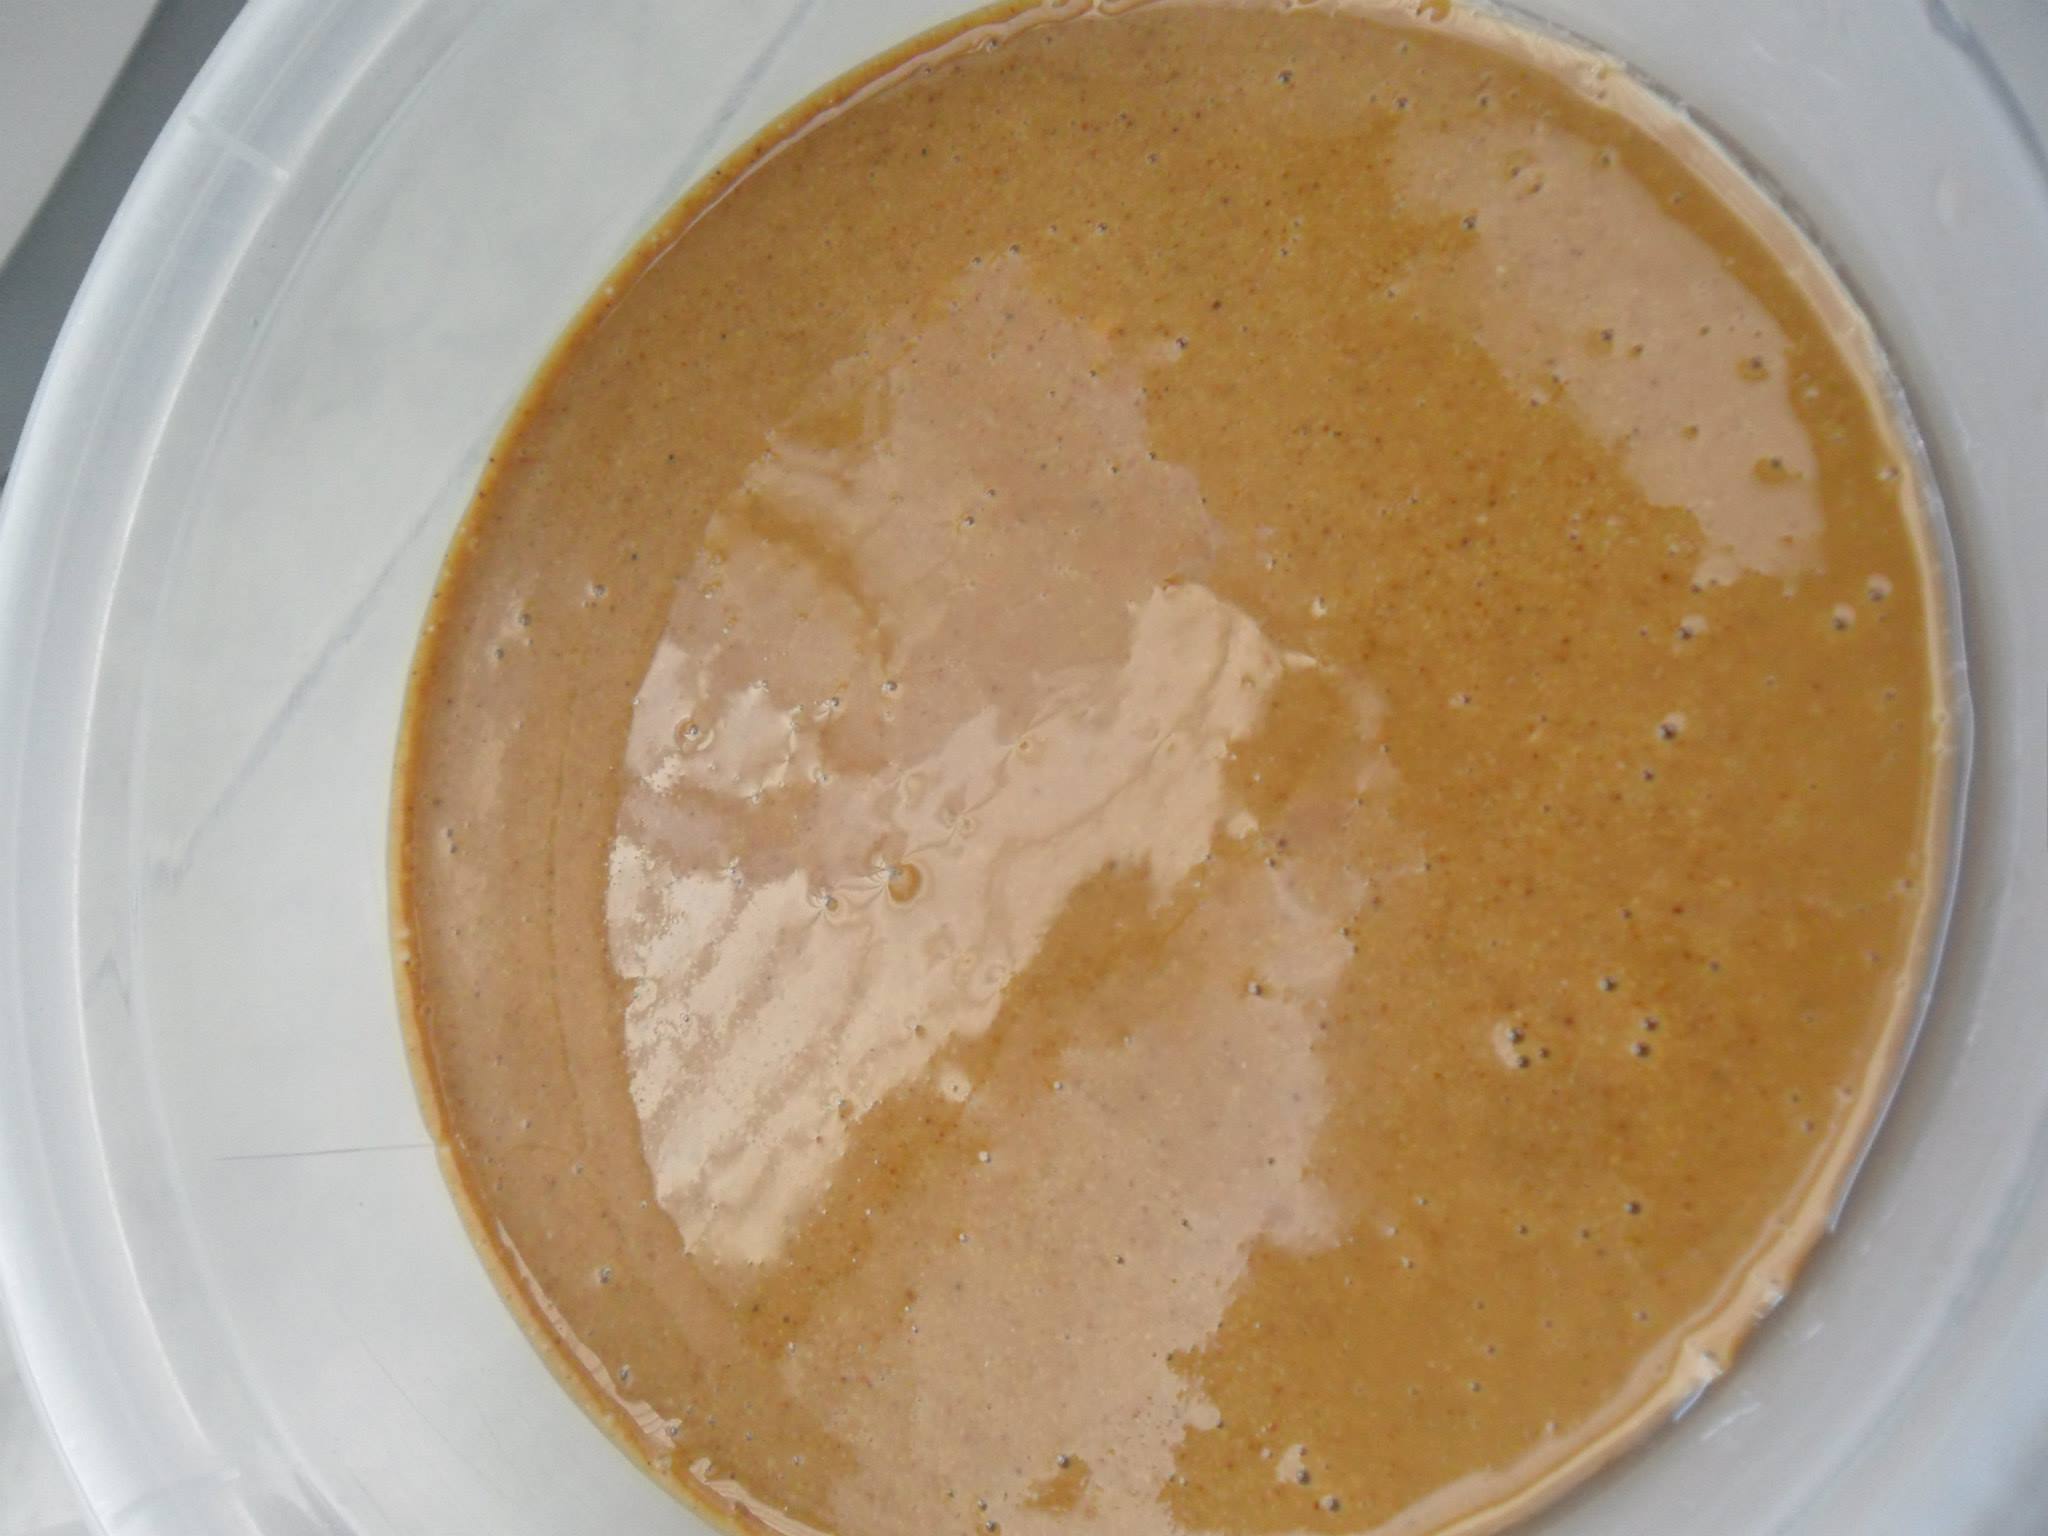
This was my first batch of homemade tahini. For this one I used unhulled (whole) sesame seeds which I toasted lightly and then, processed in a blender with some oil (Ratio: 1 cup seeds + 1/4 cup oil). I made hummus with this tahini and it was good. It was a total revelation that I could finally make my own hummus and tahini, but still, the flavor wasn’t right. It was too strong and kind of bitter at the end because of the sesame seeds I used.

After some trial and error I finally made the huge discovery that they are not just the unhulled (whole) sesame seeds, which are very common in DR, but also the hulled version of the sesame seeds that results in a tahini with a lighter flavor and color which is perfect for making classic hummus.

Also, I realized that you don’t really need the extra oil because toasting the seeds will bring out some of the natural oils in them and it will blend smooth with some patience and a good blender. In fact, once your homemade tahini has rested for a few hours, you’ll see the oil separated on top (and now I am thinking, Why I haven’t made sesame oil? Oh, well! lol). If this happens, just mix your tahini well before using.

In case you are freaking out thinking you can’t make your own tahini because you don’t have a Blendtec or Vitamix, freak no more because I made countless tahini batches in a $25 blender for years!, so it is totally possible as long as your blender can process seeds.

Garlic

When I first started making hummus, I used raw garlic, which is fine, but now I do prefer to use roasted garlic because it has a deeper flavor without the sharpness of the raw garlic, that will bring your classic hummus to a whole new level.

As I explained in the Cauliflower Mash post, making roasted garlic is as easy as charring, in an open low flame, a garlic head.

The Rest of the ingredients

For this recipe you will need some lemon juice to bring the flavors together and add some tanginess. And, you will also need chickpeas brine to process the chickpeas. You can use olive oil instead of the brine (aquafaba) but you can save some calories by adding a little bit of olive oil as garnish instead. Finally, you’ll need some spices and herbs to brighten up your plate when serving. My go-to spices for hummus are cumin and paprika plus parsley for garnish.

I think is worth mentioning that to make this delicious classic hummus you don’t really need to take the skin off the chickpeas. I mean, doing that will literally transform making hummus into a labor intensive task. Just be patient and process until you have achieved the desired consistency and the mixture is smooth.

Have homemade thick, creamy, flavorful and hundred times better than store-bought hummus when you want is priceless, and it couldn’t be more easy to do. I love to eat hummus with anything crunchy: toasts, chips and crackers, but also baked potatoes or sweet potatoes, cucumber slices, broccoli or peppers. The choice is yours!

Do you love hummus? What do you eat it with? Let us know in the comments section below! Also, don’t be shy and follow on  instagram and pinterest and tag us with the hashtag #kasheribbean so we can delight our eyes with your versions of this humble but exquisite middle eastern spread.

If you love this recipe and other recipes from the blog, spread the love by sharing with your friends and family! It really means a lot to us!

Happy cooking! ?

Classic Hummus with Homemade Tahini {Vegan, GF} Read More »

How To Eat a Balanced Diet When Your Budget Sucks

How to Eat A Balanced Diet When Your Budget Sucks

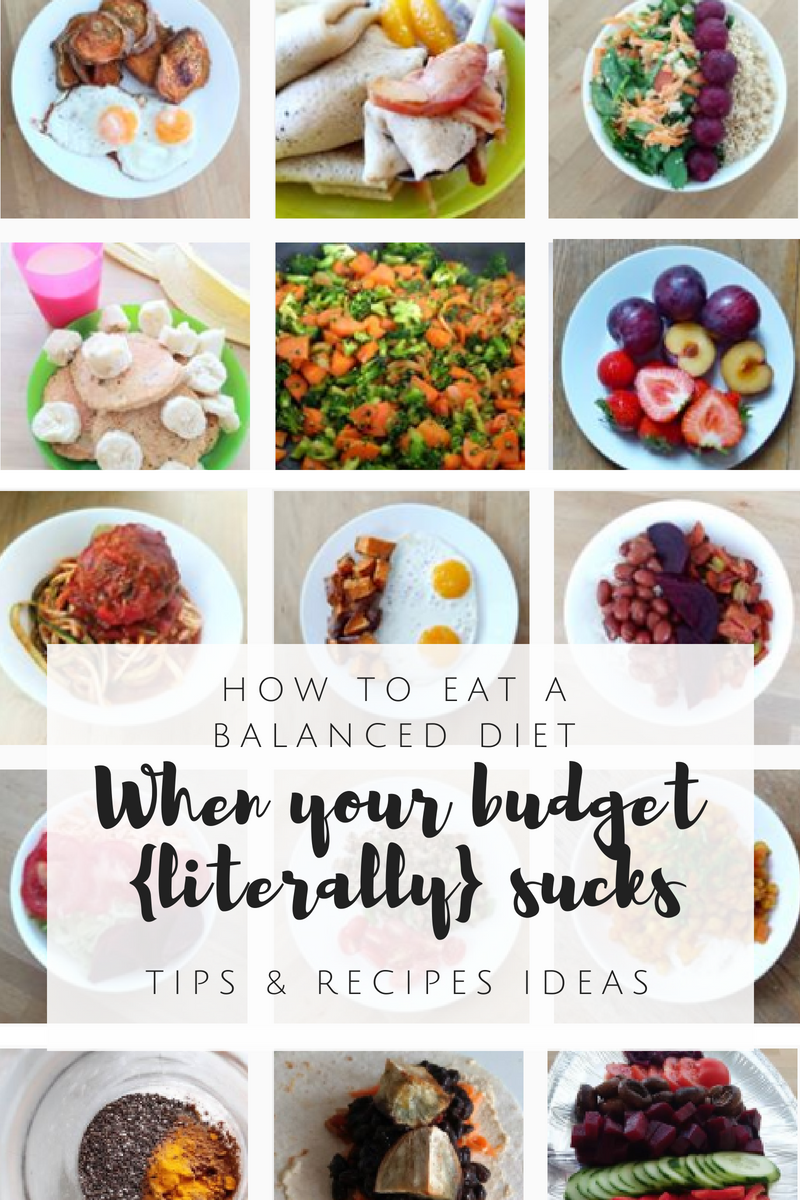
Let’s face it! At least once in a lifetime, you will hear somebody saying “eating healthy is just too expensive”. I have heard that countless of times and I used to believe that myself, until I was forced to try when facing a tight (very tight) budget. Today I want to share with you some tips and recipes ideas so that you can eat a more balanced, healthier diet even if your budget sucks (with bold capital letters!). 

Eating healthy is easier than you think

Don’t let social media fool you into think that “healthy” just means “fancy” foods that are often overpriced. Eating that way can be extremely difficult and overwhelming for a lot of people. It is also expensive, so the average earner can’t keep up. We all love times of bonanza, but economic crisis and personal finance struggles can happen to anyone, and during such times, you don’t have to trade your health.

Before I start I want to note that I understand “eating healthy” has such a broad meaning. For you it can mean eating paleo, or keto, or going vegan; but for the matters of this post, and in general terms, when I refer to “eating healthy” I mean “natural, less or non-processed food”. Whatever that you cook yourself that is made with natural ingredients (aka: not boxed ingredients) and doesn’t involve massive amounts of fat can easily falls within this category.

It doesn’t matter if you do paleo, keto, vegan or something else, as long as you eat as natural as possible, and take into account your own dietary requirements, you are all set (my condolences to those yummy Paleo cookies out there labeled as healthy and all).


Processed Foods cost a fortune

Many people often complain that eating healthy costs, and it can seem that way when you can grab a “full meal” at Mc Donalds for $5. But when you look at it in the long wrong, you’ll notice that eating processed foods is costing you way more than you think.

One visit to the store is more than enough to find out how expensive processed foods really is. I mean, a bag of crackers or chips can easily cost $3 and I can buy pasta or rice plus some veggies for the same price and have a decent homecooked meal on a tight budget.

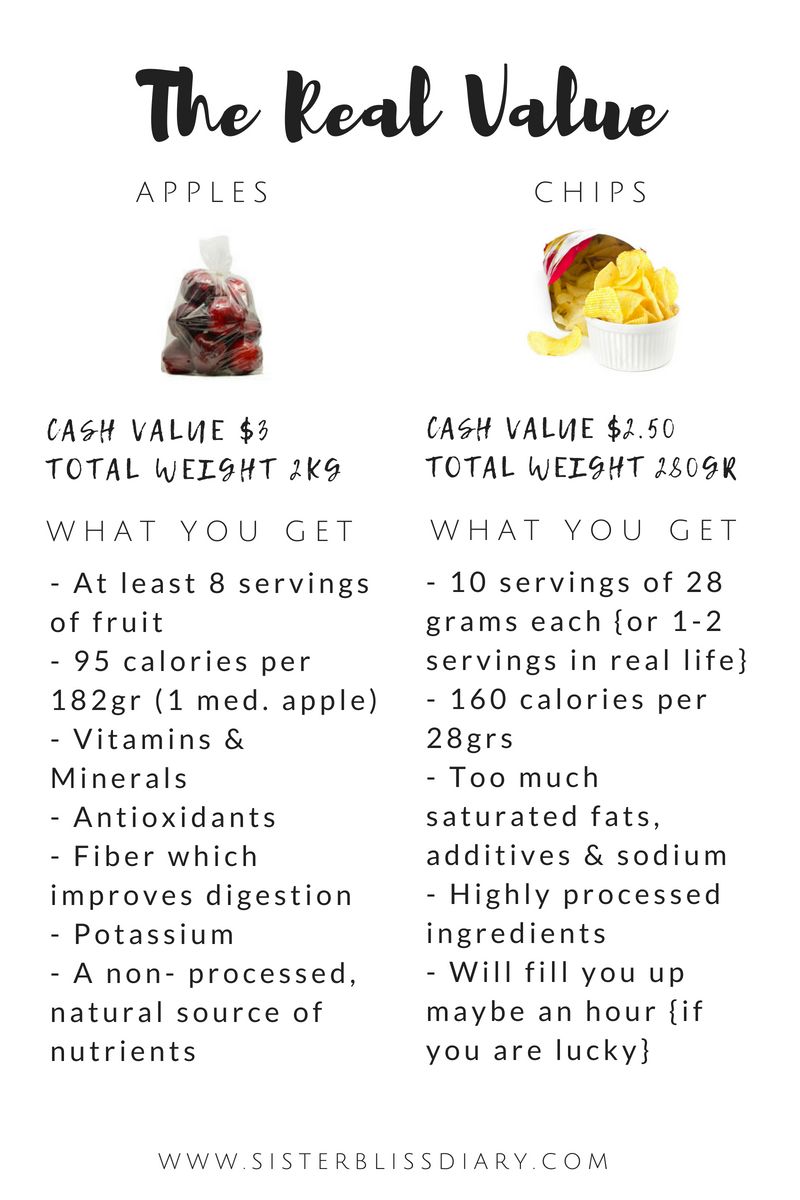
Let’s take apples as an example. They are nutrient dense, have carbs, provide fiber and a whole lot of vitamins and minerals; while a bag of chips is full of sodium, additives and other stuff that are simply not good for you in the long run. So, my first recommendation for when you are trying to eat healthier on a tight budget is consider the “real value”, and not just focus on “the cash value”, which is obviously important at this point not as important as the real value which is the nutrition you get versus the cash you pay.


Understanding the "Real Value"

When you are on a tight budget, finding the balance between eating healthy and stretching your cash can sound difficult, but it really isn’t if you so the following exercise:

The main factor to consider here is obviously the nutritional value; you can do this by answering the question: “What will give me more nutrition for less?” In the example, apparently, you have to pay more for a bag of apples but you are actually getting a whole lot of nutritional benefits that you obviously won’t find in a bag of chips, and for so little cash. So, again, focus on the real value and eat as real, natural, whole, non-processed foods as possible for you. It will not only make you feel great and bright, but you will be satiated and it will help your budget even more in the long run, as you get more experience.

But, how to actually eat healthy on a budget?


Look for sales, then plan! 

I’ve read this a million times: “plan your meals” and then, “stick to your list” and I tried and tried and tried really hard to do it, for years!, but IT. JUST. DIDN’T. WORK. FOR. ME. Sigh!

It is important to understand the value of meal planning, but when you are on a tight budget you can often plan an amazing budget friendly menu for the week and then find out in the store what you are looking for is sold out or too expensive. It’s the most frustrating thing ever! It has happened to me enough so now I do the exact opposite and I advice you to do the same: first look for sales in your local grocery store; then, plan your meals around what you’ve found.

Use your freezer 

When going to the grocery store or farmer’s market you can sometimes find a really good deal on seasonal fruits and vegetables. This is a great opportunity to get those veggies prepped for the freezer. This make it really easy to prep a healthy meal on a budget, and will be available to you at not extra cost.

Learn to cook with less

Pure and simple; learn to cook with less ingredients. It sounds pretty obvious, but I think is worth mentioning. When on a tight budget I found out I could make most of my favorite recipes with 5 ingredients or even less, so I started to simplify. Most foods don’t need a lot of ingredients to taste good, they just need some extra time so the flavor can develop.

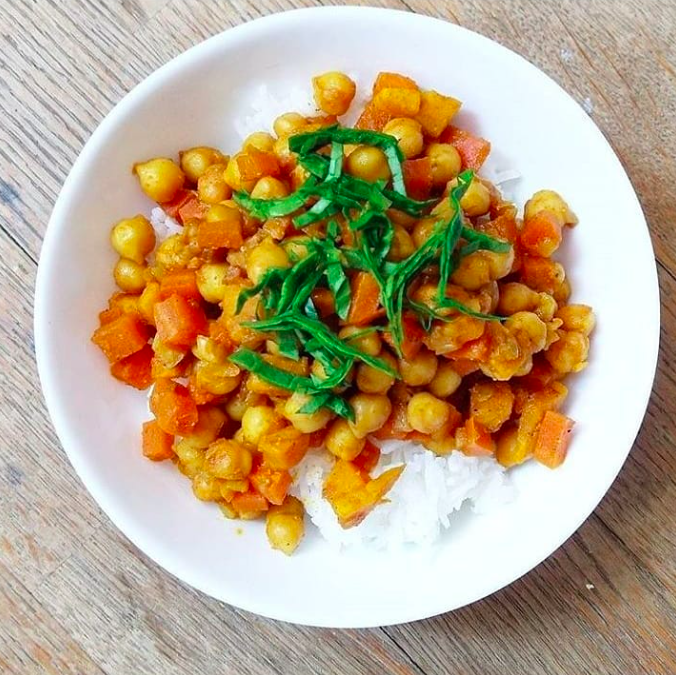
For instance, you can make a delicious rice with spinach with 5 simple ingredients: onions, salt, pepper, spinach & rice. The secret for it to taste yummy? Caramelize the onions very well by cooking over a low  to medium flame before adding the rest of ingredients. Or, you can make an incredible easy Chickpeas Curry that tastes great with just curry powder and coconut milk. Just heat the curry powder over a low flame for a few seconds until is fragrant and once you add all the ingredients, let it cook on medium low for some time.

If at any given time you are out of ideas, go to your search engine and type: “3 ingredients (or 5 ingredients) _____” (fill in the blanks). You’ll be surprise of how many people have tried already cooking with less. Just be creative and open to this new culinary experienc

Buy on the local Farmer’s Market

Going to the farmer’s market has its challenges (like, when you go with kids and they want everything they see, lol) but it can be a great way to save money, so take your time and explore your local farmer’s market.

When I started going to the local farmer’s market, I found out fairly quickly that in the entrance prices were much higher than in the rest of the market, specially the back. You can easily find more for less, or even half the price; so, go straight to the back and explore prices there first.

Paying attention to every inch of your FM can save you a lot of money in the long term. In my local FM there is a stand were they sell everything for $1 or less. I wouldn’t have discovered this stand without some exploring. They sell mostly baked products and sweets that expired the day before or are about to expire in the next couple of days. Once I found 500gr of organic quinoa and 1Kg of Spelt flour for 50 cents each (usually priced $2.99+ each in the local supermarket). After this discovery I will usually go there first. 

Pay a visit to the local ethnic shops and budget-friendly grocery stores

Don’t be afraid to go to the local ethnic grocery store. Sometimes you can find cheaper produce or special ingredients for an affordable price.

There are also some budget friendly grocery stores like Lidl & Aldi, where you can find great deals on produce and they often sell whole grains and alternative GF, and organic ingredients with a reduced price tag

Learn to use those stems and leaves

Now that you found those great deals on the Farmer’s market, please, don’t throw half that in the garbage in the form of leaves, stems or even skins! Be creative with what you bought. Our Apple Peel Chutney for example, was the result of having huge amount of apple skin after making an Apple Crisp for Rosh Hashanah one year and now it is something I always make! It’s delicious!!

Broccoli and cauliflower stems, are a great addition to stir fries. I usually remove the roughest outer skin of the stems with a potato peeler, and chop or cut into strips. It taste delicious and I love it for added texture and crunch. I also use it in soups, curries, stews and veggies rice. Broccoli and cauliflower leaves are a great addition to stir fries and soups as well. You can use onion, garlic and carrot peels to make a delicious broth. You can use carrot peel in carrot soup, or as a topping after seasoning and baking until crisp. Just think out of the box.

Repurpose those leftovers 

If you have been following for a while, you have probably read this post and this one, where I talked about food waste and re-purposing leftovers.

I used to be so mortified when I had leftovers but now I actually plan to have some to play with. Yes, I am a fan! If you have leftover spinach you can make some spinach rice, mix it into pasta, or curry, or make a fritatta; with mixed veggies you can make stews, curries, veggies nuggets, or simply add some soy or tamari sauce and make a quick fried rice. Do you have leftover apple pie or crumble? transform it into a delicious cake.

Consider eating more veggies 

Veggies are the way to go when eating healthy, and specially on a budget because meats and fish can be quite expensive.

Vegetables are incredibly versatile and as such, should always be on the top of your shopping list. You can eat them as salad or as a main dish. You can blend them into a smoothie or make a creamy soup. You are more of a wrap person? You can blend things like carrot, corn, spinach with a couple of eggs and you’ll have an easy wrap, add some sautee veggies and there you have an easy quick lunch. You can also serve fresh veggies, like cucumbers, or roasted ones, like sweet potatoes, as a snack with hummus on the side. Nowadays you can even turn veggies into sweet treats, if you are into that!

Don’t forget to add legumes, like beans, lentils and chickpeas to your menu for added protein. Nuts and seeds are a great source as well.

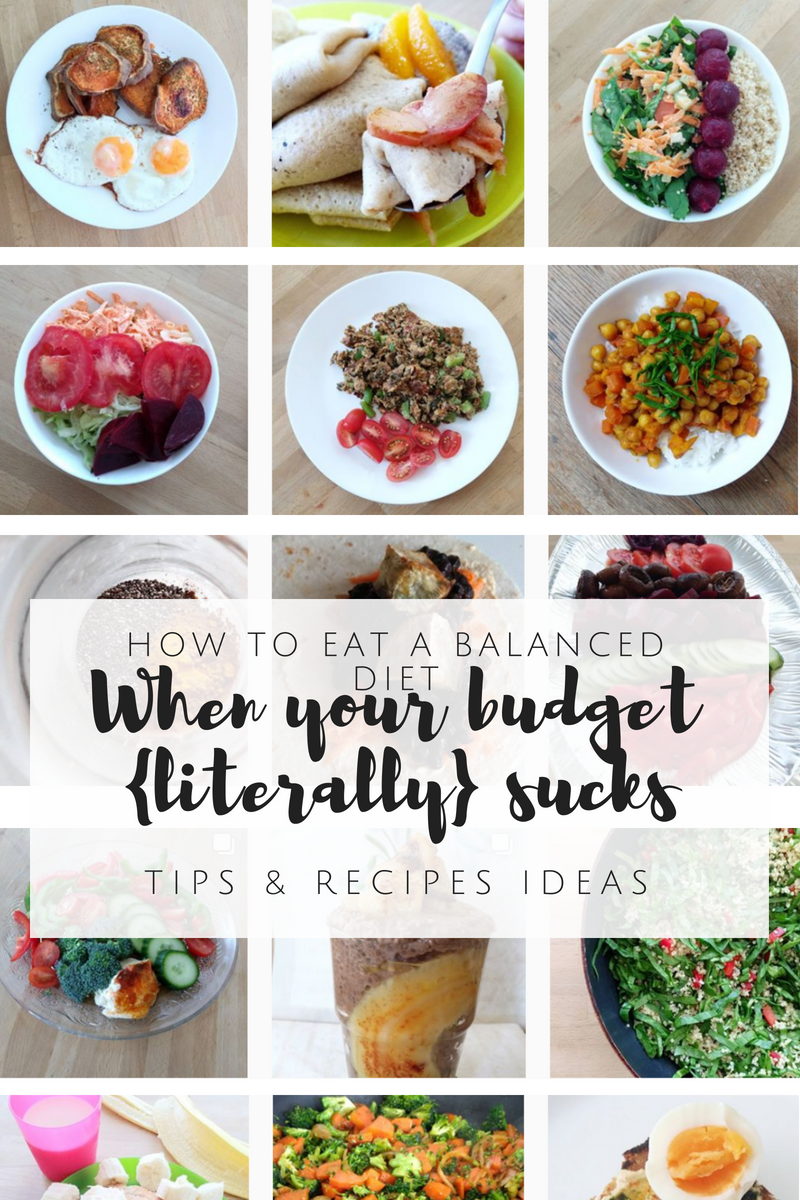
Some Easy Healthy Recipes for Tight Budgets

– Veggie Stir Fry over white or brown rice

Do you happen to have some fresh or leftover veggies that you can cut into stripes (julienne) or into cubes?… Use them to make an easy stir fry, and add some tofu, tempeh or eggs for a budget-friendly meal.

Eggs, even organic, are one of the cheapest protein sources. You can take advantage of to cook a milliard of things. If you don’t eat eggs, you can make a fritatta with chickpea flour, which is another great source of protein.

– Chickpea Curry 

This is a combo made in heavens for tight budget, and it’s so easy to make and satisfying! 

– Veggies Rice Noodles 

Rice Noodles are a great alternative for those who loves noodles (like me!) but want to escape the same pasta and sauce combo. You can also substitute noodles for zucchini noodles if you wish  😉

– Veggie Slider

I love love love this Minimalist Baker’s recipe for Veggie Sliders. It is so full of flavor and so easy to make and you just need 7 ingredients. Looking for a nut-free option? Try our Ultimate Vegan Meatballs. 


And that’s it for today folks! Hopefully you now feel relieved knowing that eating balanced and healthy is possible, even when you budget sucks.

Want to share your money-saving tips or recipes for tight budgets with us? Share it on the comments section below! Looking for more ideas and inspiration? Follow our Pinterest Board, Healthy Eating on a Tight Budget, and don’t forget to follow on instagram to keep up with other easy recipes.

Until next time,

Hannah

How To Eat a Balanced Diet When Your Budget Sucks Read More »