Kippur

Super Crusty No Knead Bread {Vegan}

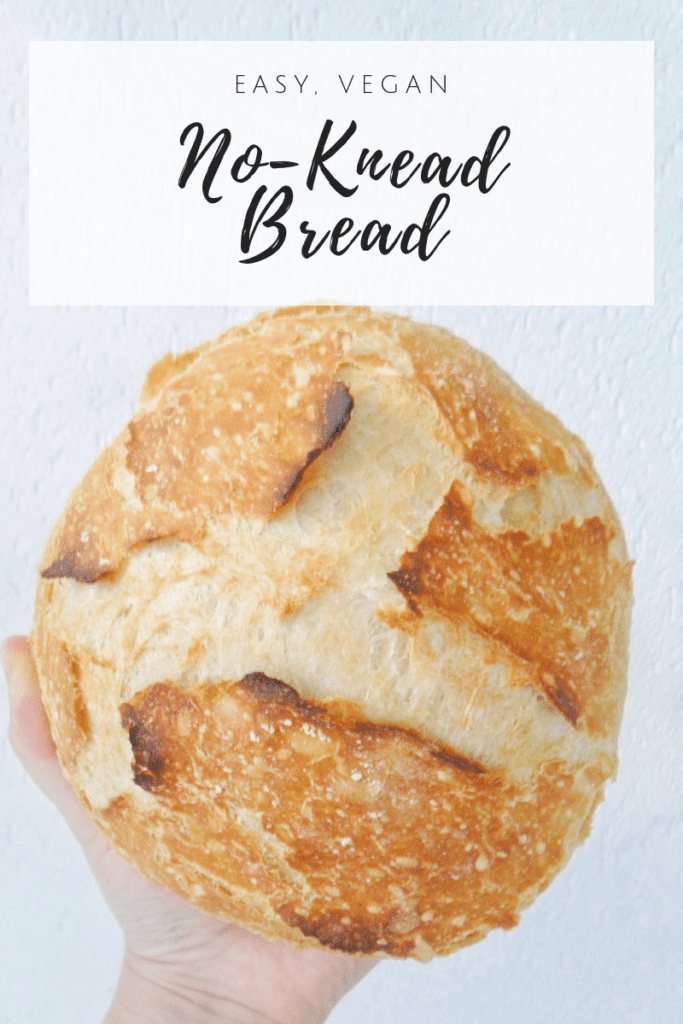
Super Crusty No-Knead Bread {Vegan}

With this easy No-Knead bread we officially start our Pre-Pesach cleaning season. Ha! Better to start early with the cleaning of the infamous flour in the cabinets and this is an excellent recipe to get started, as it is effortless and you just need 4 basic ingredients, a bowl, a “caldero” ( or you can use a cast iron pot or dutch oven with a lid) and patience to wait until is done!  

You may also like Coconut Milk Brioche with Chocolate Chunks & Vegan Challah

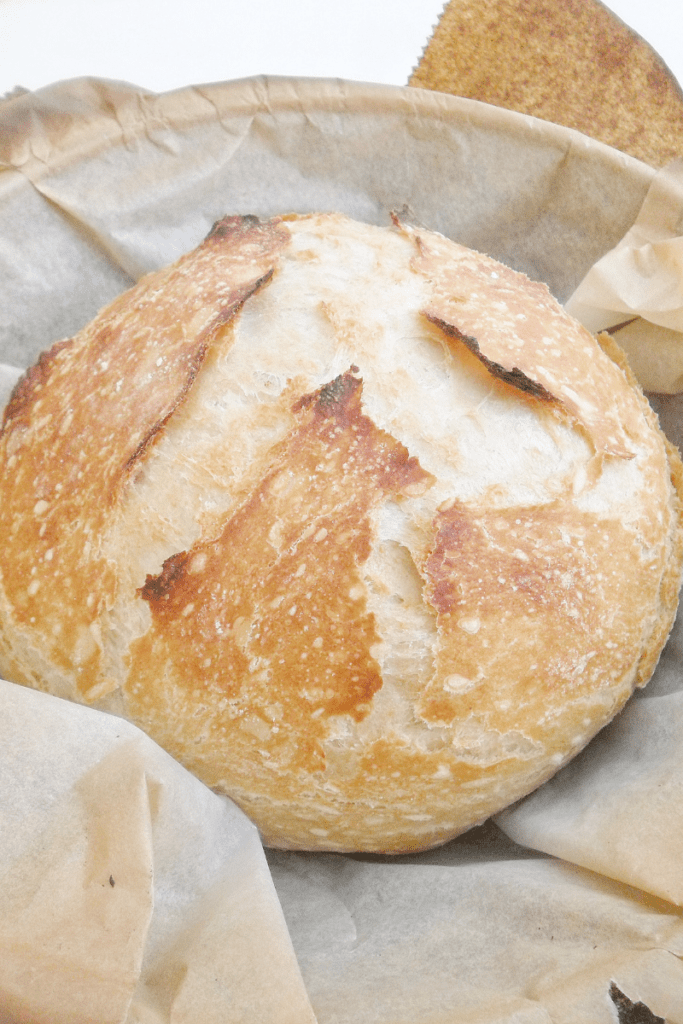
Any person that bakes at home has to eventually make this super crusty No-Knead Bread. The most basic of all breads, continue to be the king, for its simplicity and perfect crusty exterior. It also requires minimum effort on our part, and it so versatile you can have it ready tomorrow for breakfast, brunch, lunch or dinner. Any time is the perfect time to have freshly baked bread at home so, let’s get to it! 

Once you have mixed the dough, the dough have to rest for a long time. This is the price we have to pay for “no knead bread”!! This process is call “fermentation”. It is when the yeast is activated and start eating the sugars and fermenting the dough. I am not going to get into the nitty gritty of bread baking here, but essentially this process will help our dough rise, among other things. 

I let my dough for 12-14 hours at room temperature, and it was good; but in reality the fermentation process can be a lot longer (up to 24 hours in this particular case) if you want. This will develop more complex aromas in the dough. It’s magic happening. Your dough will be ready when is full of tiny air bubbles, very elastic, and at least doubled in size (image #1). At this point you need to she a ball. Your dough will be sticky so don’t panic. Shape a ball and get ready to bake. 

IMPORTANT NOTE: keep in mind that, when shaping YOU DON’T WANT TO INCORPORATE MORE FLOUR INTO THE DOUGH , you just need enough flour to be able to shape the dough into a ball without it being a sticky mess.

It is always a good idea to have some hummusbabaganoush and salads ready for when it’s munch time! 

Easy, Vegan & Super Crusty No Knead Bread {Just 4-ingredients}

Course Breakfast, Dinner

Equipment

  • Dutch Oven or Cast Iron

Ingredients
  

  • 450 gr Bread flour
  • 300 gr Lukewarm water
  • 4 gr Instant yeast
  • 10 gr Salt

Instructions
 

  • In a bowl, combine flour, yeast and salt. Add the water and mix well with a fork or wooden spoon until a rough dough is formed.
  • Place the rough dough on a lightly oiled bowl, cover tightly with plastic wrap and let it rest at room temperature (see notes) for at least 12-14 hours.
  • Before you are ready to bake, preheat the oven to 232°C (450°F). Place the cast iron pot or dutch oven with its lid inside to preheat as well.
  • Place the fermented dough on a flat surface sprinkled with enough flour to avoid the dough from sticking. Gently shape a ball.
  • Carefully take the cast iron pot out of the oven, place a piece of baking paper on it and gently place the dough ball inside.
  • Put the lid on the dutch oven, take back to the oven and bake for 30 minutes
  • After 30 minutes, carefully remove the lid and bake for another 30 minutes or until the bread is golden brown and crusty.

Notes

The time of 12-14 hours is average for room temperature (around 20°C or 68°F).
If the average temperature in your kitchen is over room temperature, you can ferment your dough in the refrigerator covered with plastic wrap for up to 24 hrs. If that's the cake, before you are ready to bake, take the dough out of the refrigerator and let it come to room temperature before shaping and baking. 
If the average temperature in your kitchen is colder than room temperature, you can leave your dough to ferment in he counter. It might just take a bit longer to be ready for baking. 
Keyword baking, bread

When you make this easy Crusty No-Knead Bread use the hashtag #kasheribbean to share on social media and, don’t forget to follow on instagram and pinterest to keep up with our easy recipes from us and the blogosphere!


Super Crusty No Knead Bread {Vegan} Read More »

Caramelized Onions & Arugula Rolls

Recipes happen as any other event in life, some are even the result of unexpected situations, like these Caramelized Onion Paste & Arugula Rolls, that have quickly become a favorite. Bare with me as we explore this incredibly delicious combo in form of dinner rolls.

For weeks I have been thinking about making cinnamon rolls as a gift for a lovely couple. I bought all of my ingredients and when I was ready to make them, I just changed my mind. Why make it sweet when savory rolls can be as delicious? As usual, I opened the fridge and quickly scanned what I had. Onion and arugula seemed like the perfect savory combo at the time, even when I haven’t tried it before, but I went with it and I’ll show you the results!

Making the Dough for the Onion & Arugula Rolls

To make these delicious Onions & Arugula Rolls you’ll start by making the dough. Very simple. Mix dry ingredients. Add wet ingredients. Add half of the fat (for this recipe you’ll need vegetable shortening, but you can also use butter), mix well and then, knead in a lightly floured surface for about 10 minutes, until you get a smooth and homogeneous dough that doesn’t stick to your hands.

Once you get to this point, place the dough in a lightly oiled bowl, cover with plastic wrap or a wet towel and let it rest for about an hour at room , or until double in size.

If you love this recipe, you may be interested in Coconut Milk Brioche with Chocolate Chunks & Vegan Challah

Make the Caramelized Onions Paste

While the yeast is working its magic on the dough, go ahead and prepare the caramelized onions.

Traditionally, caramelized onions require a lot of time to cook, plus fat and sugar, but for this recipe I followed Cook’s Illustrated method. That recipe calls for 5 ingredients and no sugar at all. I used half of the (see below the original recipe amounts) and I got 225 gr onion paste:

{THIS IS THE ORIGINAL RECIPE}

3 pounds yellow onions, in juliennes
3/4 cups water
2 Tbsps Oil 
3/4 tsp salt 
1 Tbsp water + 1/8 tsp baking soda. 

And, consists of 3 steps:

1) Cook the onions with water, oil and salt over high heat until the water is evaporated and onions sizzle.

2) Cook on medium-high while pressing & stirring the onions consistently for about 15-20 minutes or until the onions are well browned and sticky.

3) Combine a tablespoon of water with baking soda, add the solution to the onions and cook for another minute until the solution has completely evaporated.

When the caramelized onions are ready, simply pulse in a food processor for a few seconds to make a paste and reserve.

Proofing… a Second time.

By the time you finish the caramelized onion paste, the dough should be almost in doubled in size. When it is, take it out of the bowl, flatten it out a bit and knead the remaining shortening in.

It will get a bit sticky at first, but don’t panic. Knead for 3-5 minutes and it will get back to normal. The dough should be a little tacky but not too sticky.

Once again, place your dough into a lightly oiled bowl and let it double in size again.

By the time the dough is double in size you would notice a rich aroma. That’s what you are looking for when you proof your dough for longer than usual! it is heavenly!

Punch the dough down again, and let rest for 10 minutes on the counter for the gluten to relax (this way is easier to roll out into a rectangular shape)

Shaping &… yeah, you guess it! Proofing one last time for a few minutes!

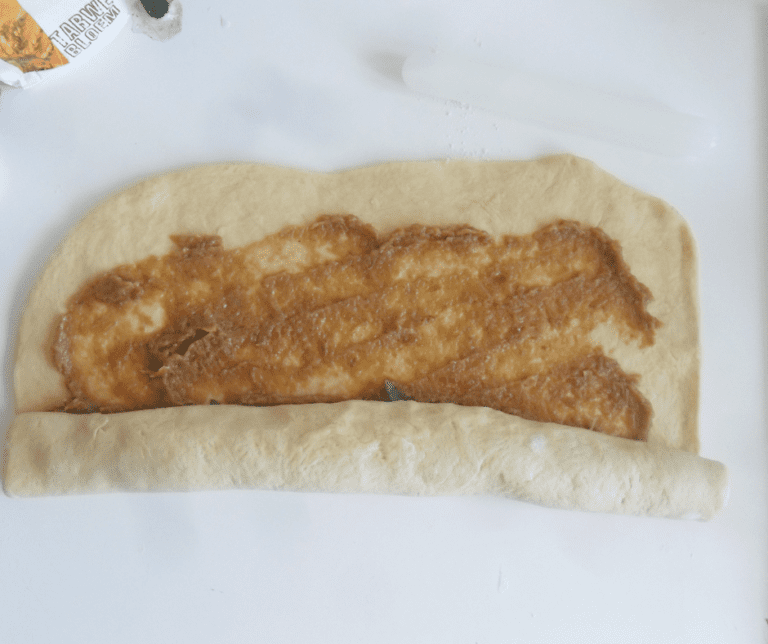
Roll it out into a rectangular shape, about 17 by 15 inches and evenly spread the onion paste.

I was a little timid with the arugula, because I was making the rolls as a present and didn’t know if our friends will like arugula, but if you are making for someone that loves arugula, don’t sweat it and add more!

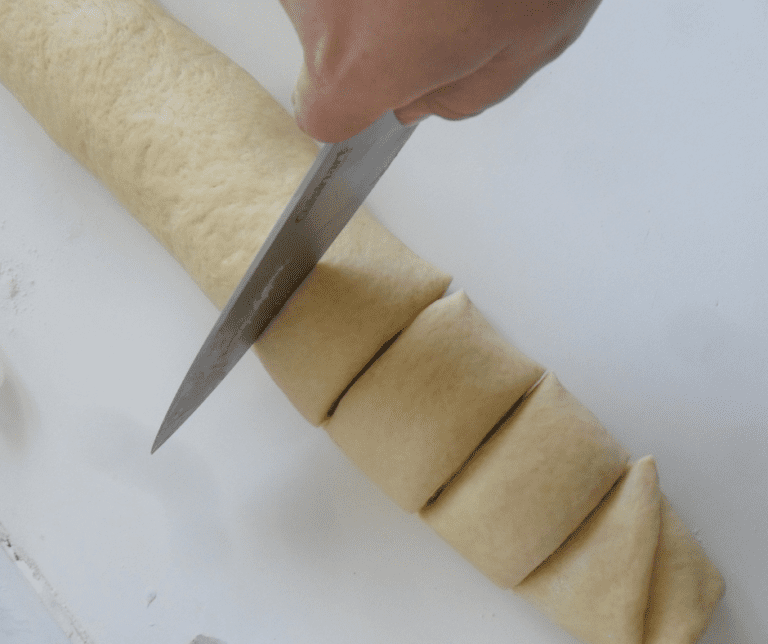
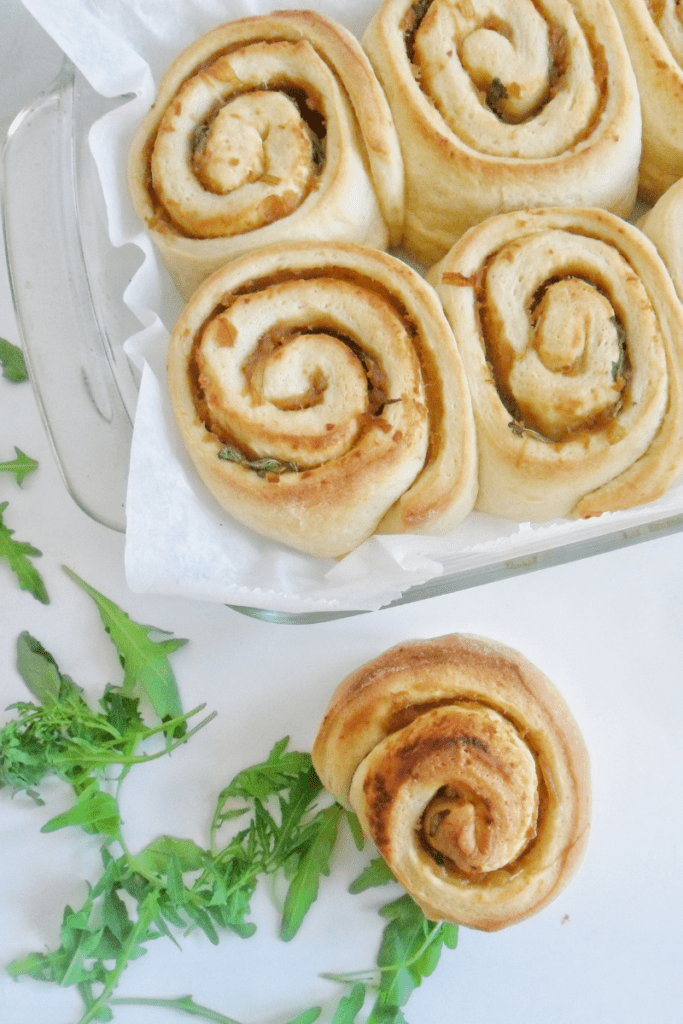
Roll out tightly and cut into 10 rolls. Place into a baking tray, baking dish or pyrex covered with baking paper and let rest for 20-30 minutes.

The only step left is to bake in a preheated oven at 350°F for 20 -25 minutes, or until the rolls are lightly golden on the top edges and the bottom.

When you make this recipe or any other from the blog, use the tag #kasheribbean to share on social media and, don’t forget to follow on instagram and pinterest to keep up with our easy recipes from us and the blogosphere!

So, now there is a gazillion possibilities on how you can take these rolls and make a million more combinations. Which one would you make next?

Until next time! ?

Caramelized Onions & Arugula Rolls Read More »

Chickpeas & Spinach Curry {Vegan, GF}

Temperature is dropping and rainy days are pretty much everyday, and this Chickpeas & Spinach Curry is perfect for such days. I hope you enjoy this easy recipe and make it very soon.

Super Quick Lunch or Dinner

I have been making this delicious and super quick Chickpeas & Spinach Curry for months now. The first time I made it I basically just trowed some random ingredients in a pot and let it cook for a few minutes. The combination of ingredients resulted in a very yummy, thick and chunky “soup” that totally exceeded my expectations.

For this recipe I used the most simple ingredients of all: yellow onion, potato, spinach, parsley, chickpeas and spices. In the pictures you can see I ended up adding some carrots; and from that you understand this curry (or thick soup) is very forgiving. You can add as much variety of veggies as you like, scraps and also is a great way to use leftovers. 

Ginger, Garam Masala, Turmeric & Curry 

These are the 4 spices I used for this recipe. The aromas are strong but the coconut milk balanced them out really well with its sweet smell. 

You can find Garam Masala in the ethnic food aisle, or in Hindu, Suriname or Morocco shops. If you don’t have one of those shops close by you can easily buy on amazon and other places online. 

How to make Chickpeas & Spinach Curry

Months ago, I was making this recipe over and over again every week, so one day I made a quick video on how to make it that you can find on our IGTV, so go check it out. 

Want more Vegan Recipes? Check out Our Ultimate Vegan Meatballs (They taste almost like the real thing!!) & the Classic Stuffed Peppers

Don’t llet the simple ingredients and easy process fool you because the flavor is amazing!

Have you made this recipe or any other from the blog? Use the tag #kasheribbean, so we can see your yummy pictures. And, don’t forget to follow on instagram and pinterest to keep up with the easy recipes we share also from the blogosphere!

Until next time! 😉  

Chickpeas & Spinach Curry {Vegan, GF} Read More »

Moroccan Carrot Salad

Moroccan Carrot Salad with a Twist

There are a few things I always include in my Shabbath and Holidays’ table and that’s it Moroccan Carrot Salad, a popular refreshing simple dish from the Morrocan cuisine, featuring carrots, a variety of spiced and fresh parsley. 
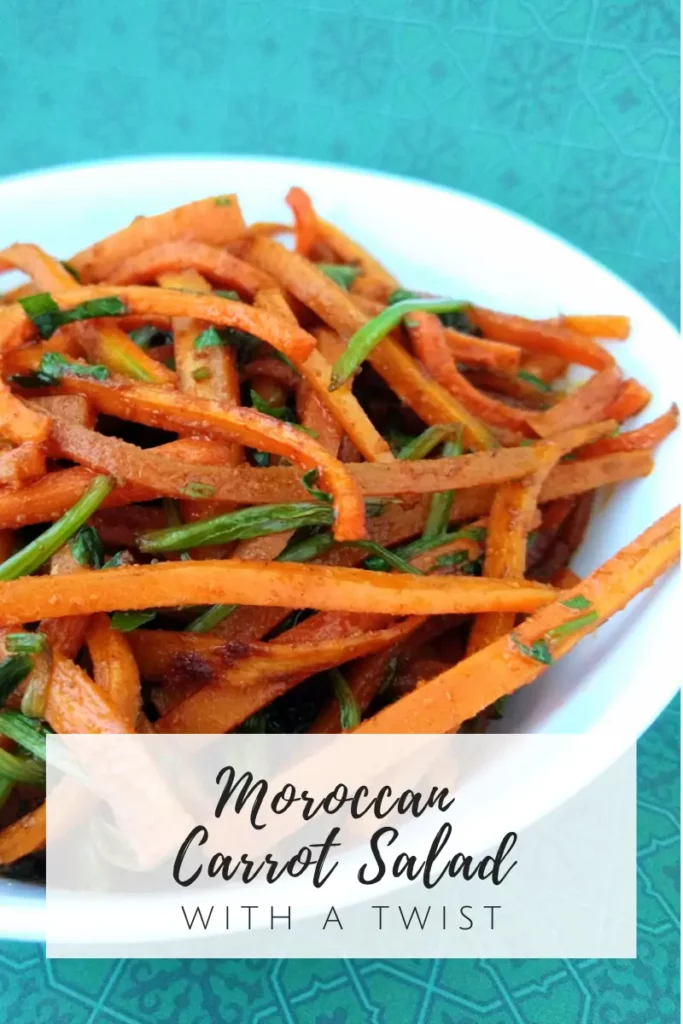
This time I went for the julienne cut to add some visual interest to this humble salad, and also used some spinach stalks that were sitting in the fridge, to avoid throwing them . Feel free to use sliced carrots if you prefer, and use only parsley for a more simple yet delicious side dish. 

Carrots are root vegetables that belong to the Apiaceae family, widely known for their vibrant color, sweetness and earthy flavor. Carrots are not only a versatile ingredient, but are also packed with nutrients like antioxidants, vitamin C, potassium, and dietary fiber, and known to be an excellent source of beta-carotene, which once converted into vitamin A in the body helps maintain good vision, promotes healthy skin, and supports the immune system

Always wash and scrub carrots thoroughly to remove any dirt or residues before using. If you buy organic, you can always save the skin, chop it up and add to soups, stews or sauté and sprinkle over rice or salads. Although orange carrots are the most common, you can also find it in other colors as well. Try them on for a kick of flavor and color. Now, let’s get cooking Moroccan Carrot Salad.

Moroccan Carrot Salad

Course Dinner, Salad, Side Dish
Cuisine Middle East, moroccan

Ingredients
  

  • 2 Tbsp Extra Virgin Olive oil
  • 1 Garlic clove, Crushed {or 1 tsp. Garlic powder}
  • 1 tsp Paprika
  • 400 gr Carrots, cut into julienne
  • ½  tsp Ground cumin
  • ¼ cup Fresh pasrley, finely chopped {Can use fresh cilantro instead}
  • Freshly squeezed lemon juice {add to taste}
  • Salt and Pepper {add to taste}

Instructions
 

  • Start by preheating your pan on low heat.
  • Add your oil, chopped garlic, cumin and paprika, and cook for a few minutes until the garlic and paprika are fragrant.
  • Add the carrots, about 1 teaspoon of salt, and pepper to taste and let this cook with the lid on for about 5 to 7 minutes or until your carrots are al dente (meaning that they still have a little crunch on the center. Turn off the heat.
  • Add parsley and lemon juice and adjust the salt and pepper if necessary.
  • Mix everything well and let it cool to room temperature before storing in the fridge.

Notes

Do you have fresh spinach in the fridge that need some love? Add them also to this recipe to avoid food waste. 
Keyword carrot salad, moroccan salad

Have you make this Moroccan Carrot Salad or any other recipe from the blog? Use the tag #kasheribbean to share on social media and, don’t forget to follow on instagram and pinterest to keep up with our easy recipes from us and the blogosphere!


Moroccan Carrot Salad Read More »

What NOT TO DO in order to have a Succesful Fast?

With Yom Kippur approaching, and the impact of this long day of fasting and prayers, we want to dedicate today’s post to this topic: What NOT TO DO in order to have a Succesful Fast? I mean, like Really!!
When I started fasting for kippur I genuinely thought I just needed to put my mind “into it”. At that time I thought “emunah” would be enough to keep me going, then, during the actual fast I experienced the worst headache ever and I realized how tough this could be. How I was supposed to do this for the coming years?! ?? Real reason behind my headaches and first “bad” experience with a long day of fasting? I was unprepared. My food choices were poor prior to the fast, and my water consumption was really low, and this alone affected me A LOT during the fast, so I started to change my habits little by little, specially two weeks to a week before the fast so that I could manage better and the result of the next kippur was really positive. For the upcoming years I did better and better, and now, now, I can really focus on the prayers without headaches or anything in between, and I am going to tell you how I do it.

This is not a complete list, of course. This is my No-No list of what to avoid, what not to do before and after the fast. After reading this you may discovered that some apply to you, or all, or even realized that we forgot something! (In that case you’ll let us know to add it to this list ?)

Here we go…

No-No #1:
Jumping into the fast without sinking in the idea first

I said before that in my first experience fasting I had a terrible time because I thought it was enough to just put my mind into it and jump into the fast. I was so unprepared… Well, after many years of fasting, obviously this alone was not enough, but it is still a very important part of the fasting experience. You have to meditate in this idea of fasting and visualize you finishing it before it even starts. If you are in some way addicted to certain foods, and there is a good chance that you think about those foods and feel hunted by your cravings, think about what triggers those thoughts and feelings and try to bring other positive thoughts to your mind.

Usually when we crave food is because we “crave” a particular time in our life or a friend, a family member, or this particular food triggers some emotions like love, comfort, etc. If for some reason you have those cravings during the fast, you now know that it is not about the food, it is about the memories around them. If your cravings remind you of a friend or family member, you can make a conscious decision of calling them before or after the fast. Differentiating these two, real hunger and cravings, will make a huge difference in terms of how successful you will be during your fasting period.

No-No #2:
Starting the fast Dehydrated

Don’t you EVER start the fast dehydrated! You need to drink a huge amount of water, no kidding!
On the days around the fast (starting 2 to 1 week before) I make the conscious decision to drink a lot (Like a REAL LOT!) of water. It helps with focus, bloating and cravings and it makes you feel better in general. Even though Yom Kippur’s fast is not about “health”, at the end your body will thank you for all this water in your system .

I have found that drinking half my body weight in ounces of water helps me a lot with headaches, hunger and focus. I always start my massive water consumption at least a week before the fast. Even 3 days of massive (literally massive!) water consumption will make a big difference on your fasting day. Of course, consuming tons of water means you may go more than usual to the bathroom but this is just one little downside (if you really are that negative to call this “downside”) comparing to all the benefits you’ll get. And, since many people are partly dehydrated (even without knowing it), all this water will for sure make a positive impact on you overall health.

No-No #3: 
Eating like is the end of the world before the fast

If you want to be successful in this fasting endeavor, you need to start reducing your food intake at least a few days before the fast, not eating more!. I know! Your mind may be telling you that you need to “store” as much “food” as you can in order to “survive” but you will probably end up with stomachache, gas, bloating and other symptoms that are never good nor welcome, specially before Yom Kippur. What you really want is to get used to less food so that the day of the fast you don’t miss any food or at least the probabilities or doing so are reduced.

I usually start eating less at least a week before the fast. I have tried many ways, one of them being making a 3-days fruit “fast” that ends on ereb kippur which means I just eat fruits (that also counts towards my water consumption) for 3 days, and the end of this “fast” is the beginning of kippur . Take into consideration that if you are eating just fruits, you need to increase the amounts you eat because fruits have considerably less calories that other foods.

No-No #4:
Not Choosing your food wisely

When you are preparing for a fast, and after the fast, is better you avoid certain foods like fatty foods and junk foods starting days before the fast. Need reasons? We all know these foods are bad for you in general terms, and if you are not going to stop consuming them 100%, at least consider it at this time, previous to Yom Kippur.

One of your goals right before the fast should be to eat enough nutrient dense foods that will keep you full longer and maintain your sugar levels stable long enough so that you finish the fast without cravings, headaches, bloating and things like that, and for that reason is better to limit and even avoid refined carbs and super sweet stuff before and after the fast.

In my experience, when I eat refined carbs before the fast like breads, donuts, pastas, etc, I am more likely to get a headache, maybe stomachache and the worst… cravings!. In the past 10 years or so I have been eating from pasta to chicken soup to vegan food before the fast, and I have found that the best food to eat for me are those with more protein content (meat or plant-based) and less refined carbs; but I would not suggest cheese, because dairy is more comparable to a junk food than a proper nutrient dense food.

Also, and this is kind of obvious, avoid foods that tend to make you gassy. Of course this will vary from one person to another, but some people may find that legumes, dairy products, and certain vegetables like cabbage, onions and garlic make them more likely to get gas, so if you are one of those, avoid these foods completely before the fast.

No-No #5: 
Thinking & talking about food during the fast

I don’t understand why, right before Minhah, there is always someone that starts talking about how good his/her mom cooks, or even describing certain foods! (aka “pure torture for everyone else!”)… Going to the synagogue means that you will be very busy with the prayers, but if at any point in between services you feel like this, thinking and even salivating while remembering your favorite foods’; meditate or grab a book and read something positive. Even your siddur’s footnotes would be a good thing to read at such time 😉

No-No #6:
Overwhelm your shrunk stomach with a marathon of food 

All of these tips can lead you to have a more meaningful fast, so, don’t ruin everything you’ve done until now by eating 2 kilos of meat, a whole pizza or a dozen donuts after the fast is finished. You literally need to eat like a poor man after the fast. Try to be prepared and have a simple meal like some root vegetables soup or chicken soup ready at home. Hot chamomile, dandelion, ginger, lemon or mint tea are also great options to have as soon as the fast finishes. Try not to rush into food and, if for any reason you are going to eat something like pasta or rice to break the fast (we cannot control the universe after all) try to eat much less than what you normally eat. Remember that you just had 26 or so hours without food and water. DO NOT overwhelm your shrunk stomach with a marathon of food.

Well, well, this is all for today. Tell us, is there any other tip you put into practice in order to prepare for the fast? Let us know in the comment section below or head over instagram or pinterest and let us know there 🙂

Tizké leshanim rabboth!


What NOT TO DO in order to have a Succesful Fast? Read More »