Passover

3 Ingredients Coconut Macaroons {Gluten-Free, Passover-Friendly}

3 Ingredients Coconut Macaroons {Gluten-Free, Passover-Friendly}​

3 Ingredients Coconut Macaroons {Gluten-Free, Passover-Friendly}

I remember being a fan of all things coconut, and I still am. It’s aroma it’s one of those things that easily transports me to my roots in the Dominican Republic. It is also a feeling ingredient, that can be added to many dishes, savory and sweet, and prepared in many ways. Now, this cookies combine two things that I enjoy: coconut and crunch. 

Are you a fan of peanut or nut butters? You might want to try these Peanut Butter Cookies which are also made with 3 ingredients.

These cookies are perfect because: 

 – They are passover-friendly 

– It’s made with very few ingredients and requires short prep.

– You can increase this recipe easily to make bigger batches depending your needs.


I baked these cookies for 8 minutes and by the time they were golden all around, crunchy on the outside and a little creamy on the inside. You can reduce the oven temperature to 325F and bake for about 10-15 minutes if you want set cookies that are just lightly crunchy and more creamy. 

Semi sweet chocolate drizzle is a nice addition to this cookies, once they are baked and completely cooled down. 


Enjoy!

3 Ingredients Coconut Macaroons {Gluten-Free, Passover-Friendly}

3 Ingredients Coconut Macaroons {Gluten-Free, Passover-Friendly}

Course Snack
Servings 14 Cookies (20 grs each)

Ingredients
  

  • 140 gr Coconut  (Finely shredded)
  • 70 gr Egg whites
  • 70 gr Granulated Sugar

Instructions
 

  • Preheat your oven to 350ºF (175ºC) and line your baking sheet with a silicon mat or parchment paper.
  • Mix all of your ingredients in a small saucepan, turn on the heat and start heating the mixture while stirring, until the mixture is well incorporated and the coconut is moist.
  • Scoop out cookies of about 20 grams onto your baking sheet. You can also shape little balls in your hands and flatten a little.
  • Bake in your preheated oven for 30 minutes, or until your cookies turn a light golden color.
  • Remove from the oven and let cool completely on the baking sheet.
  • This keep well stored in an airtight container for several weeks.

Notes

Optional: You can drizzle or cover these cookies with semi-sweet chocolate or couverture.
Keyword baking, cookies, dairy-free, Gluten-free, passover, sweet treats

Have you make these Peanut Butter Cookies? Use the tag #kasheribbean to share on social media and, don’t forget to follow on instagram and pinterest to keep up with our easy recipes from us and the blogosphere!


3 Ingredients Coconut Macaroons {Gluten-Free, Passover-Friendly}​ Read More »

Rice Pudding: 3 Ways {Traditional, Coconut & Coffee}

Rice Pudding is one of those simple dishes you could eat over and over again. For breakfast, for dinner or for dessert, hot or cold, plain or dressed up, is one of a kind recipe. Easy to make and so versatile. Get ready to learn how you can make delicious Rice Pudding 3 ways: the traditional dairy version, the vegan coconut version and the coffee version {can be made dairy or vegan and is delicious!}

The Basics of Rice Pudding

Rice Pudding is one of the most basics and popular breakfasts, dinner and/or dessert served in Dominican Republic.

Is incredibly easy to make, and as you can see, super versatile. The most basic version need 5 ingredients: rice, milk, sugar, salt and lemon peel. For extra flavor some people also add cinnamon stick and sweet cloves, but let’s keep it simple this time. You can later experiment adding more flavor.

When making Rice Pudding I personally prefer to start with my rice uncooked, but you can certainly use leftover white rice, that is not too salty or greasy, and still have a delicious rice pudding.

Are you looking for more recipes with rice? Check out our Dominican Style Spicy Sardines Rice & Beer and Almonds Risotto

The Traditional Version

In general terms, the traditional version of Rice Pudding is made with Milk. Whole milk is just fine for the recipe, but if you are looking for the best of the best, thick and super creamy Rice pudding, always use evaporated milk.

Nowadays you can easily find evaporated plant based milks; you can certainly use that if you avoid dairy products.

The Coconut Version

To make the coconut version you just need to use full fat coconut milk instead of whole or plant-based milk of choice.

What I like about the coconut version is that it has such a silky texture and is very light compared with the dairy version. It also has a very delicate aroma, and a pure white color at the end, which I love. It just looks heavenly.

Keep in mind that in all recipes on the blog that call for Coconut milk we use FULL FAT, simply because we want all that coconut milk goodness in our final product. Fat free or low fat coconut milk are usually full of flavorings, including sugar, and use gums to give a thick texture, but the flavor in general is always off. Avoid yourself the headache of ruining a delicious silky smooth rice pudding by buying the best full fat coconut milk you can find on the market, with not extras or nasty ingredients.

The Coffee Version

Almost a month ago I published a photo on instagram of my breakfast that day: a small glass container full of Coffee Rice Pudding.

The idea just came to me when I couldn’t decide if I wanted a full delicious cup of coffee, or a bowl with freshly made thick and totally delicious rice pudding. Both fill up my stomach easily on their own, and because I couldn’t have both (obvious reason: I am trying to lose my next 25 pounds) I ended up adding a bit of instant coffee to the rice pudding while it was still hot.

Taste wise, the result was a-ma-zing! and to my surprise, that “out-of-the-blue-picture” quickly had over a hundred likes, so is a fact; instagram is full of #coffeelovers.  😛

How to Make Rice Pudding

Have you make this recipe or any other from the blog? Use the tag #kasheribbean to share on social media and, don’t forget to follow on instagram and pinterest to keep up with our easy recipes from us and the blogosphere!

So, now there is a gazillion possibilities on how you can take your traditional rice pudding to the next level. What special ingredient will you add to your very own version?

Until next time! ?

Rice Pudding: 3 Ways {Traditional, Coconut & Coffee} Read More »

Dominican Stewed Kidney Beans {Vegan, GF}

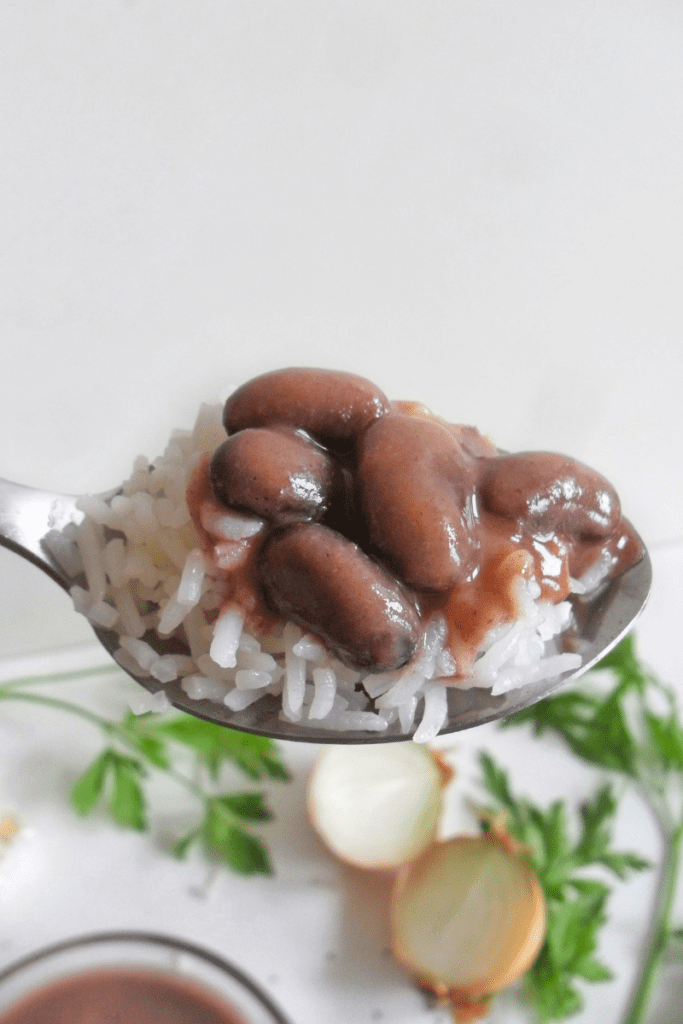
Dominican Stewed Kidney Beans {Vegan, Gluten-Free}

These dominican style Stewed Kidney Beans are the perfect companion to fresh and steamy white rice. We chose kidney beans for this particular recipe, because of their robust and earthly flavor as well as their creamy texture. Kidney beans are also full of nutrients, versatile and easily available, but you can also use small red beans, or pinto beans if that’s what you have available. 

When buying kidney beans (or any beans for that matter) is important to look for dried beans that are clean and unbroken. Beans and packaging should be free from mold or insect damage, and you should avoid anything with a humid or musty odor. If you can, choose beans packaged in airtight or sealed bags to maintain freshness. Fresher beans will cook fasted and more evenly, and will have better flavor.

Store dried beans in a cool, dry place in an airtight container to maintain their quality and freshness. Cooked beans can be stored in the refrigerator for up to 4 days. If you want to keep for longer, store in an airtight container and freeze for up to 3 months. 

How to make Dominican Stewed Kidney Beans

In order to make stewed kidney beans, you’ll need to first soak the beans overnight. Once the beans are all hydrated (they will almost double in size), discard the water, rinse the beans, add the beans to a pot, cover with fresh water and boil the beans on medium-high until they are fork tender. This could take somewhat between 1 hour to 2 hours. Alternatively, you can cook the beans with a pressure cooker, if you have one. 


Once the kidney beans are tender, is time to make the base of your stew with a simple but powerful trio: olive oil, minced garlic and dried oregano. This is seriously the base of any delicious stewed beans, so don’t skip this important step!


One unconventional but important addition to these stewed kidney beans are bell pepper cores. If you don’t do this already, hear me out and save those beauties, because they take any stewed beans to the next level. I like to clean mine from seeds and the stems, after which I keep in the freezer on an airtight container for future use. 

These are my little secrets to make dominican style stewed kidney beans. Now that you know them, there’s no excuse for you to make delicious stewed beans over and over again. 

Dominican style Stewed Kidney Beans

Course Lunch
Cuisine Dominican Republic

Ingredients
  

  • 1,200 gr Kidney beans From 1 Kg soaked overnight, drained and cooked without any salt or seasoning
  • 30 gr garlic cloves, minced
  • 3 gr 3gr dried oregano leaved (about 1 Tbsp)

    Dried leaves not powder

  • 2 Tbsp Extra Virgin Olive Oil
  • 30 gr Yellow onion about 1 medium
  • 20 gr Red bell pepper
  • 1 Bell pepper core, seedless
  • 1/2 Tbsp Sweet Paprika (optional)
  • Fresh cilantro if you can't find it, feel free to use fresh flat-leaf parsley
  • Salt to taste

Instructions
 

  • Add Olive oil to a pot and cook minced garlic and oregano on low, until fragrant. This will take 2-3 minutes.
  • Add the cooked kidney beans, onion (leave it whole), bell pepper, sweet paprika powder and parsley. Simmer on medium low for about 30 min or until the vegetables are soft.
  • Take out the onion, bell pepper and parsley, with approximately 1/2 cup of the liquid and beans, and blend until smooth.
  • Strain the vegetable mixture you just blended over the rest of the beans. Add salt (about 1/3 to 1/2 Tbsp for this amount of beans would be enough).
  • Continue to cook the beans for a few more minutes until it thickens to your liking (keep in mind they will thicken even more when cool)

Notes

-  1 Kg of dried kidney beans, will yield approximately 1200 gr of cooked beans. You can use it all for this recipe.
 
Keyword beans, caribbean cuisine, lunch

If you make this Dominican Stewed Kidney beans, or any other recipe from the blog, don’t forget to use the hashtag #kasheribbean to share your pictures, and don’t forget to follow along on instagram and pinterest for more easy recipes.

Dominican Stewed Kidney Beans {Vegan, GF} Read More »

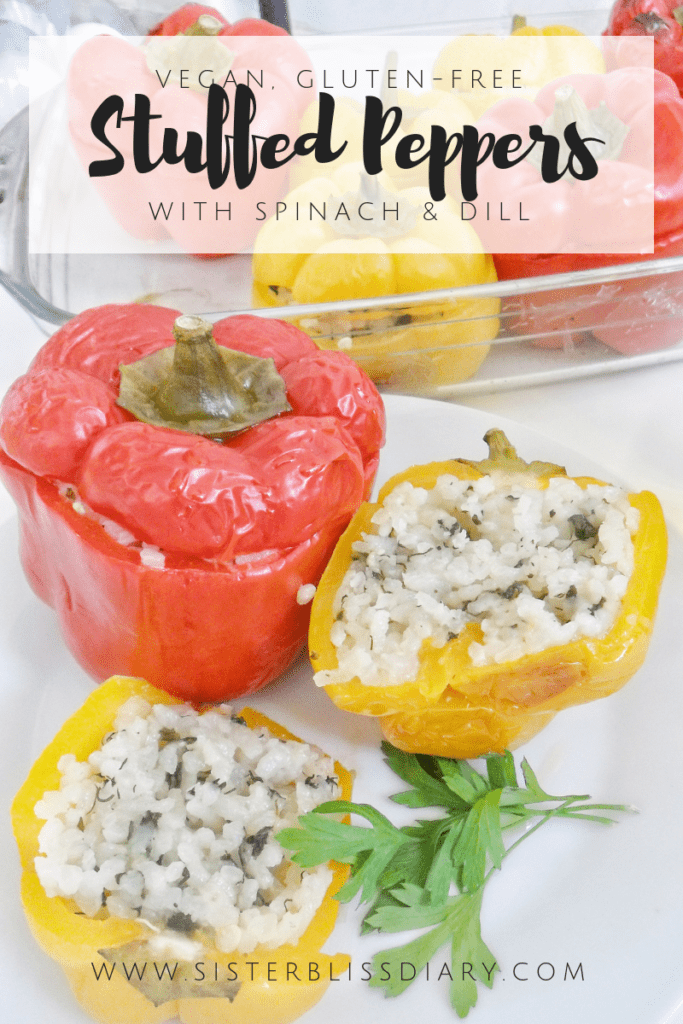
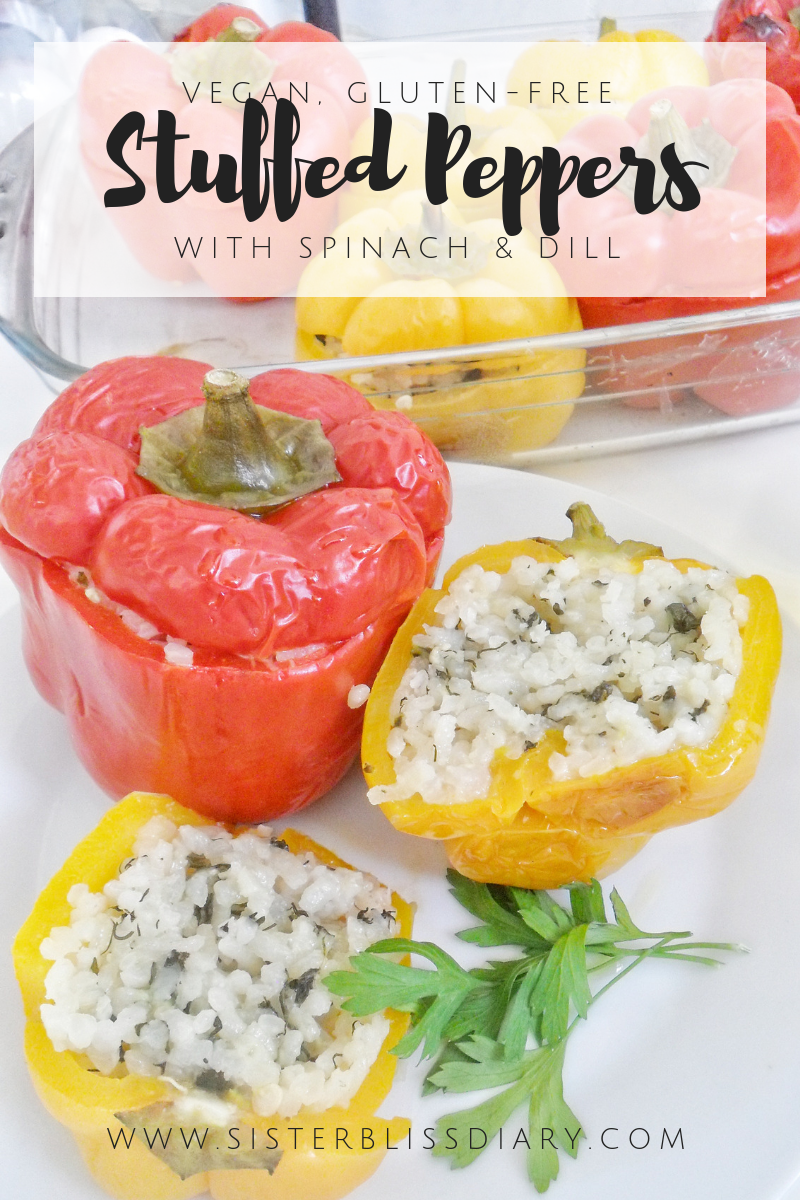
Classic Stuffed Peppers with Spinach & Dill {Vegan, GF}

Today we are making Stuffed Peppers!

I tried Stuffed Peppers and I failed miserably

Somewhere in May, one random ereb shabbath, my creative energy was not flowing AT ALL. After a while I decided I was going to make Vegan Stuffed Peppers for shabbath, since I had what I needed: Peppers and rice. Right? Wrong!! 

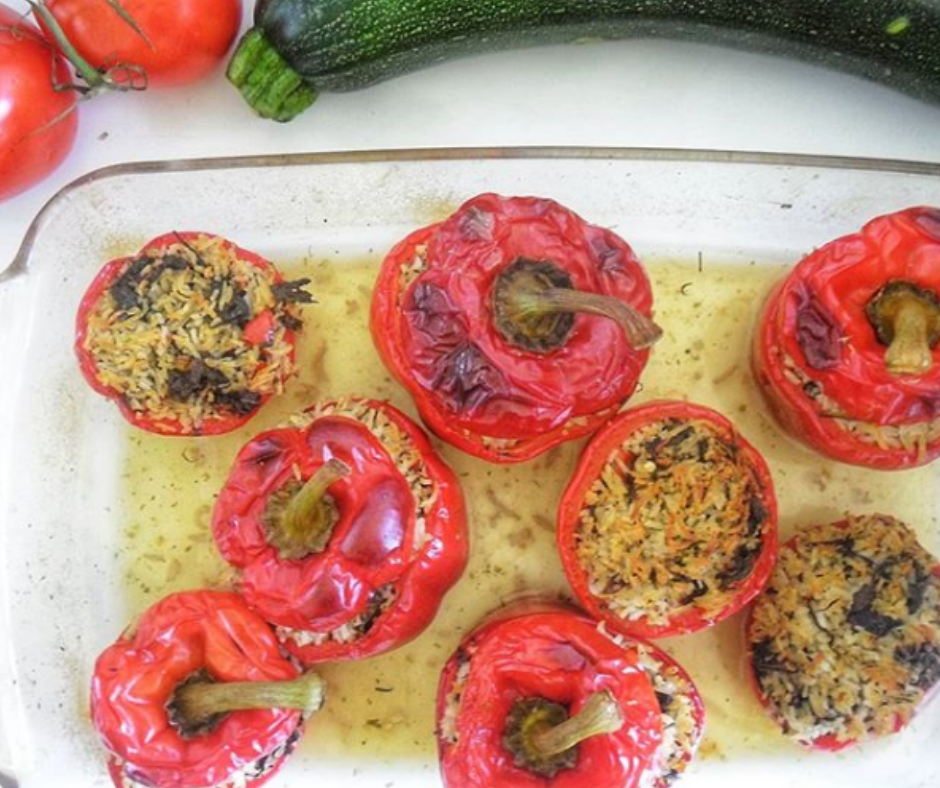
Usually, when people realize that I “can cook” they automatically assume all I do is good and perfect from the first time, but the truth is good food is a beautiful leaning process. Some get it easily the first time, and other after a few tries. You are now a witness; the first time I made stuffed peppers it was for sure a total disaster. For some reason (maybe all those 30 seconds insta videos are guilty lol) I believed stuffed peppers was about just peppers and any rice, so I tried with basmati and I failed miserably.  

I love Basmati rice. It has beautiful aroma, cooks easily, fluffy and separate which makes it perfect for salads and pilafs, but definitely not so good for stuffed peppers. As you can see in the picture above, the rice looks dry (it was actually crispy) and it was not holding together, as it should when making stuffed peppers, so the perfect rice to make stuffed peppers (and also dolmas, stuffed cabbage, and more) is risotto rice. 

Want more risotto rice recipes? Check out our Vegan Beer & Almonds Risotto 

The Basics of Stuffed Peppers

The good thing about Stuffed Peppers is that, apart from the rice, there is really not “basics”…. Well, maybe there are a few “must”, and they are: 

  1. Add salt and pepper to the interior of your Peppers: this can be easily forgotten but it is so important! Just sprinkle a little salt in the interior of each pepper and you are good to go. 
  2. Always keep your Pepper tops!: They would act like lids and will prevent a crust on the top of the rice . 
  3. Cut a little bit of the bottom, so the peppers stand on the baking dish.
  4. Pack the rice tightly in each cavity. If you don’t want to serve too much rice, use smaller peppers. 
  5. Place the stuffed peppers tightly in the baking dish. This will help the peppers hold their shape while baking. 


Bonus Tip!
Don’t throw away the peppers core! Remove the seeds and store in the freezer on resealable bags. They give amazing flavor and aroma to any stew, specially stewed kidney beans. Nom nom!  

How to Make Stuffed Peppers

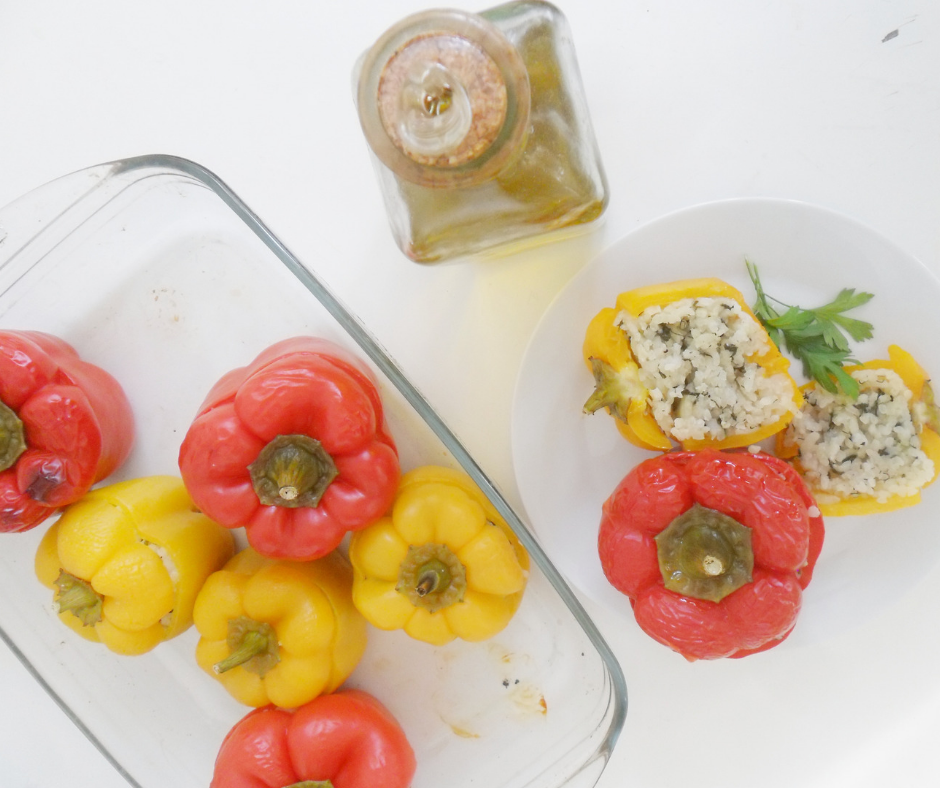
Because this is a very basic Stuffed Peppers recipe, I used 3 simple ingredients for my rice: onions, spinach and fresh dill. 

Basically, I sauteed the onions until lightly golden. Added the risotto rice, spinach, dill and salt to taste. Cook until most of the water is absorbed. Then, cover with the lid and cook on low until the rice is al dente. 

What you need to do next is to stuff the peppers, place the pepper caps on top, and bake until the peppers are tender.  

When you make this recipe or any other from the blog, use the tag #kasheribbean. And, don’t forget to follow on instagram and pinterest to keep up with our easy recipes from us and the blogosphere!


As you can see, Stuffed Peppers are easy to make and you can play with the fillings as much as you want, so the combinations are endless. Play around with your favorite ingredients and let us know the most exciting combos you come up with! 

Until next time! 😉  

Classic Stuffed Peppers with Spinach & Dill {Vegan, GF} Read More »

Chickpeas & Spinach Curry {Vegan, GF}

Temperature is dropping and rainy days are pretty much everyday, and this Chickpeas & Spinach Curry is perfect for such days. I hope you enjoy this easy recipe and make it very soon.

Super Quick Lunch or Dinner

I have been making this delicious and super quick Chickpeas & Spinach Curry for months now. The first time I made it I basically just trowed some random ingredients in a pot and let it cook for a few minutes. The combination of ingredients resulted in a very yummy, thick and chunky “soup” that totally exceeded my expectations.

For this recipe I used the most simple ingredients of all: yellow onion, potato, spinach, parsley, chickpeas and spices. In the pictures you can see I ended up adding some carrots; and from that you understand this curry (or thick soup) is very forgiving. You can add as much variety of veggies as you like, scraps and also is a great way to use leftovers. 

Ginger, Garam Masala, Turmeric & Curry 

These are the 4 spices I used for this recipe. The aromas are strong but the coconut milk balanced them out really well with its sweet smell. 

You can find Garam Masala in the ethnic food aisle, or in Hindu, Suriname or Morocco shops. If you don’t have one of those shops close by you can easily buy on amazon and other places online. 

How to make Chickpeas & Spinach Curry

Months ago, I was making this recipe over and over again every week, so one day I made a quick video on how to make it that you can find on our IGTV, so go check it out. 

Want more Vegan Recipes? Check out Our Ultimate Vegan Meatballs (They taste almost like the real thing!!) & the Classic Stuffed Peppers

Don’t llet the simple ingredients and easy process fool you because the flavor is amazing!

Have you made this recipe or any other from the blog? Use the tag #kasheribbean, so we can see your yummy pictures. And, don’t forget to follow on instagram and pinterest to keep up with the easy recipes we share also from the blogosphere!

Until next time! 😉  

Chickpeas & Spinach Curry {Vegan, GF} Read More »