Hannah Abreu

I am a food lover, baking addict and full-time mom, fascinated with new ingredients, vegan food, hassle-free cooking and travel. Follow my adventures and discoveries here on the blog and instagram!

Savory Hamantaschen

Savory Hamantaschen Round-Up: Top 10

Top 10 Savory Hamantaschen Round Up

Savory Hamantaschen

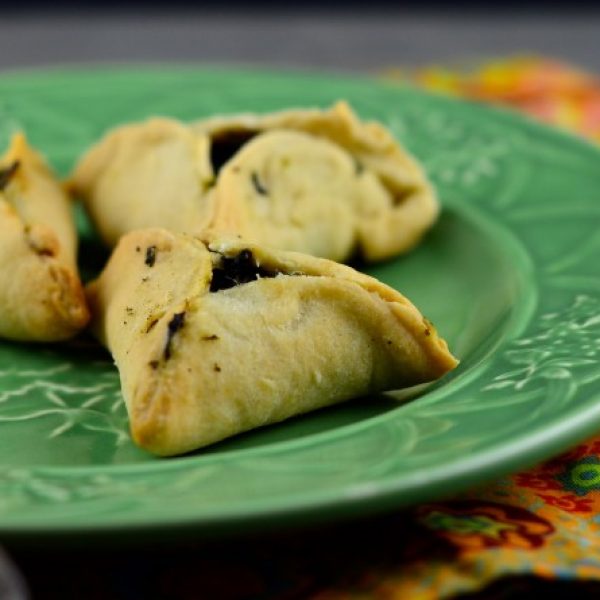
Purim is getting close, and for the occasion I want to share with you my all time favorites savory hamantaschen (or how we call it in spanish: “Orejitas de Haman”, literally “Haman’s ears”) creations from the blogosphere. Here you’ll find Our Top 10 Favorite Savory Hamantaschen. Let’s go! 

Do you have more of a sweet tooth? Check Out: Sweet Hamantaschen Round-Up

These are our favorite Savory hamantaschen from the blogosphere. I hope you found some ideas to incorporate in your Purim celebration, and maybe even come u with your own creations! Do you have a favorite hamantaschen that we should add to this list? Or do you want to share your creation? Contact us so we can add it! 

Happy Purim!

Hannah

Have you make a recipe from the blog? Use the tag #kasheribbean to share on social media and, don’t forget to follow on instagram and pinterest to keep up with our easy recipes, cooking videos and more! 

Savory Hamantaschen Round-Up: Top 10 Read More »

Sweet Hamantaschen Round-Up: Top 10

Top 10 Sweet Hamantaschen Round Up

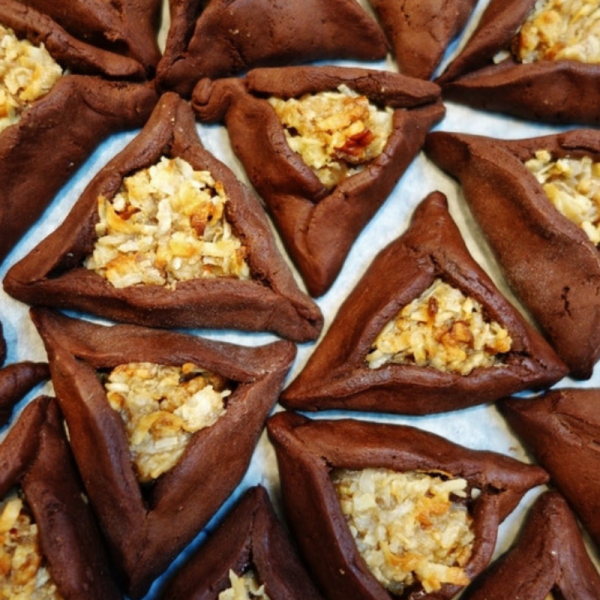
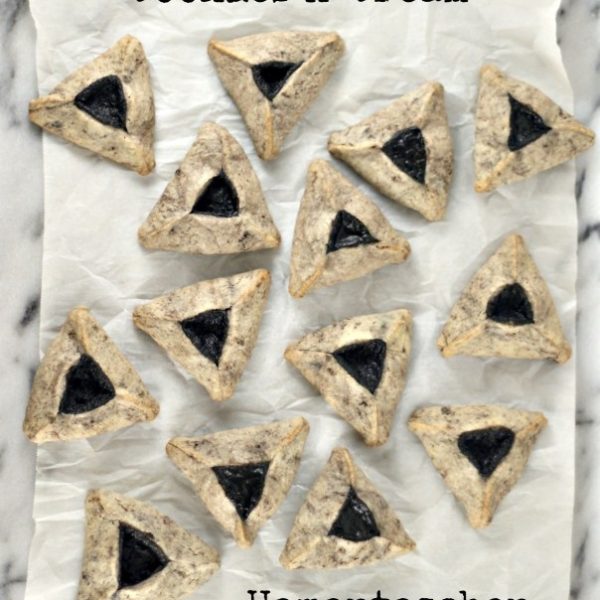
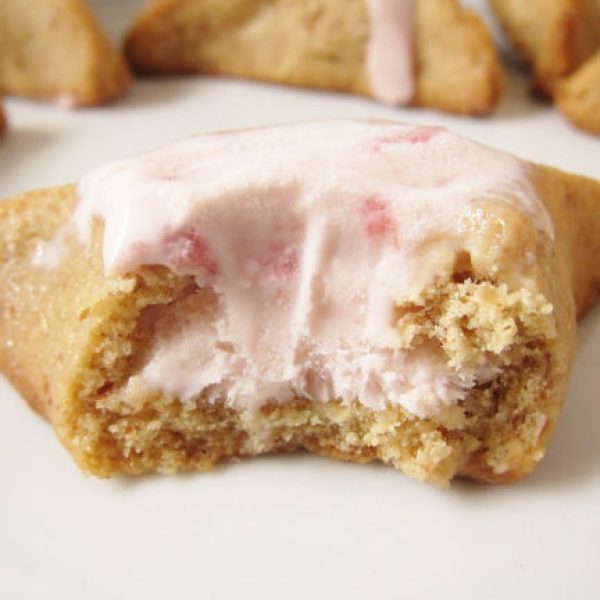
Purim is getting close, and for the occasion I want to share with you my all time favorites sweet hamantaschen (or “Orejitas de Haman” in spanish) from my favorite bloggers. I hope you enjoy these Top 10, and get inspire to make for Purim and also create your own. Let’s get into it!  

Do you prefer savory hamantaschen? Check Out: Our Top 10 Savory Hamantaschen Round-Up

There you have it! Our favorite Sweet Hamantaschen from the blogosphere. Did you find your favorite? Or do you know of other creations we should add to this list? Let us know so we can add it! 

Happy Purim everyone!!

Hannah

Have you make a recipe from the blog? Use the tag #kasheribbean to share on social media and, don’t forget to follow on instagram and pinterest to keep up with our easy recipes, cooking videos and more! 

Sweet Hamantaschen Round-Up: Top 10 Read More »

Peanut Butter Hamantaschen

4-Ingredients Peanut Butter Hamantaschen {Gluten-Free, Dairy-Free}

4 Ingredients Peanut butter Hamantaschen {Dairy-Free, Gluten-Free}

Call me crazy for taking the classic Peanut Butter Cookies and making them “purim style”  in hamantaschen shape. This was the genius idea of my son and niece who wanted to make peanut butter cookies with chocolate chips, but changed the shape of the cookies mid-way through the process, and although I was skeptical, it worked. 

If you are looking for an easy recipe to have some baking fun with the little ones, these 4 ingredients Peanut Butter Hamantaschen with chocolate filling might be what you are looking for. 

Turning a classic into Peanut Butter Hamantaschen

To make these Peanut Butter Hamantaschen you’ll need 4 simple ingredients, you probably have at home right now:  peanut butter, eggs, sugar and chocolate chips, ganache or nutella (or your filling of preference). 

The process couldn’t be easier, just mix the ingredients in bowl (except for the chocolate chips), as you would when making the classic peanut butter cookies, and and mix with a fork or hand mixer until it has the consistency of a thick batter.

Peanut butter Hamantaschen

After this what is left is portioning the cookies, shaping and baking. I find that smaller cookies are easier to handle, so I weigh portions of 25-30 grams each. Flatten each one in your hands, pinch with a fork, place the filling in the center and shape. Transfer to a baking sheet for baking, and bake in a preheated oven at 180°C (350°F) for about 12 minutes. 

Peanut butter Hamantaschen
Peanut Butter Hamantaschen

4-Ingredients Peanut Butter Hamantaschen {Gluten-Free, Dairy-Free}

Course Dessert

Ingredients
  

  • 400 gr Creamy Peanut Butter

  • 100 ml Eggs
  • 100 gr Granulated Sugar
  • 200 gr chocolate chips, ganache or nutella

Instructions
 

  • Preheat the oven to 180ºC (350ºF) and line a baking sheet with a silicon mat or parchment paper.
  • In a bowl, combine peanut butter, sugar and eggs and mix well with a fork until the mixture thickens
  • Scoop out portions of 25 grams each (you can make them smaller or bigger as you please), flat them out and pinch the center with a fork.
  • Add the chocolate chips, ganache or nutella in the center and shape the cookies into a triangle by folding in the edges.
  • Place the cookies on the prepared baking sheet, leaving a gap in between so they can expand.
  • Bake in the preheated oven for 12 minutes (baking time may vary depending on the size of your cookies)
  • Cookies are done when they are lightly brown at the bottom and firm to the touch.
Keyword baking, cookies, Purim

Have you make these Peanut Butter Hamantaschen recipe or any other from the blog? Use the tag #kasheribbean to share on social media and, don’t forget to follow on instagram and pinterest to keep up with our easy recipes from us and the blogosphere!


4-Ingredients Peanut Butter Hamantaschen {Gluten-Free, Dairy-Free} Read More »

Classic Hamantaschen {Dairy-Free}

Classic Hamantaschen {Dairy-Free}

These must be the easiest crunchy on the outside and cake-y on the inside Classic Hamantaschen.

Easy to make,
No need equipment. Just basically a bowl, a whisk and an oven.

It is made with simple, accessible ingredients.
Seven to be exact.

To make these Classic Hamantaschen, you’ll need the most basic ingredients for baking: Flour, sugar, eggs, oil and some flavorings. In this particular recipe I used melted coconut oil to avoid the vegetable oil, but you can use vegetable oil if that’s what you have on hand.

What I love the most about these cookies is that you don’t need a stand-mixer or hand mixer. Your hands, a whisk and a bowl will do the trick. All you have to do is mix all ingredients (except flour) in a bowl. Then, incorporate most of the flour, making sure there is not dry bits when you finish mixing. Finally, add the last 50 grams or so of flour, and work the dough lightly with your hands to finish mixing very well (make sure you don’t overwork it).

Some of you may be wondering, “how do I weight eggs?” In USA, you’ll find a standard large egg is about 50 grams and, an extra large weighs approximately 55 grams. To measure eggs by weight start by cracking a few into a bowl until you are close to the amount you need. Once you are short a few grams, take another egg, whisk it on a separate bowl, and weigh the amount you need. 

This is not your typical cookie dough. It is slightly sticky and that can make it a bit challenging to work. You can help yourself with baking paper, or just shape the cookies in your hands. It might be helpful to use gloves or lightly oil your palms before starting.

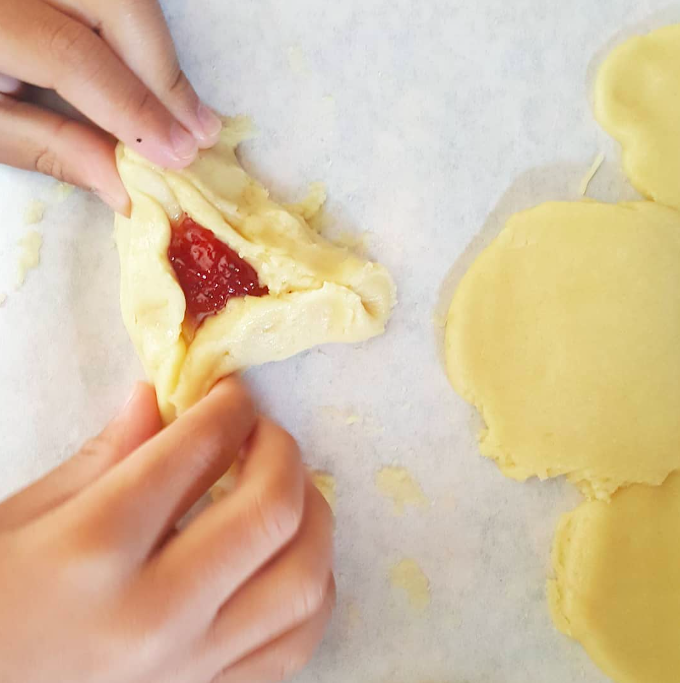
All you have to do is place one ball of dough  in your hand, flatten it out to form a circle, place the jam on the center and fold in the edges to form a triangle. You can also roll out the dough and between two sheets of baking paper. 

My favorite fillings for these cookies are berries jam, pineapple jam, Nutella or chocolate chips, and peanut butter, but the possibilities are endless. If you need some inspiration check these posts for some sweet and savory ideas: 

 Sweet Hamantaschen Round-Up & Savory Hamantaschen Round Up

Classic Hamantaschen {Dairy-Free}

Prep Time 15 minutes
Cook Time 15 minutes

Ingredients
  

  • 450 gr Self-Rising Flour*

  • 130 gr Granulated sugar
  • 125 gr Eggs
  • 100 gr Coconut Oil, melted** (or vegetable oil)
  • 1/2 tsp Vanilla extract
  • 1/4 tsp Salt

Instructions
 

  • In a bowl mix eggs, sugar, oil, vanilla extract and salt.
  • Then, add 400gr of the flour and start mixing with a fork until you have a homogeneous dough, with no dry flour. Then, mix in the rest 50n grams with your hands.
  • Weight balls 0f 30 grams each (each ball will be a cookie). Place the dough on your hands, flatten the dough out, shaping a circle with approximately 1/4" thickness.
  • Place your preferred jam in the center, then fold in the sides of the circle to achieve a triangular shape.
  • Place carefully on a baking sheet covered with parchment and bake at 180°C (350°F) for aprox. 12-15 minutes or until the bottom is light golden brown.
  • Let them rest for about 5 minutes on the baking sheet and transfer to a wire rack to cool completely if you really can wait lol (I couldn't!)

Notes

  • For this recipe I use Self-Rising flour because is the one I had at home. If you don't have it you can also mix All-Purpose with 1 1/2 (one and a hallf) teaspoon of baking powder. Mix well and sift a couple of times for even distribution of the baking powder.
  • You can also use vegetable oil for this recipe, or any other with mild flavor. 
Keyword hamantaschen, Purim

Have you make this Spinach-Basil & Walnut Pesto, or any other from the blog? Use the tag #kasheribbean to share on social media and, don’t forget to follow on instagram and pinterest to keep up with our easy recipes from us and the blogosphere!


Classic Hamantaschen {Dairy-Free} Read More »

Easy Hamburger Buns {Vegan}

Easy Hamburger Buns {Vegan}

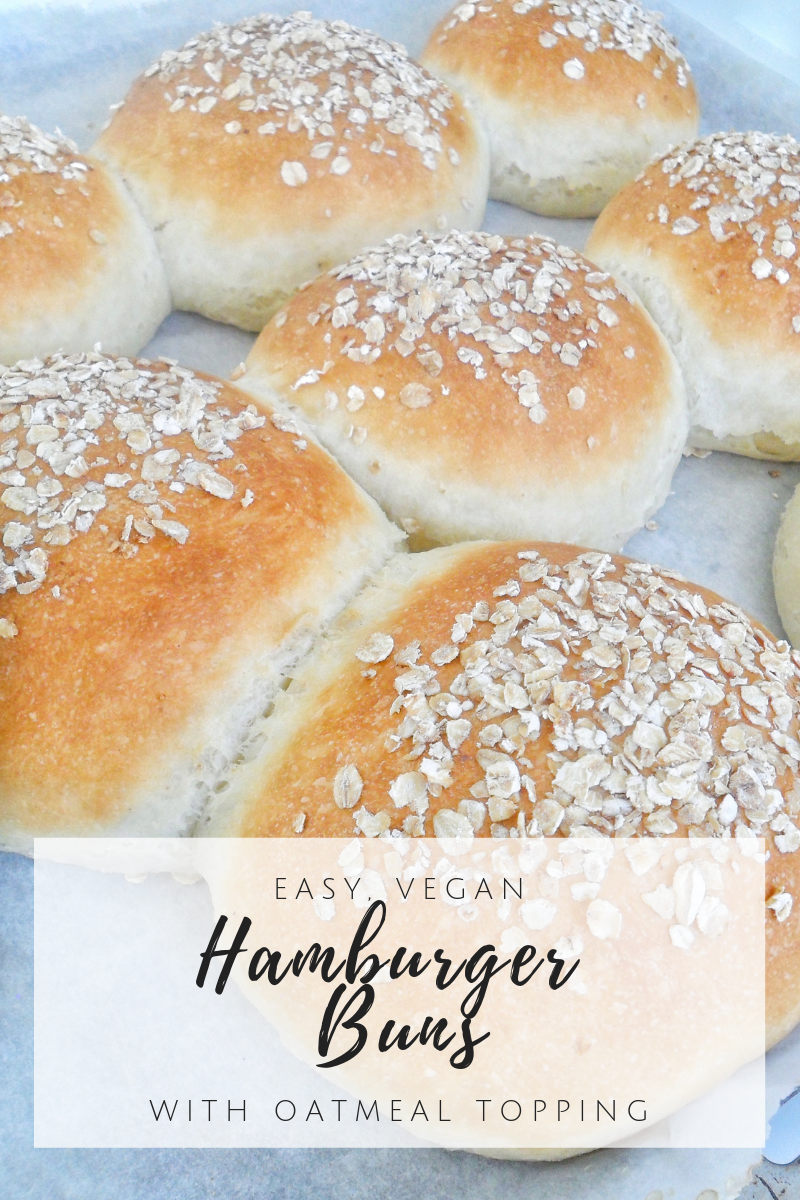
A humble bread, perfect to hold a thick and juicy burger, without overpowering it. 
These hamburger buns are: 
Easy to make: no need equipment to make, just a bowl, your hands and an oven
Vegan: so, no eggs, no butter… simple, accessible ingredients
Fluffy: zero overpower, just a fluffy guy 

How to make Vegan Hamburger Buns

To make these hamburger buns you’ll need the basic ingredients of bread baking: Flour, yeast, water, salt, plus we add a bit of sugar for softness and help with fermentation, a little bit of shortening also for texture, and oatmeal to coat before baking (but you can use other ingredients like seeds, nuts or other grains to coat). 

The process is fairly simple as well, and something that you can do by hand: 

If you love this recipe, you may be interested in my Coconut Milk Brioche with Chocolate Chunks & Vegan Challah

Now, Let’s get into it with a visual step by step: 

Vegan Hamburger Buns

Course Breakfast, Dinner, Lunch
Servings 8 buns

Ingredients
  

  • 550 g Bread flour 12% or more protein
  • 60 gr vegetable shortening
  • 50 gr sugar
  • 10 gr salt
  • 8 gr instant yeast
  • 350 gr lukewarm water

Instructions
 

  • Mix dry ingredients and add water.
  • Start mixing with your hands until you form a rough dough. Keep kneading until you get an homogeneous dough with no dry spots.
  • Lightly grease the bowl, and let the dough rest in the bowl, covered in plastic wrap, until doubled in size.
  • Gently deflate the dough, and transfer it to a lightly floured surface. Flatten it out to form a round shape. Cut into 8 portions. Lightly oil the palm of your hands to shape each piece into a ball.
  • Brush the top with water, and dip into a bowl of oatmeal, your preferred seeds or a mix of both.
  • Place the buns in a baking sheet, covered with baking paper.
  • Bake the buns in a preheated at 190°C (375°F) oven for 15 to 18 minutes, until golden.
  • Remove from the oven, and place on a cooling rack for a few minutes before serving. Enjoy!
Keyword bread, buns, hamburger, vegan

When you make these vegan hamburger buns use the tag #kasheribbean to share on social media and, don’t forget to follow on instagram and pinterest to keep up with our easy recipes from us and the blogosphere! 

Easy Hamburger Buns {Vegan} Read More »

Caramelized Onions & Arugula Rolls

Caramelized Onion & Arugula Rolls {Dairy-Free}

Recipes happen as any other event in life, some are even the result of unexpected situations, like these Caramelized Onion Paste & Arugula Rolls, that have quickly become a favorite. Bare with me as we explore this incredibly delicious combo in form of dinner rolls.

For weeks I have been thinking about making cinnamon rolls as a gift for a lovely couple. I bought all of my ingredients and when I was ready to make them, I just changed my mind. Why make it sweet when savory rolls can be as delicious? As usual, I opened the fridge and quickly scanned what I had. Onion and arugula seemed like the perfect savory combo at the time, even when I haven’t tried it before, but I went with it and this is the results!

For weeks I have been thinking about making cinnamon rolls as a gift for a lovely couple. I bought all of my ingredients and when I was ready to make them, I just changed my mind. Why make it sweet when savory rolls can be as delicious? As usual, I opened the fridge and quickly scanned what I had. Onion and arugula seemed like the perfect savory combo at the time, even when I haven’t tried it before, but I went with it and this is the results!

Make the Dough

To make these delicious Caramelized Onions & Arugula Rolls you’ll start by making a brioche-style dough, since it has a bit of resting time. While the yeast is working its magic, you can go ahead and make the caramelized onions paste.

If you love this recipe, you may be interested in Coconut Milk Brioche with Chocolate Chunks & Vegan Challah

Make the Caramelized Onion paste

Traditionally, caramelized onions require a lot of time to cook, plus fat and sugar, but for this recipe I followed Cook’s Illustrated method which calls for no sugar and a secret-not-so-secret ingredient and got 225 gr onion paste. Here’s how to make it:

{CARAMELIZED ONIONS PASTE}

3 pounds yellow onions, julienne
3/4 cups water
2 Tbsps Oil 
3/4 tsp salt 
1 Tbsp water + 1/8 tsp baking soda. 

PREPARATION:

1) Cook the onions with water, oil and salt over high heat until the water is evaporated and onions sizzle.

2) Cook on medium-high while pressing & stirring the onions consistently for about 15-20 minutes or until the onions are well browned and sticky.

3) Combine a tablespoon of water with baking soda, add the solution to the onions and cook for another minute until the solution has completely evaporated.

4) Let the caramelized onions cool down and process to a fine paste with a food processor or blender. 

Caramelized Onions & Arugula Rolls

Delicious dinner rolls with caramelized onions paste and arugula
Course Appetizer, Dinner, Snack
Cuisine Mediterranean

Ingredients
  

  • 400 g All Purpose flour
  • 100 g Bread flour
  • 14 g Dry yeast
  • 250 ml Lukewarm milk I used evaporated soy milk. You can use coconut to keep soy-free
  • 60 g Sugar
  • 12 g Salt
  • 90 g Egg yolks
  • 150 g Vegetable shortening You can use butter if not dairy-free
  • 225 g caramelized onions paste

Instructions
 

  • Mix dry and make a well on the center.
  • Add liquids, eggs and 2/3 of the fat. Mix until a rough dough forms.
  • Transfer to a lightly floured surface and knead for 10-15 minutes, until you get a soft dough.
  • Transfer to a lightly oiled bowl and let rest for 1hr at room temperature or until double in size.
  • Knead the remaining shortening in, and let rise for another hour.
  • Punch the dough and form a ball. Let rest in the counter for 10 min to relax. Roll into a rectangular shape, about 17 x 15 inches.
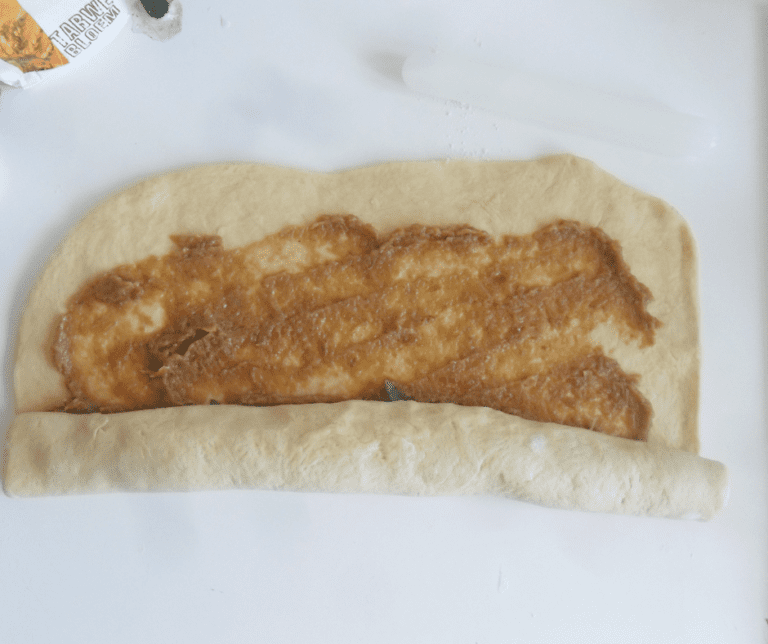
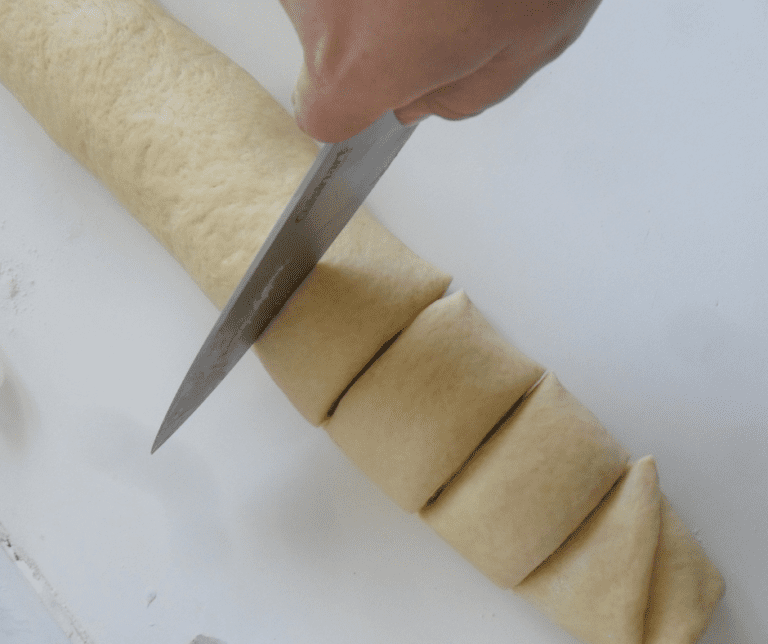
  • Spread the caramelized onions paste evenly and add the arugula. Shape into a roll and cut into 10 rolls.
  • Arrange on a baking sheet with baking paper and bake in a preheated oven at 350°F for 20 -25 minutes, or until the rolls are lightly golden on top.
  • If desired, brush the top lightly with olive oil as soon as they get out of the oven. Let rest on the baking sheet for a few minutes before transferring to a cooling rack to cool completely (if you can really wait for that!!)
Keyword baking, dinner, rolls

 Did you try this recipe?
Share your photos with us on social media and tag us —
Use the hashtag #kasheribbean. We want to feature you!
And don’t forget to follow along on instagram and pinterest for more tips, recipes and inspiration.

WhatsApp
Facebook
Pinterest
Telegram
Email
Print

Caramelized Onions & Arugula Rolls Read More »

Review: Champion Household 4000 Masticating Juicer. For US$325, Is it Worthy?

Review: Champion Household 4000 Masticating Juicer. For US$325, Is it Worthy?

Since last year I have been literally taking the juice out of this machine: The Champion 4000 Household Masticating Juicer

According to the Recommended Assembly Manual, with this juicer you’ll be able to juice Greens, fruits, wheatgrass, leafy greens, whip frozen fruit, make nut butters (with dry-roasted nuts), sauces, soup, baby food (of cooked vegetables) and shred carrots, beets, onions and cabbage.

It looks very promising so I gave it a try (I mean, like a LOT of tries) and this has been my experience so far.

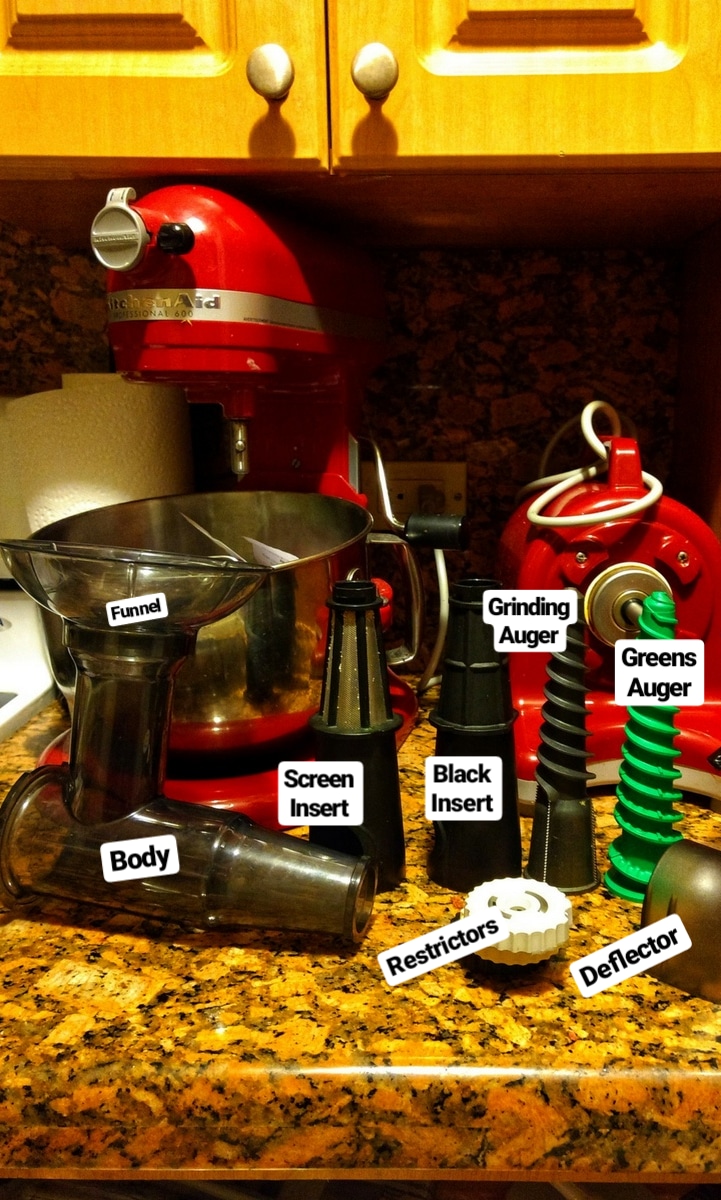
Parts of the Champion 4000

As you can see, this juicer comes with a body tube, 1 screen insert, 1 black insert, 2 augers, 3 restrictors,a deflector and a tamper that I let out of the picture unintentionally while editing.

How to assemble and the parts needed to juice, grind or grate different veggies are included in the manual. The manual also includes a few recipes, but I didn’t tried any.

Making 1-Ingredient Sorbet (oh, yum!)

Frozen fruit is probably my favorite use of the Champion 4000 Household Juicer. I have tried 1-ingredient sorbet with bananas, berries and mangoes (super creamy! the best!) and it was incredibly easy for the frozen fruit to pass through.

To make these sorbets you just have to freeze the separated pieces of fruit in a tray, and once they are frozen, pass them through the juicer with the appropriate attachment. Pure fruit. Best sorbet ever! And a winner with the kids! (As you can see I had to make a lot!)

Making Tahini and Hummus

According to the instructions, you can make nut butters with the Champion Juicer. It specifies you use dry-roasted nuts, but because I didn’t have roasted nuts at home, I decided to give a try with dry-roasted sesame seeds; because technically, tahini is also like a nut-free “butter”, right? no? maybe? lol I am crazy! I know!

I did it anyways and let me tell you, it didn’t work!! lol (but at least I got sesame meal, very nutritious) Totally not the manufacturer’s fault. So, that doesn’t count, but I wanted to tell you anyway in case you have the same “big idea” and then start blaming the juicer. It doesn’t claim to make tahini, so at the end I finished the tahini with a blender, as usual.
 

The hummus on the other hand, came out really good. Exactly how I like it. Creamy but with a few pieces of garbanzos. I didn’t mind because I like it this way but if you prefer a smooth hummus you may use very soft (a bit overcooked chickpeas)

Griding Root Veggies to make Pasteles en Hoja Dominicanos (no, they are not like tamales!)

The most intense of all uses. It was time to make pasteles en hoja and my mother-in-law needed to grind huge amounts of plantains, green bananas, yucca, yautia and ñame (not sure how to call ñame in english because in the dictionary says is “yam” but yam doesn’t look at all like the root veggie I am referring to, big ops!) so this was going to be the real test!

This Juicer is so powerful, it can grind root veggies so easily. I was done in no time. If you would spend like 3hrs grating all veggies the old fashion way, you can literally finish all within 10 minutes. Super cool.

This is just one of our “grinding sessions” (we had at 4). Just as a side note, when I am grinding that amount of veggies I like to turn off the juicer for a few minutes to prevent overheating, just in case.

And this is one Pastel en Hoja stuffed with chicken, veggies and garbanzos (dominican-style) in case you are wondering…

Grating Potatoes and Other Vegetables

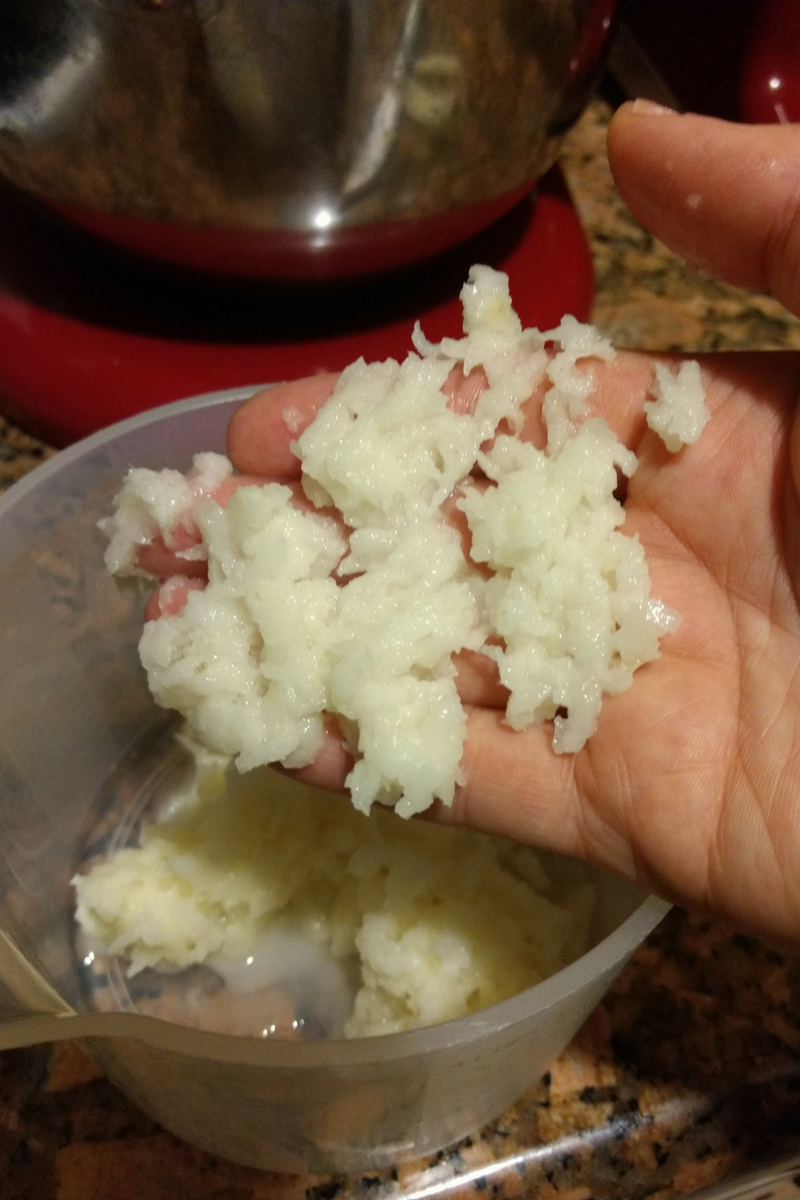
The Champion Juicer works really great for grating veggies (specially potatoes, beets, carrots, cabbage), but of course, I will just use it for grating big amount of these veggies.

In short…

PROS:

  • Versatile: Can juice fruits, greens, wheatgrass, shred veggies, make sauces, soups, baby food, nut butters (with dry-roasted nuts), and frozen fruit sorbets.

  • Excellent for Frozen Fruit Sorbets: Super creamy, pure fruit desserts that kids love. Very easy to use.

  • Great for Hummus: Produces creamy hummus (slightly chunky if chickpeas aren’t overcooked).

  • Powerful Grinder: Handles tough root vegetables (plantains, yuca, yautía, ñame) with ease—saves hours compared to manual grating.

  • Efficient for Large Quantities: Cuts down prep time drastically (e.g., 3 hours of grating reduced to 10 minutes).

  • Good for Grating Vegetables: Works especially well with potatoes, beets, carrots, and cabbage.

⚠️CONS: 

  • Not Suitable for Tahini: Attempt with sesame seeds didn’t work (produced sesame meal instead).

  • Requires Resting for Heavy Use: May need to pause during long grinding sessions to avoid overheating.

  • Not a Smooth Finish for Hummus (unless using very soft chickpeas).

  • Bulky Setup: Multiple parts and attachments required, which might feel like extra work for smaller tasks.

Final Thoughts

The Champion 4000 Household Masticating Juicer is a powerful, versatile machine that shines with frozen fruit sorbets, hummus, and especially grinding/grating large amounts of vegetables or root crops—making it perfect for batch cooking or traditional dishes like pasteles en hoja. While it doesn’t handle tahini or nut butters outside of the manufacturer’s guidelines, and may require occasional rest during heavy use, it’s an excellent investment for serious home cooks who process big quantities of fruits and vegetables.

WhatsApp
Facebook
Pinterest
Telegram
Email
Print

Review: Champion Household 4000 Masticating Juicer. For US$325, Is it Worthy? Read More »

Rice Pudding: 3 Ways {Traditional, Coconut & Coffee}

Rice Pudding is one of those simple dishes you could eat over and over again. For breakfast, for dinner or for dessert, hot or cold, plain or dressed up, is one of a kind recipe. Easy to make and so versatile. Get ready to learn how you can make delicious Rice Pudding 3 ways: the traditional dairy version, the vegan coconut version and the coffee version {can be made dairy or vegan and is delicious!}

The Basics of Rice Pudding

Rice Pudding is one of the most basics and popular breakfasts, dinner and/or dessert served in Dominican Republic.

Is incredibly easy to make, and as you can see, super versatile. The most basic version need 5 ingredients: rice, milk, sugar, salt and lemon peel. For extra flavor some people also add cinnamon stick and sweet cloves, but let’s keep it simple this time. You can later experiment adding more flavor.

When making Rice Pudding I personally prefer to start with my rice uncooked, but you can certainly use leftover white rice, that is not too salty or greasy, and still have a delicious rice pudding.

Are you looking for more recipes with rice? Check out our Dominican Style Spicy Sardines Rice & Beer and Almonds Risotto

The Traditional Version

In general terms, the traditional version of Rice Pudding is made with Milk. Whole milk is just fine for the recipe, but if you are looking for the best of the best, thick and super creamy Rice pudding, always use evaporated milk.

Nowadays you can easily find evaporated plant based milks; you can certainly use that if you avoid dairy products.

The Coconut Version

To make the coconut version you just need to use full fat coconut milk instead of whole or plant-based milk of choice.

What I like about the coconut version is that it has such a silky texture and is very light compared with the dairy version. It also has a very delicate aroma, and a pure white color at the end, which I love. It just looks heavenly.

Keep in mind that in all recipes on the blog that call for Coconut milk we use FULL FAT, simply because we want all that coconut milk goodness in our final product. Fat free or low fat coconut milk are usually full of flavorings, including sugar, and use gums to give a thick texture, but the flavor in general is always off. Avoid yourself the headache of ruining a delicious silky smooth rice pudding by buying the best full fat coconut milk you can find on the market, with not extras or nasty ingredients.

The Coffee Version

Almost a month ago I published a photo on instagram of my breakfast that day: a small glass container full of Coffee Rice Pudding.

The idea just came to me when I couldn’t decide if I wanted a full delicious cup of coffee, or a bowl with freshly made thick and totally delicious rice pudding. Both fill up my stomach easily on their own, and because I couldn’t have both (obvious reason: I am trying to lose my next 25 pounds) I ended up adding a bit of instant coffee to the rice pudding while it was still hot.

Taste wise, the result was a-ma-zing! and to my surprise, that “out-of-the-blue-picture” quickly had over a hundred likes, so is a fact; instagram is full of #coffeelovers.  😛

How to Make Rice Pudding

Have you make this recipe or any other from the blog? Use the tag #kasheribbean to share on social media and, don’t forget to follow on instagram and pinterest to keep up with our easy recipes from us and the blogosphere!

So, now there is a gazillion possibilities on how you can take your traditional rice pudding to the next level. What special ingredient will you add to your very own version?

Until next time! ?

Rice Pudding: 3 Ways {Traditional, Coconut & Coffee} Read More »

We are now Kasheribbean

If you have been keeping an eye on us you already noticed our social handles and our website changed, so we are now “Kasheribbean”. In this post we explain our reasons behind it and what Kasheribbean is about.

Have you ever woke up one day and felt like “I just need to do this now”. That’s exactly how I felt one day back in 2017. My sister and I had an idea for a blog and I spent months looking for the perfect host, the perfect domain provider, the perfect concept, the perfect images, and the perfect “everything”.

I ended up with analysis paralysis until one day when I said to myself “is now or never”. So, I just jump at it by buying a domain of the name we both agreed upon, and sisterblissdiary.com was born.

After some time, I personally felt our name wasn’t clear, and didn’t really communicate what we were about. At some point I wasn’t even sure what we were really about! Oops! But I kept going because I thought some day I would make it work.

But it didn’t work…

As much as I tried to give Sister Bliss Diary an identity, it wasn’t really working. It simply didn’t resonate and it wasn’t clear. So I had another idea. What if I was just myself, share what I make at home on a daily basis and and pick a name that represents me better instead of just having to make “special” recipes for the blog, under a name I wasn’t feeling?

So, on the Dominican Republic’s Independence Day , I introduced my first Caribbean recipe: Dominican Style Spicy Sardines Rice. In less than a week it was shared over 100 times on pinterest. I was very, VERY surprised!

I continued blogging, making a dominican recipe here and there, until I started to feel more comfortable and more ideas started flowing on that direction. Without realizing it, I started narrowing down by focusing on Caribbean inspired recipes (instead of just random easy recipes ideas) while continuing with the travel posts and lifestyle posts.

One day, I was talking with my husband about old restaurants ideas we had, and it hit me. Kasheribbean, a word my husband coined years ago as a concept for a restaurant, was THE NAME! The perfect concept for the blog I wanted to create and that better represented who I was; so, in our 1st blog anniversary I announced we were expecting some big changes, included a name change!. It couldn’t wait any longer – the blog needed to undergo a major surgery.

I didn’t figure out everything from the start

I admire all of those talented bloggers that hire a team and have all figure out from the start, but as you can tell, this wasn’t the case here AT ALL, and honestly, I would not have it any other way, because I have learned so much and have discovered others I enjoy (who would have told me that creating a tiny piece of code can be so fulfilling?)

Thankfully, just like human beings, brands and concepts can evolve with time.

So, it was the time for Sister Bliss Diary to transform to Kasheribbean.

Kasheribbean: the place for kasher Caribbean recipes

I love to collect recipes from all over; but back to 15-20 years ago, every time I looked at a kasher cookbook or a promising kasher website, the recipes were either middle eastern recipes or ashkenazi. No offense! I love Middle Eastern food, and I even like Gefilte Fish (which apparently is rare among sepharadim!) but as a jew that grew up in the Caribbean, the lack of representation I felt was real.

So, Kasheribbean = Kasher + Caribbean, and has as a main goal to share with you kasher, family-friendly Caribbean inspired recipes, always made with natural ingredients so that you have the most authentic Caribbean flavor.

Final words

I dedicate this blog to all Caribbean Jews that are always told “there are not jews in the Caribbean”. We exist and this is a place to showcase our flavors and traditions about food.

Do you like Kasheribbean?

If you love what we share, spread some love by following on instagram and pinterest, and don’t forget to share with your friends and family. Stay tune for other exciting news that are already cooking!!

Until next time! 😉

We are now Kasheribbean Read More »