Hannah Abreu

I am a food lover, baking addict and full-time mom, fascinated with new ingredients, vegan food, hassle-free cooking and travel. Follow my adventures and discoveries here on the blog and instagram!

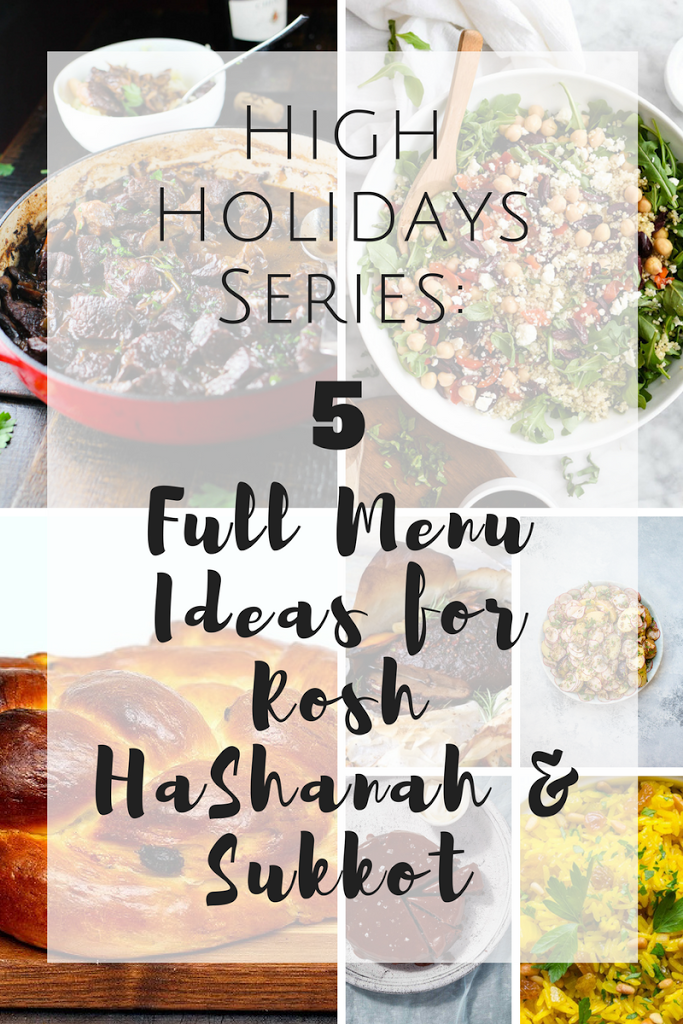
High Holidays Series – Part 3: 5 Full Menu Ideas for Rosh HaShanah & Sukkot

High Holidays series part 3: 5 full menu ideas for Rosh haShanah & Sukkot

Rosh haShanah is officially 3 days from now! Whoop! 

 If you haven’t decide on your menu yet, today we bring you 5 Full Menu Ideas for Rosh haShanah & Sukkot. Each one includes entrees/salads, main dishes, sides & desserts. 


Once you have decided on your menu, don’t forget to head over our first post on this series where we talk about meal prepping for the holidays. We have included a 3-Days Meal Prepping Timeline that you can download and customize according to your plans and that way have everything ready just in time for the holiday. You can also check out our second post on the series; 50+ Recipes to help you build your Holidays Menu if you need even more recipes. 

Now, let’s jump into the menus: 


Entrees

Kale Salad with Warm Cranberries Vinaigrette (Can be Vegan by using Maple syrup instead of honey)
Spinach Salad with Toasted Pepitas & Creamy Dressing (Vegan)
Warm Garbanzo Bean Salad (Vegan)
Roasted Green Beans with Harissa (Vegan)
Carrot, Jicama and Sweet Peppers Slaw (Vegan)

Main Dishes

Spiced Roast Beef with Red Wine Gravy
Slow-Cooked Coffee-Braised Brisket
Meatballs in Spicy Curry
Rosemary-Maple Roast Chicken
Chicken, Mushrooms & Zucchini Skillet

Side Dishes

Zucchini Gratin (Vegan)
Roasted Fingerlings Potatoes with Preserved Lemons (Vegan)
Pomegranate Glazed Acorn (Can be vegan by using coconut oil or another oil with neutral flavor instead of butter)
Fragrant Rice (Vegan)
Balsamic Roasted Baby Carrots (Vegan)

Desserts

Ginger, Almond & Plums Crumble (For a vegan version, use maple or agave syrup instead of honey)
Pumpkin Panna Cotta (Vegan)
Tiramisu (Vegan)
Chocolate Mousse (Vegan)
Rustic Cherry Tart (Contains eggs – For a vegan version, you can either ignore the egg or substitute this with flax egg, add chia seeds to gelatinize a bit the cherries or add other binding agents like xantam gum or agar agar)


[convertkit form=1664539]


Entrees

Chilled Tomato Soup (Vegan)
All Green Salad with Citrus Vinaigrette (For a vegan version, use maple syrup or agave instead of honey)
Spring Green with Orange Fennel Vinaigrette (Contains Honey)
Shaved Carrots & Radish Salad with Herbs and Pumpkin Seeds (Contains Honey)
Greek Salad with Mushrooms & Walnuts (Vegan)

Main Dishes
Slow-Cooked Lamb Shoulder with Petit Pois á la Française (Petit Pois in the recipe are cooked with butter but this can be easily substituted with neutral oil, olive oil or vegan spread)
Honey Lavender Balsamic Chicken
Roast Beef with Caramelized Onions Gravy
Rib-Eye with Soy & Spice
BBQ Steak with Watercress Salsa Verde

Side Dishes
Fragrant Rice (Vegan)
Smoked Salmon Niçoise with Blue Potatoes
Beet Bowls (This recipe mentions cheese as an optional ingredients which you obviously won’t add if you are cooking meat for your menu )
Balsamic Roasted Carrots (Vegan)
Broccoli with Black Garlic, Poppy Seeds & Olive Dressing (Vegan)

Desserts
Blueberry Peach Parfait (Vegan)
Rum Poached Pineapple with Coconut Sorbet (To make vegan use coconut or other plant-based whipped cream. In case you don’t know how to make coconut whipped cream, just take a can of full fat coconut milk (light won’t work) and place it on the fridge overnight (or in the freezer for about 10 minutes). Flip the can (to open it from the bottom), discard the liquid (but don’t throw it, you can use it for a variety of dishes and beverages) and scoop out the cream that is left. Whip it and voilá!)
Pears Baked in Marsala (Vegan)
Pumpkin Panna Cotta (Vegan)
Cherry Cream Pies with Chocolate Crust (Vegan)

Entrees
Butter Bean Soup (Vegan)
Hummus Sriracha Deviled Eggs
Crunchy Pickled Salad (Vegan)
Grilled Vegetable Salad with Green Mole (Vegan)
Green Beans, Beets & Pistachios (Vegan)

Main Dishes
Grilled Salmon
Salmon en Papillote
The Ultimate Vegan Meatballs (Vegan)
Eggplant Envoltini with Feta
Baked Cod in Tomato Sauce

Side Dishes
Vegetarian Stuffed Vegetables (Vegan)
Pearl Couscous with Roast Spiced Cauliflower, Saffron, Dates & Olives (Vegan)
Apple & Poppy Seeds Coleslaw
Skinny Scalloped Potatoes (Vegan)
Balsamic Roasted Baby Carrots (Vegan)

Desserts
No Bake Salted Caramel Chocolate Mascarpone Tart
Strawberry Granola Parfait
Stuffed Figs with Goat Cheese
Creme Caramel (Contains eggs)
Cranberry-Apple Slab Pie (Contains eggs)

Entrees

Ful Mudammas Dip (May contains Eggs as topping, but you can totally skip the eggs)
Classic Salad with Anchovies Dressing
Garlic Roasted Beets & Chickpeas Salad (Vegan)
Sweet Potato & Green Beans Salad with Maple-Mustard Vinaigrette (Vegan)
Roasted Asparagus & Avocado Salad (Vegan)

Main Dishes
Lamb Tagine
Rib-Eye with Soy & Spice
Chicken Shawarma
Falafel Crusted Schnitzel
Grilled Snapper with Olives Topping

Side Dishes
Balsamic Roasted Baby Carrots (Vegan)
Eggplant & Tomato Casserole  (Vegan)
Pearl Couscous with Saffron, Olives & Spring Vegetables  (Vegan)
Warm Garbanzo Bean Salad (Vegan)
Potato Borekas

Desserts
Raw Chocolate Ganache Bars (Vegan)
Black Sesame Seeds Cake with Raspberry Glaze (Contains Eggs)
Coconut & Blueberry Cake (Contains Eggs)
Vanilla Poached Peaches (For a vegan version, use maple syrup or agave instead of honey)
Almond-Medjool Dates Tart (Vegan)

Entrees

Curried Vegetables Stew

Beet Chutney
Cucumber & Radish Salad
Spring Green with Orange Fennel Vinaigrette (Use Maple syrup instead of Honey)
Middle Eastern Okra


Main Dishes
Greek Style Roast Lamb
Herb-Crusted Cauliflower Steaks
The Ultimate Vegan Meatballs
Tofu Popcorn Chick’n
Chickpeas Lentils Loaf

Side Dishes
Cheesy Cauliflower Broccoli Rice Bake
Stuffed Mushrooms with Kale & Onions
Cinnamon Roasted Carrots
Honey Roasted Sweet Potatoes (Ignore the honey, use maple)
Flourless Vegetables Quiche


Desserts
Pan Forte
Blackberry Apple Crumble
Tiramisu
Coconut Pudding
Chocolate Pots

Well, this is it!
We hope you find some dishes for your menu, or even a full menu!Let us know what menu was your favorite in the comments section below, or in our social channels instagram and pinterest. We will love to hear from you!

Tizké Leshanim Rabboth!

High Holidays Series – Part 3: 5 Full Menu Ideas for Rosh HaShanah & Sukkot Read More »

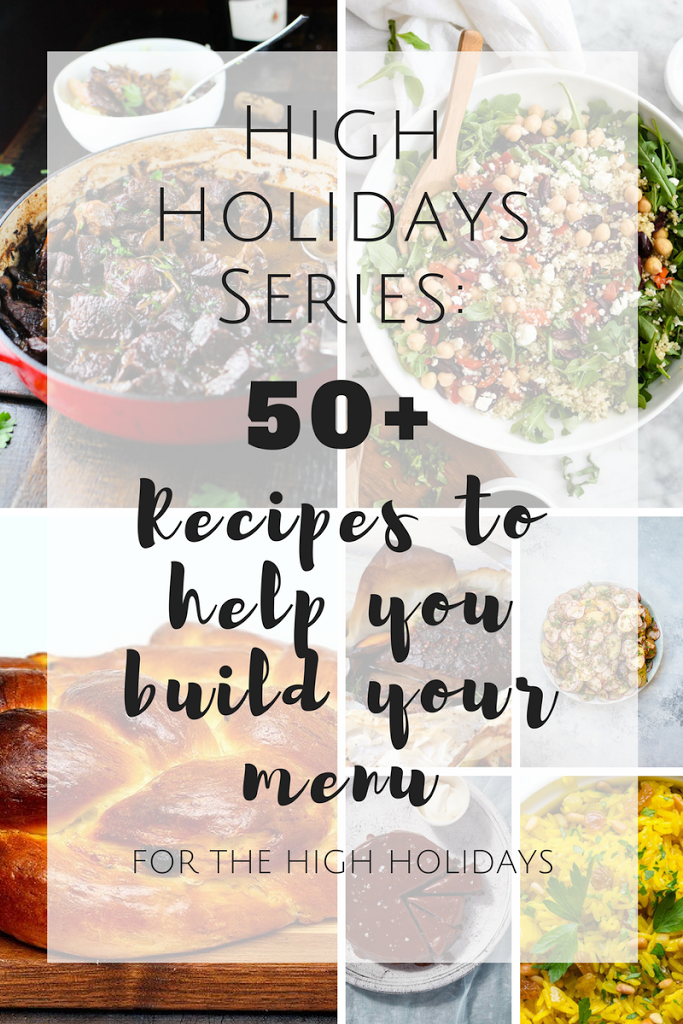
High Holidays Series – Part 2: 50+ Recipes for Your Holidays Menu

Hi, there!
We are very excited to bring you PART 2 of our High Holidays Series (ft. Rosh haShanah & Sukkot). This 3 part series covers:
Part 2: Today we brig you our biggest recipe hunt to this day. 50+ recipes from around the blogosphere that hopefully will give you some inspiration and help you build your menu. For those of you who are vegan, we have included a selection of vegan recipes as well (We also love vegan stuff! 😀 )
Here we Go….

Main Dishes

Wild Mushrooms & Beef Stew

Wild Mushrooms Beef Stew
Spice-Rubbed Rack of Lamb
Jewish Style Chinese Brisket
Grilled Chicken Leg Quarters with Lime Dressing
Roasted Chicken with Dates, Citrus & Olives
Tofu Stir Fry (Vegan)

Honey Lavender Balsamic Chicken

Disclosure: Please note this post contains affiliate links, which means at no additional cost to you, we earn a few bucks if you decide to make a purchase through any of those links. We only recommend products that we personally use, support and/or would recommend without an affiliate link. Do not spend any money on these products unless you totally feel you need them for more that one-time use. Thank you so much for your support. For more information visit our Affiliate Disclosures Page.

Honey, Lavender Balsamic Chicken
Braised Chicken with Tomato & Fennel
Beef Stew with Root Veggies
Fiona’s Green Chicken 
Southern Style Smoky Meatless Loaf (Vegan)
Chickpeas Cutlets with Mushroom Gravy (Vegan)

Greek Style Roast “Lamb”

Greek Style Roast “Lamb” (Vegan)
Seitan Stuffed Roast (Vegan)
The Ultimate Vegan Meatballs (Vegan)
Peppered Lamb Chops
Spinach Cilantro Meatballs
Israeli Roast Chicken

Side Dishes

Pumpkin Puree (Vegan)
Herbed Rice with Dates & Pomegranate (Vegan)
Cauliflower Hashbrowns (Contains Eggs)

Yellow Rice with Pignoli Nuts & Raisins

Yellow Rice with Pignoli Nuts and Golden Raisins (Vegan)

Sautéed Carrots with Lemon & Marjoram (Vegan)
Grilled Vegetables & Tofu Kebabs (Vegan)
Grilled Chipotle Lime Cauliflower Steaks (Vegan)
Shepherd’s Pie (Vegan)
Stuffed Sweet Potatoes (Vegan)
Cauliflower Gratin (Vegan)
Garlic Thyme Pan Seared Tofu (Vegan)

Salads


Mediterranean Quinoa Salad

Mediterranean Quinoa Salad (This Quinoa salad is a great addition to you holiday menu, just ignore the cheese 😉 Still will be delicious with that touch of balsamic, garlic and thyme! Yum! )
Moroccan Carrot Salad (Vegan)
Avocado Chickpea Salad with Pesto (Vegan)
Shaved Butternut Squash Salad with Dates & Sunflower seeds (Vegan)
Cucumber Tomato Avocado Salad (Vegan)
Roasted Beets and Kale Salad (Vegan)
Warm Edamame Salad (Vegan)

Grainy Mustard Potato Salad

Grainy Mustard Potato Salad (Vegan)

Quinoa Salad with Beets, Carrots & Spinach (Vegan)
Ranch Potato Salad (Vegan)
Thai Cashew Chopped Salad (Can be vegan; just swap the honey with maple syrup or other sweetener of choice)
Italian White Bean Salad with Salsa Verde (Vegan)
Salmon Niçoise with Mint, Olives & Capers Vinaigrette

Sweets & Desserts

Edible Apple Bowl (Not properly a ”dessert” but this idea was so genius I had to include it)

Toffee Apple Cake

Toffee Apple Cake (The cake is Dairy-Free)
Grilled Apple Cinnamon Skewers (Can be easily prepared dairy-free, just swap butter for vegan butter, neutral oil like sunflower or don’t use butter/oil at all)
Flourless Almond Honey Cake (Dairy-free, Gluten-free, grain-free)
Curried Apple & Carrot Cake with Basil Buttercream (Dairy-free)
Carrot Cake with Cream Cheese Frosting

Chocolate Date Cake with Salted Caramel

Chocolate Date Cake with Salted Caramel 
Pistachios Stuffed Dates with Coconut
Chocolate Peanut Butter Avocado Pudding (Vegan)
Honey-Apple Layer Cake
Pumpkin Coconut Flan (Contains Eggs, Gluten-free, grain-free)
Apple Crisp (Vegan)

Breads

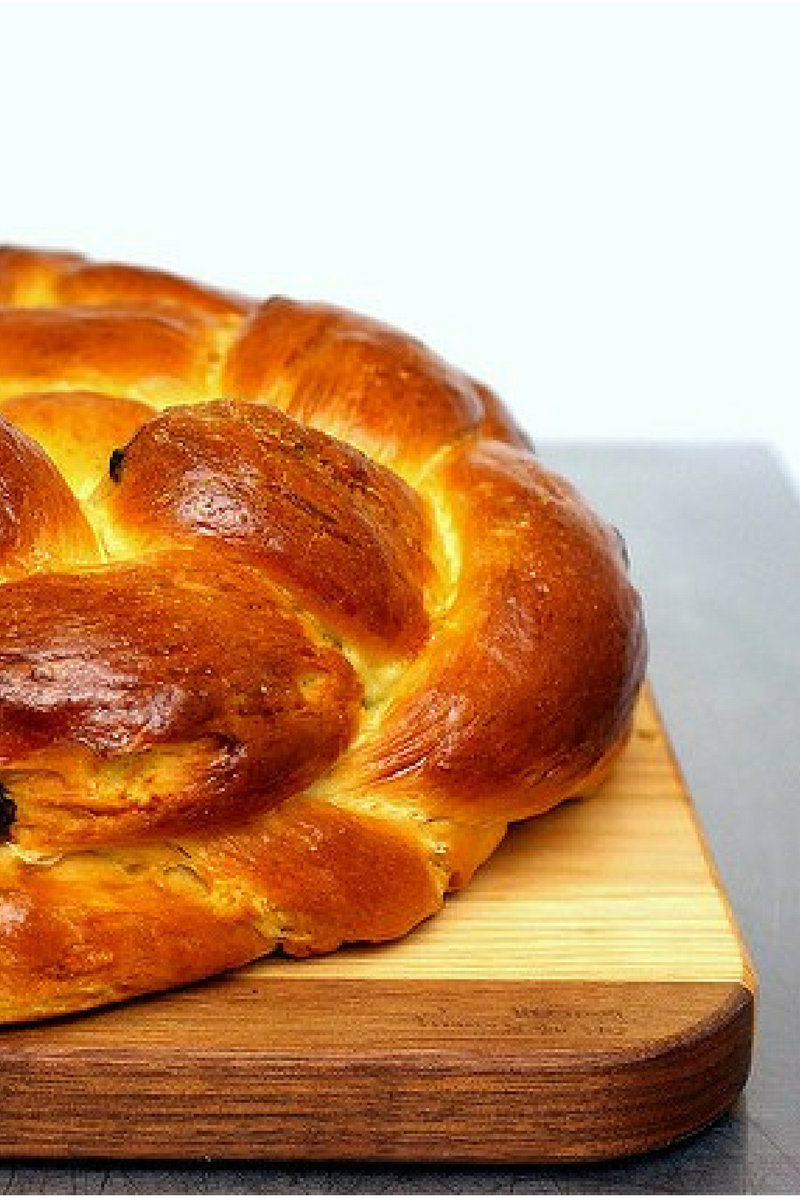
Best Egg Challah
Apple Honey Challah
Apple Kugelhopf Rolls
Egg-Free Challah

Don’t forget to Follow on Pinterest & Instagram.
Stay tune for next week post: 5 Full Menu ideas for Rosh haShanah & Sukkot 🙂 😀

High Holidays Series – Part 2: 50+ Recipes for Your Holidays Menu Read More »

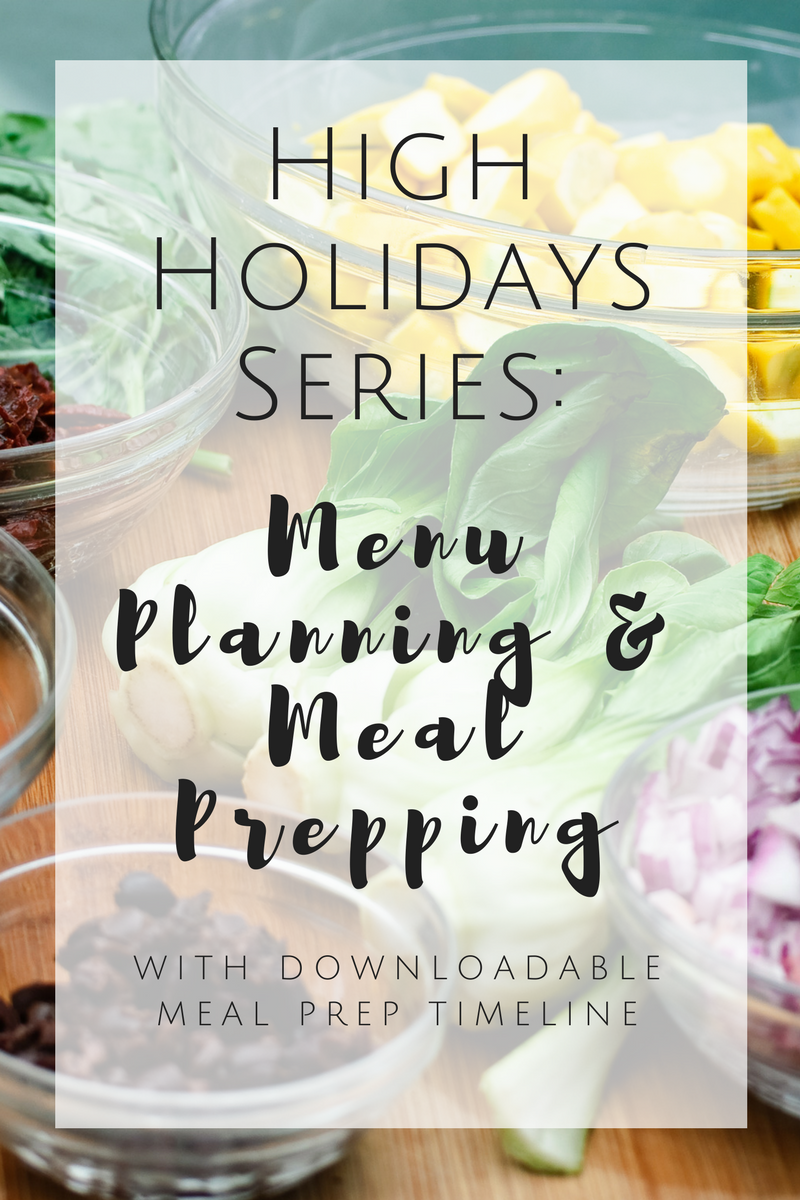
High Holidays Series – Part 1: Menu Planning & Meal Prepping {with downloadable meal prep timeline}


In today’s post I share with you some tips on how to kick off your High Holidays Menu Planning and Meal Prep for basically any Holidays, so that you can plan better, have more fun when it’s time to prepare for the Holidays, and in the process enjoy more the special occasion.

This High Holidays Series will consist of 3 Parts:

Part 1: High Holidays Menu Planning & Meal Prepping

When thinking about the High Holidays, I want to make sure I have enough time to plan my menu, look for special offers and make adjustments if needed, all of that without burning out or having a nervous breakdown, so, if you are like me in any way. I hope you find these tips useful:

High Holidays Menu Planning & Meal Prepping

1. Decide on a Theme

 You have to start by deciding which kind of food or ”theme” you want for your menu. Of course, by the end it will be ”food” but when you decide a theme your menu will look more cohesive. I usually go for mediterranean, caribbean or middle eastern kind of food. Once you’ve decided on the ”theme”, you want to think about who are you cooking for. If you are cooking for family members you can prepare some staples that your family love. If you are cooking for a larger group of friends you may want more ”crowd-friendly” dishes or maybe ”easy dishes”. Those decisions will define your menu. In my case, for example, if I am cooking just for my family I tend to cook simpler meals with plenty of raw veggies. On the other hand, if I am cooking for a larger group, the salads tend to be more complex and include more cooked veggies.

2. Brainstorm

Now that you have an idea of the kind of food you want to serve and the people who you are cooking for, you want to start a brainstorming process. At this point I brainstorm about starters, mains, sides, salads and desserts and their different components. I write down all my dishes ideas and if I get stuck I can head over pinterest, instagram or just a plain google search for inspiration. The Kitchn, Tori Avey Blog and Joy of Kosher are some of the blogs I look for inspiration specially at this time of the year (they have great selection on Sephardic-style dishes with a modern presentation)

3. Create a visual Board for your recipes

I am a very ”visual” person and that is why at this point I will start looking for images that resemble what I have in mind and pin those images to Pinterest (hopefully they are pinables! lol) to a special board dedicated to my menu. This works well for me because it helps me visualize the final menu as a whole and also gives me an overview of which are the main ingredients, and give me some ideas on how I’d like my final dish to look like. Pinterest is such an awesome tool because with it I can also visualize how many variations I may end up with and even how colorful my menu will be (I like to have many colors on the table as this alone makes the food looks much more appealing). Of course, if you are not into pinterest you can just write down your ideas making sure you have enough variety, and if you have cooking magazines you can literally *pin* your ideas to your bedroom wall ;).

For more inspiration, follow my current Rosh HaShanah Board by clicking here.


Disclosure: Please note this post contains affiliate links, which means at no additional cost to you, we earn a few bucks if you decide to make a purchase through any of those links. We only recommend products that we personally use, support and/or would recommend without an affiliate link. Do not spend any money on these products unless you totally feel you need them for more that one-time use. Thank you so much for your support. For more information visit our Affiliate Disclosures Page.

4. How many & How much

At this point you will need to use a bit of math but nothing fancy. Before you start properly building your recipes and calculating portions per dish you have to take into consideration your guests. For example: a 5 year old boy won’t eat as much as a 25 year old and may not eat certain things like soups or certain veggies so you may not need as much of those dishes as of those which may be a hit).

I usually write down the name of the dish and below the ingredients, after that I refer to my favorite Servings per Person Cheatsheet (I use this amazing Cooking for a Crowd for Dummies Cheatsheet but you can also use your favorite recipes servings as guide) to make rough calculations on how much of each dish I need and how much people it will serve in total. Make sure to adjust quantities on the ones that may not be as popular, as I mentioned before. This will ensure you have enough food per person but also that you are not going to be wasting a lot.

After this process is finished I have pretty much built the recipes for each dish, so now I can go and make a shopping list.

5. Make a (pre-) Shopping List

Now it is time to start making your (pre-) shopping list. I say “pre” because it doesn’t have to be massive at this point but at least it is going to include the main ingredients of your dishes (like grains, meat, fish, some kind of veggies, pastas, baking supplies and other items like aluminum foil, disposable trays, baking paper, etc). After all, you cannot expect to just make one trip :-/ If I am working with a specific budget I like to include average prices for each ingredient and where can I find them. (I usually visit 2 to 3 stores depending what I am looking for). That way I can plan my shopping strategically within certain days and look for special offers. Once the “main shopping” has been done, I can revisit my shopping list to see if there is something missing and then, make a final list with those last items.

6. Time to Meal-Prep

[convertkit form=1664539]
When you have a lot of stuff to do, planning is the key to success.
Did we miss something? How do you plan your cooking for major holidays? Let us know in the comments section below and don’t forget to follow on pinterest and instagram!
Happy planning!

High Holidays Series – Part 1: Menu Planning & Meal Prepping {with downloadable meal prep timeline} Read More »
A Quick Summer Vacation Memoir {Plus, My Favorite Snacks for Air Travel}

Hi There!

Finally back to the habit of writing after a few weeks without posting…So sorry about that! (after 3 weeks on vacation on USA, I came home to find a dead laptop (that finally decided to turn on last week) and 2 days after that, a broken smartphone. Well, I’m still trying to find a good deal on the “right phone” which apparently is like seeing a shooting star, but hopefully, we are going to start posting regularly again soon! 🙂 Enough tragedy for now… lol.. Let’s move on…

It might sound crazy what I am about to say but there is something fascinating about the whole travelling experience that gets me excited. I don’t know if it is the fact that I am learning something new, or that I want to push myself to do certain things differently (like packing lighter and lighter every time, or finding healthy foods for travelling…) or just the fact of being on another country and experience a different culture, but it is just SOOO cool! 🙂 I was also very excited to see my mother-in-law and finally eat proper caribbean food not cooked by me. Wohoo!

On our way to USA we spent one day in Berlin. The trip is just 1 hour by airplane so, even though I took my healthy snacks with me, we didn’t eat that much. Once in Berlin, I had the opportunity to finally meet a facebook friend, we have being fb friends for around 5 or 6 years. She kindly spent the day with us and showed us a few city landmarks. We went to The Brandenburg Gate, the Reichstag which is home for the Parliment now, and to the Memorial of the Murdered Jews of Europe (picture below).

Then, our friend invited us to an extravagant hindu restaurant where I had the most amazing vegan meal I’ve ever tasted: Vegetables Tutong; which is a blend of vegetables (mine had brocooli, potatoes and peppers) in a massaman curry with coconut milk and roasted peanuts. Oh my! It was so delicious that I almost ate the bowl, lol. I will have to make a rendition of this in the near future because it seems to be easy and honestly so filling and yummy.

After that, we headed to the Fernsehturm, close to Alexanderplatz which is now a radio station and is the tallest building in Germany (It was surreal looking it from the ground because I could see it from the airplane! O.o)


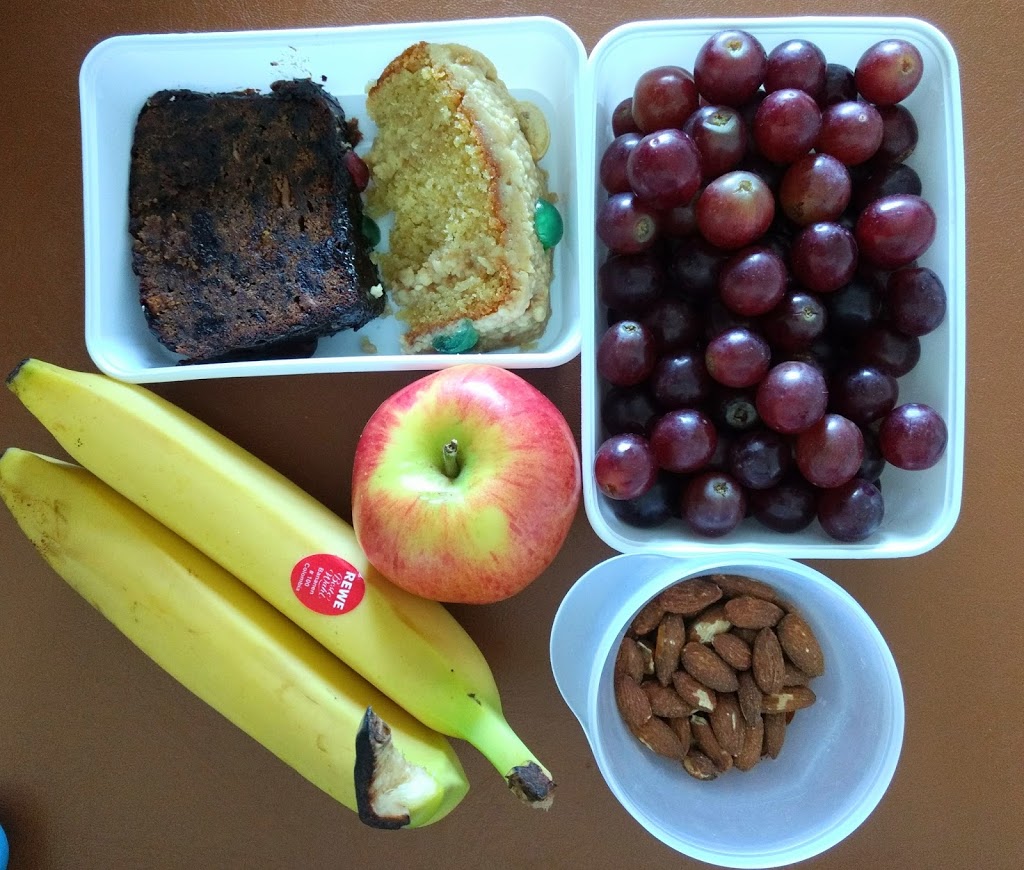
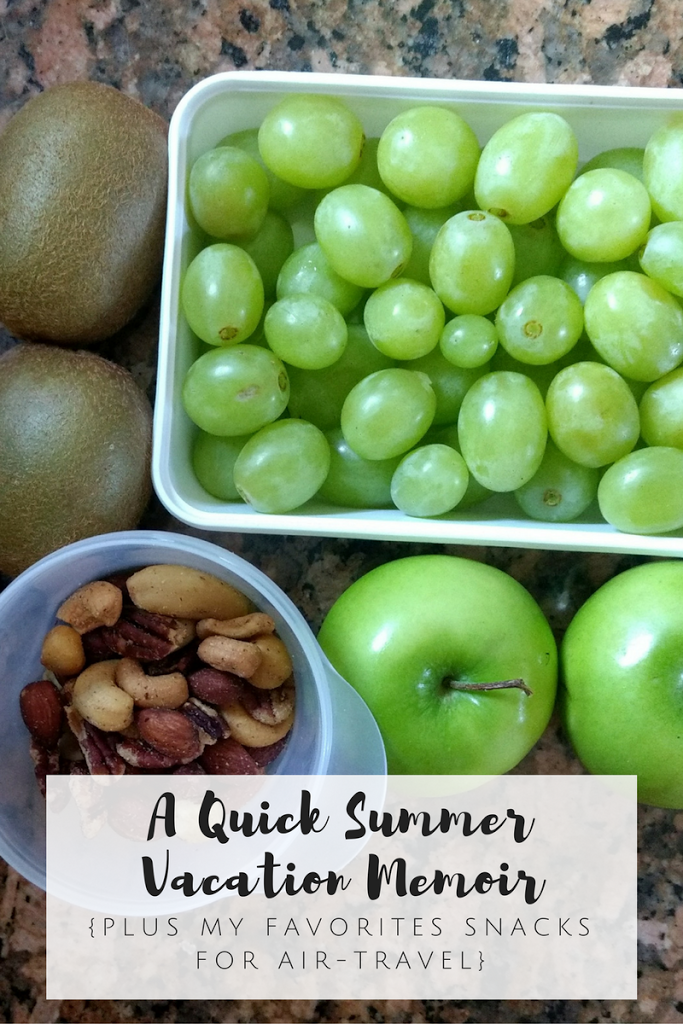
It was a long day, we walked a lot so we were really tired, but before heading to our airbnb room (Did you know that airbnb is awesome solution for people traveling on a budget? We have had a great experince so far!), we stopped by the supermarket to replenish our snacks vault for next day long flight. So, This is a ”sample” of what I prepared for snacking:

CLICK HERE to Get €30 (US$40) off your first stay with Airbnb

Cakes Slices / Muffins
I had already on hand some pieces of cakes (2 fruit cake slices (made with plums) and 2 coconut cake slices) that our lovely friend who took us to the airport in amsterdam gave us early that day. What I loved about these cake slices is that they were homemade and had just the right amount of sweetness. Also, because they were made with a lot of plums and the other one coconut, they were an excellent source of fiber, which for me is great 😛

Fresh Fruits
To those cake slices I summed up a couple of fresh fruits.

– Bananas (I got 6): I love bananas for travelling because they are like a complete meal and my son loves them too so I always take some bananas. Only con is that they can be smashed easily if you just throw them in your bag. To avoid this what I do is I store them in a plastic bag and then, I put them on top of everything else in my personal bag.

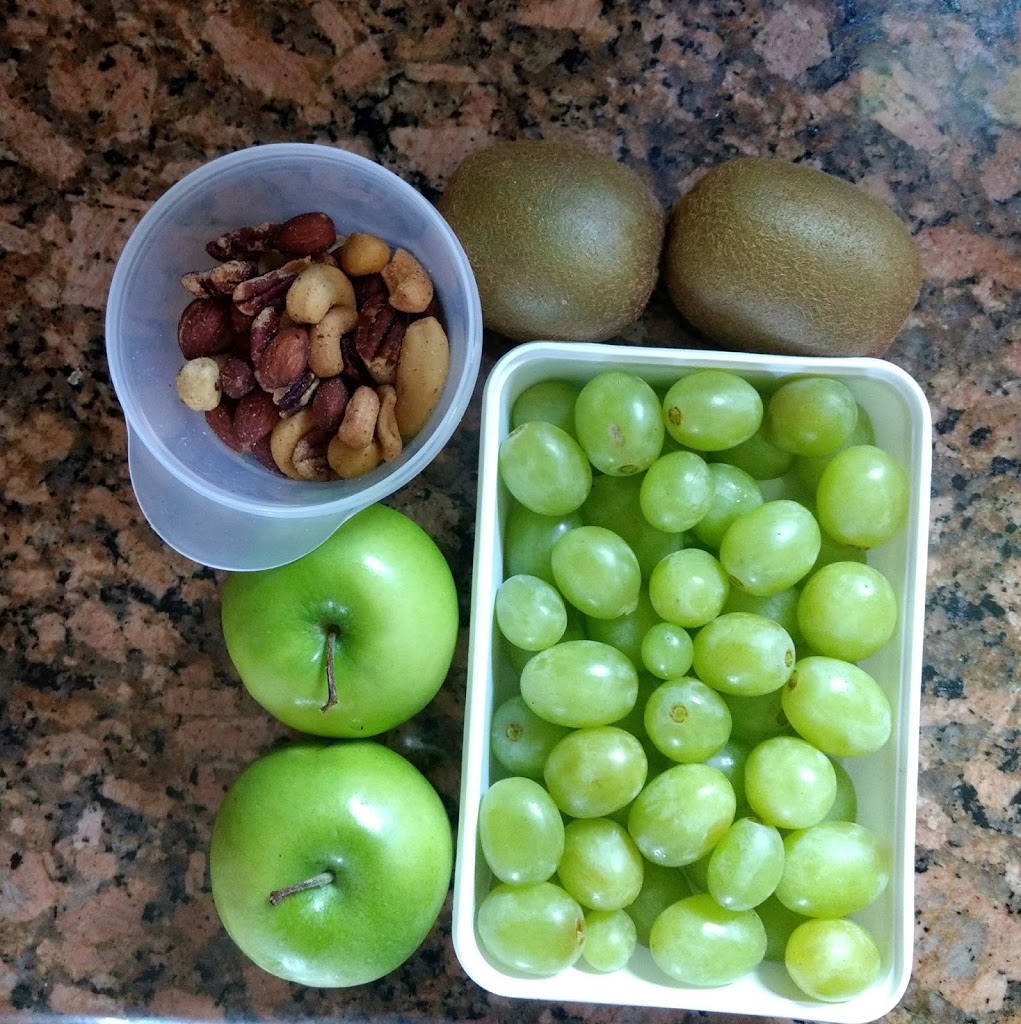
– Apples (I got 3): Apples are probably the most travel friendly snack because they can survive almost any condition of temperature and you can just throw them as is on your bag without them getting all smashed.

– Grapes: (I got 1Kg Seedless Grapes): Grapes are just super travel friendly as well, easy to transport and eat withput getting all messed up.

– On our travel back to holland I packed the same fruits mentiones before plus some kiwis

– On our return flight I also grabbed 1kg of fresh cherries which I recently discovered that 21 cherries (which is A LOT) are just 100 calories. They are full of vitamin C, full of flavor and delicious.

Roasted Nuts / Seeds

Roasted almonds are definitely one of my favorite healthy snacks. They, again, are super travel-friendly and of course very nutritious. They provide you with energy, plant-based protein and healthy fats. Of course you can replace almonds with your favorite nut / seeds of a blend (My favorite Almonds, cashews, walnuts and Macadamia)

Cookies / Crakers:

– Store-bought Coconut Cookies (hubby’s favorite): Well, this are not a “healthy option” but is just something I grabbed from the supermarket to please my husband, but of course they are tons of healthy options out there. Look on the health isle or the protein isle on the supermarket.

With those healthy snacks we always have more than enough snacks to survive. It is not like we want to stuff ourselves with all that food but I just want to make sure we have enough in case our son don’t want to eat the meal on-board (he is usually vegan and extreme in his choices) 🙂 Anyways, As for today we never have gone out of healthy snacks while travelling, on the contrary! (usually we have fruits left lol)

Good to see and feel a poweful sunny day when we arrived to Miami. It was much needed after spending a rainy day in Berlin.

So, this is all for today guys!
Now tell me, what healthy snack do you prefer while traveling? Let us know in the comment section below and on instagram! 🙂

Until next time…


A Quick Summer Vacation Memoir {Plus, My Favorite Snacks for Air Travel} Read More »
Avocado Pesto Pasta

Hi, everyone!
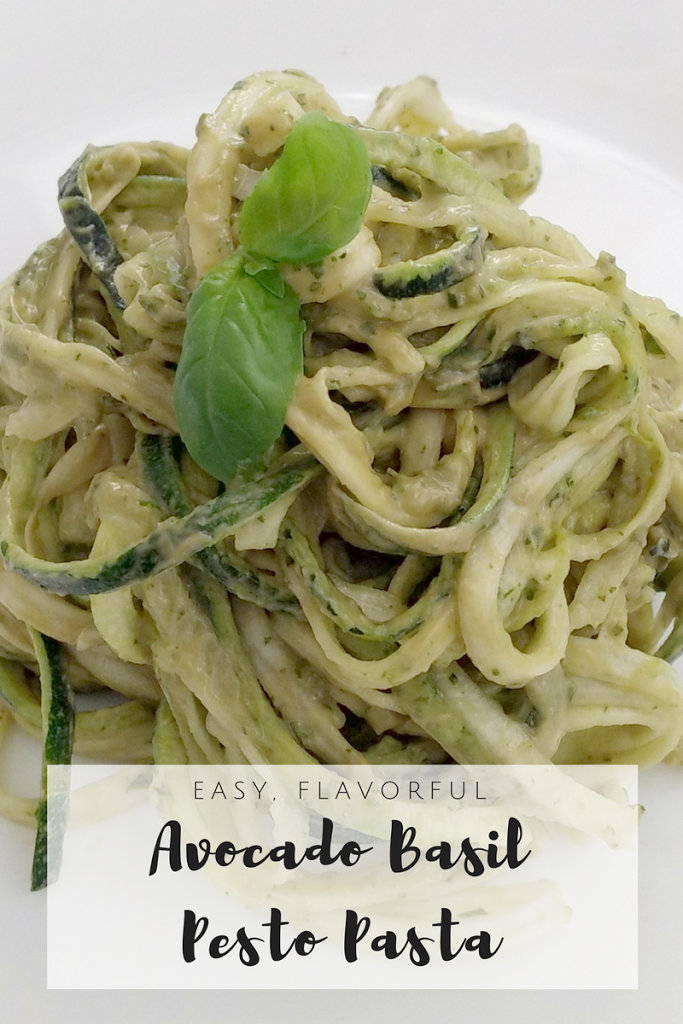
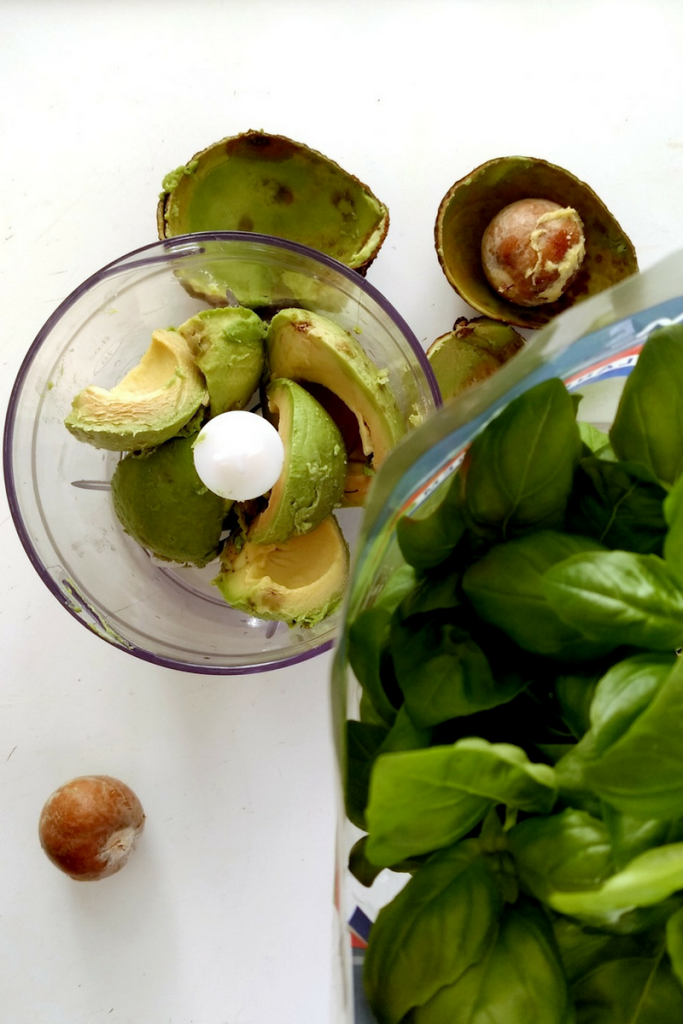
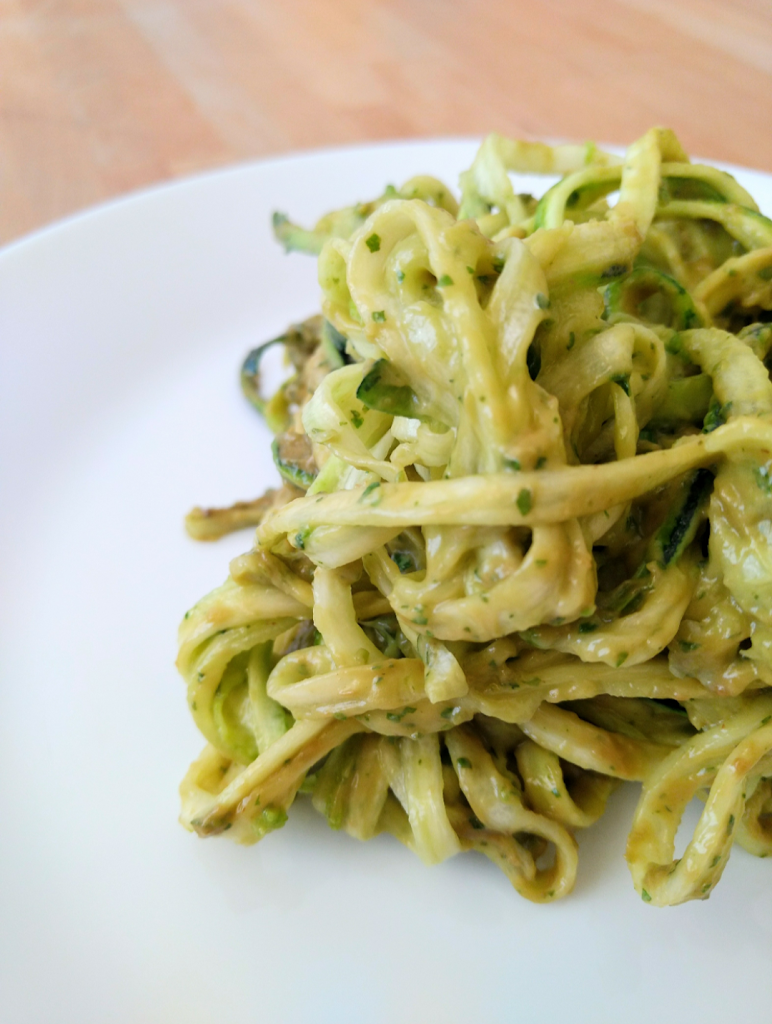
As you can see, the recipe we are presenting today is avocado pesto pasta.
I can totally say that avocado is one of the favorite fruits of my mom, sister and I and yet, this was the first time I personally tried the avocado pesto. I don’t even know why I didn’t try it before (probably because I was having a difficult time finding good ripe avocados 🤔) Anyways, this is for sure one of the easiest, simplest yet extremely delicious pasta dishes I’ve tried.
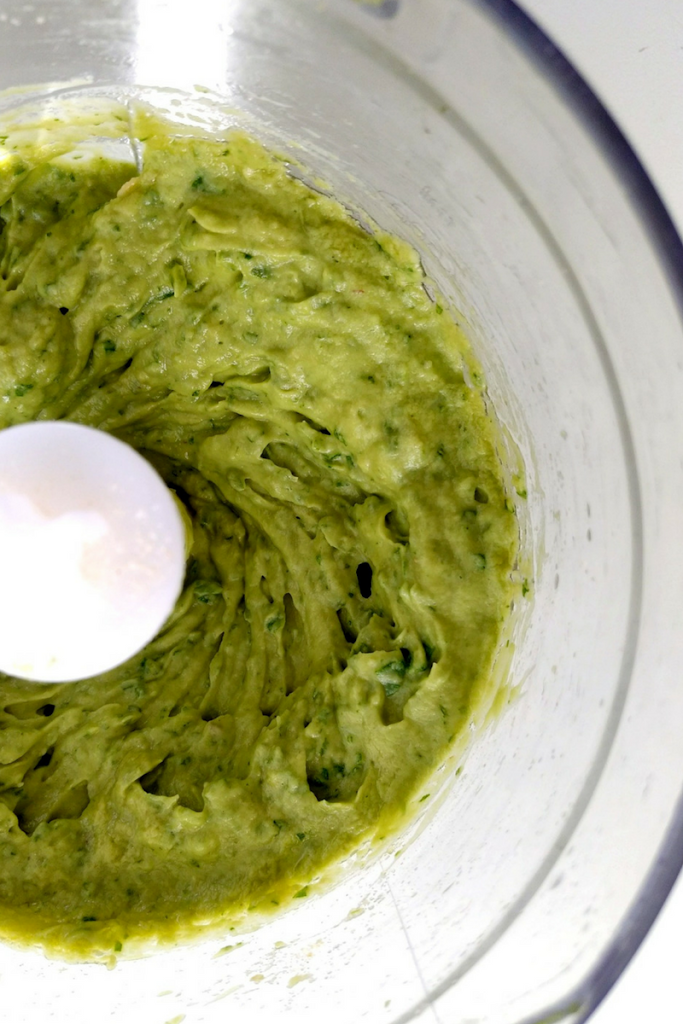
In terms of texture, this is probably the cremiest pasta that I have eaten (no cream, no butter, all vegan, just creaminess from the avocado). I instantly felt in love with this avocado pesto pasta, but because this was my first time, there are a few things I will do differently next time I am doing this:
Ex.: Next time I will double or triple the amounts because I cooked 1 pound of linguini and it was way too much pasta for the pesto, so the pasta didn’t get the super green color I like in pesto. The zoodles were different, though.
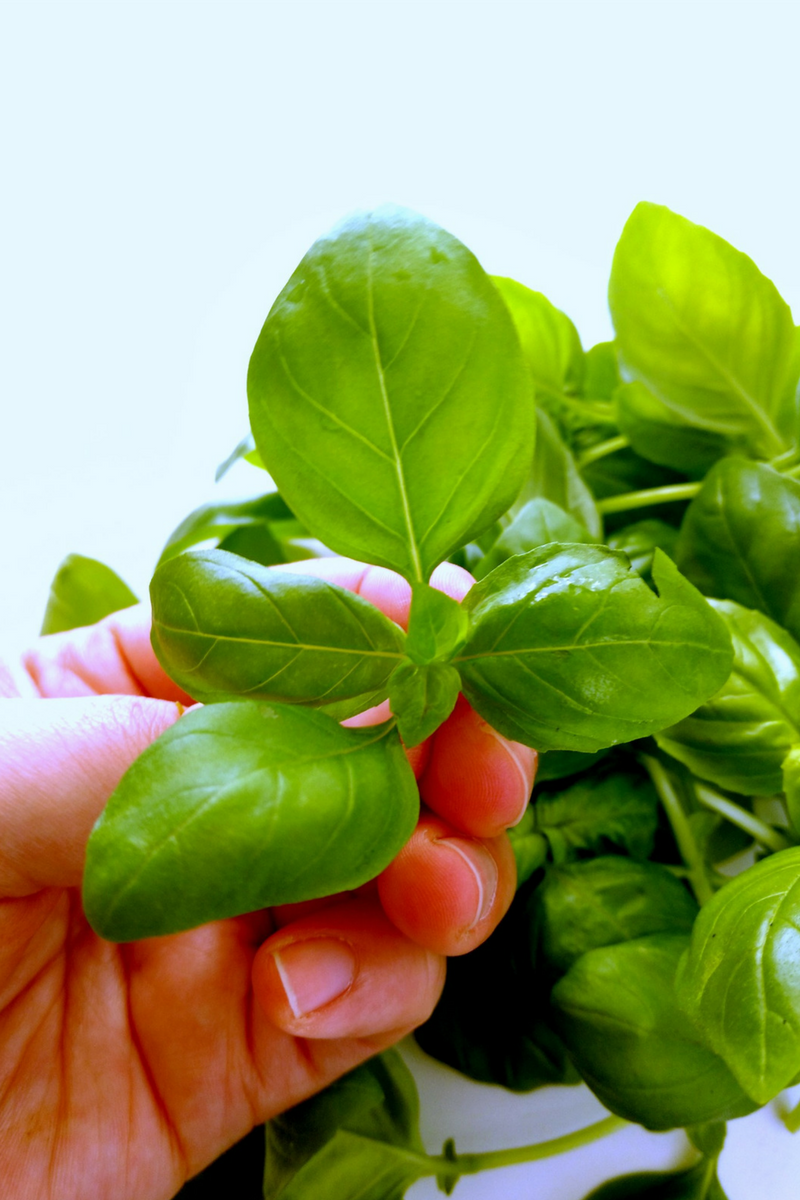
Also, next time I will make de pesto first with 3 or 4 bunches of basil for 1 pound fetuccini and then, add the avocado to the ready pesto. This is because I always add the whole bunch of basil to my pesto (yup, stalks included!) and for some reason they were not properly processed when added from the beginning with the avocados.
There were not any other issue. The process is very straight-foward. Just process all the ingredients until creamy.
That was enough introduction, let’s jump to the recipe:
YUMMY AVOCADO-BASIL PESTO
Prep. Time: 5 minutes.

Cooking time: 10 minutes (if using pasta)

Ingredients:

115 gr Avocado, ripe but firm (about 2 avocados)

About 150 gr fresh basil
¼ cup Extra Virgin Olive Oil
1 clove of Garlic
½ tsp of salt (or more to taste)
Pepper to taste
Juice of half lemon, about 2 Tbsp.

¼ cup of pine nuts or almond Meal*

Preparation:

First make your traditional pesto by processing all the ingredients except for the avocados. (I added almond meal to my pasta first because I didn’t have the pine nuts and second because is nutritious anyway and I love the flavor, but if you don’t have any, it can be totally optional).
Then add your avocados for extra creaminess. Mix with your pasta or veggie noodles and enjoy.
It couldn’t be easier! Keep this in your list of life saving recipes list so you can grab a jock lunch or dinner next time you are in a hurry! Oh! And, I almost forgot!… This is very kid friendly (if your children love colorful creamy pasta 😉😋)
Have you guys tried avocado pesto pasta? Do you prefer zoodles or noodles? 😆😋 Let us know in the comment section below!


Avocado Pesto Pasta Read More »
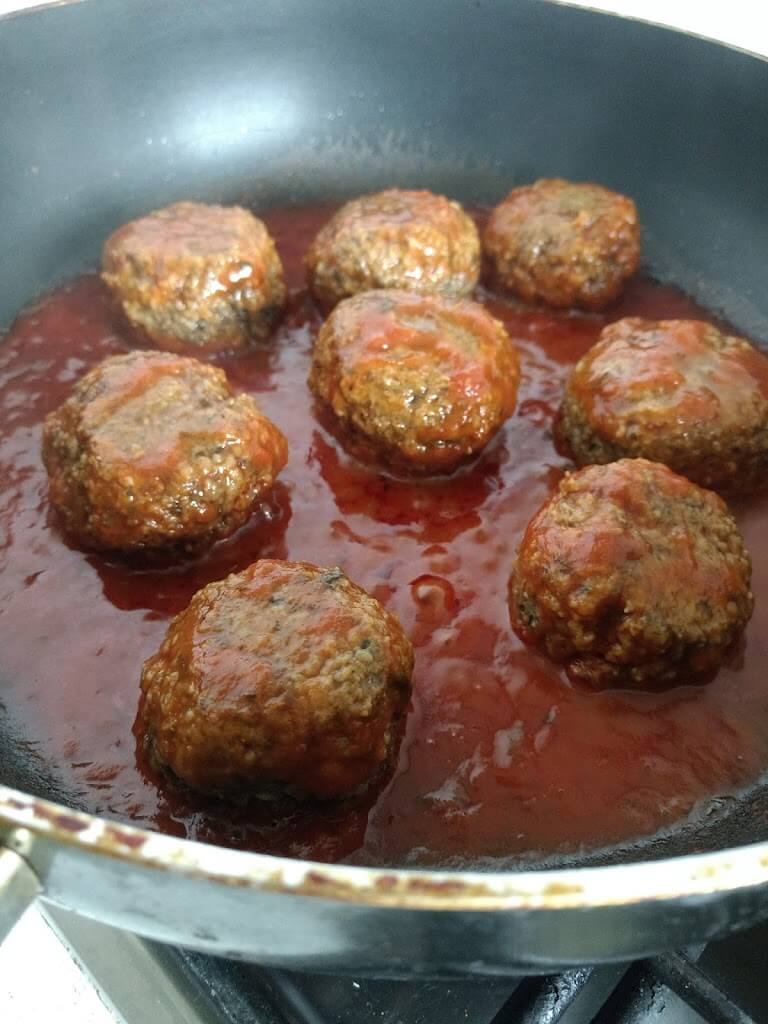
The Ultimate Vegan Meatballs {Vegan, Gluten Free}

The Ultimate Vegan Meatballs {Vegan, Gluten-Free}

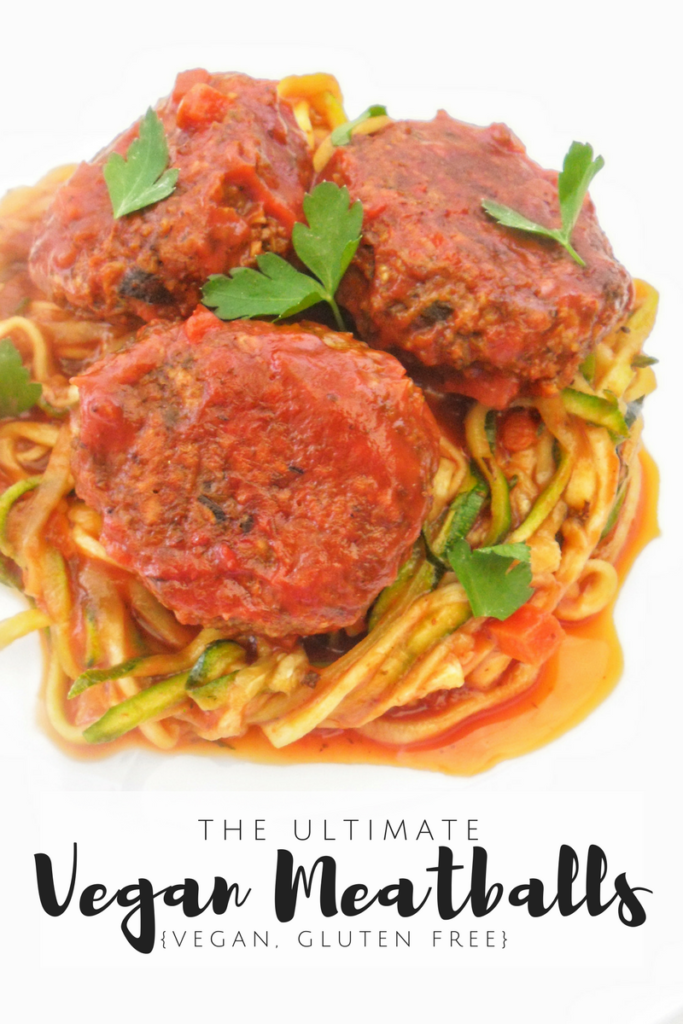
Hi, everyone! I am very excited today to finally share with you this recipe for vegan meatballs. I have taken some time perfecting it to get it right, and I hope you enjoy as much as I do. These are The Ultimate Vegan Meatballs.

How the Ultimate Vegan Meatballs came about...

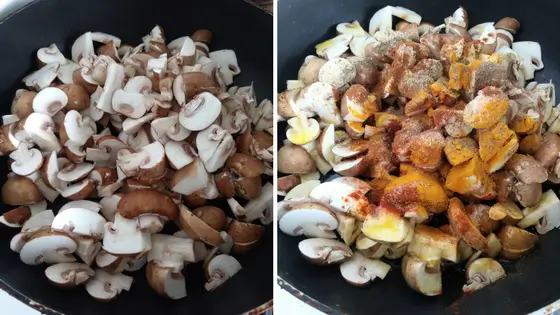
The Ultimate Vegan Meatballs were born a couple of weeks ago while I was cooking a whole bunch of mushrooms for lunch but once they were cooked they were so little! The disappointment was real! Those mushroom filled the pan and when cooked were just a few grams! I needed to act quickly and finish lunch so I thought: Why not make some meatballs? Yes! Of course!

I processed the mushrooms with some oats, more spices, a bit of water and so on until I had the consistency I wanted. Then I finished cooking in tomato sauce. They were good in terms of flavor, but way too dense, so I had to make them again correcting the amounts but I was out of mushrooms, so the recipe had to wait.

Next day was friday. I was cooking chicken for Shabbath but, who says you cannot make chicken and vegan meatballs? I made up my mind to take advantage of the momentum, so I weighed my ingredients, took some notes and pictures, cooked and reserved the meatballs, that were going to be served for dinner.

We had guests for shabbath and I was mortified. I just was praying the meatballs were at least edible. But, well, if they were not that good, at least I could have some feedback to perfect this recipe and write it on the blog.

The time to eat came and I remember when one of the kids wanted to try the meatballs. They honestly looked like their meaty cousins so much but to avoid any confusion, I told him straight away the meatballs were vegan. He tried it and immediately his eyes opened up!

When he asked for more I realized they were happy open eyes, those that happen when you try something delicious! At this point, everyone started eating the meatballs and I was receiving positive feedback. I was very happy when a vegan guest told me she wanted the recipe for making them like everyday 🙂 That moment I knew they were not only edible, but certainly good. Even my picky husband liked them!

In the week that followed I probably made this recipe every other day, just to make sure the recipe was on point, and now it is just turn to try them. I really really hope you like them.

How to make the Ultimate Vegan Meatballs

The main ingredients in the Ultimate Vegan Meatballs is Mushrooms. Since they can come quite dirty, you’ll start by soaking the mushrooms in cold water for a few minutes, and then finish cleaning with a paper towel or a soft brush to remove any soil, before continuing with the next steps which include removing the excess moisture, mix all ingredients with the help of a food processor, fry or bake and finish cooking in the sauce. 

UPDATE: You can totally make this recipe OIL-FREE by skipping the oil entirely and baking these vegan meatballs instead. 

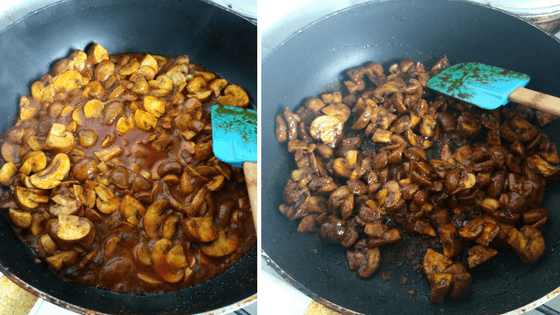
When first cooking the mushrooms we want most of the liquid to evaporate. This step is important. Our second most important ingredient, 100% Whole Grain Oats will benefit from some moisture, but if the mushrooms are too moist and you end up adding more oats than recommended (which you totally can) the texture won’t be as desired and meaty as intended. 

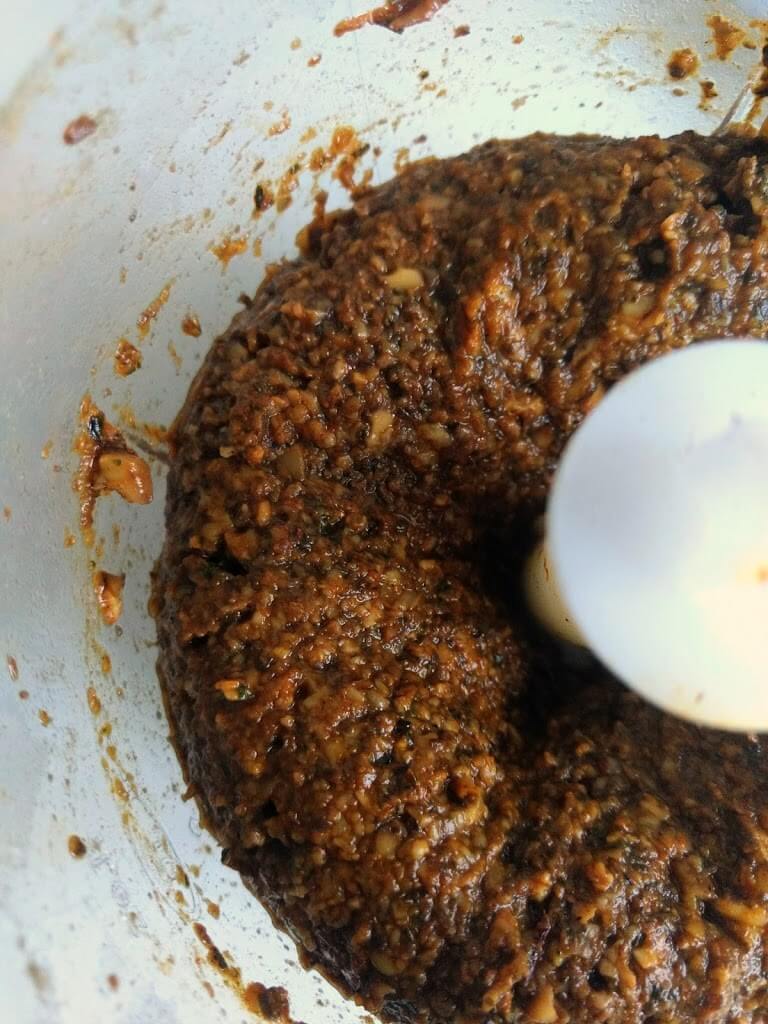
Once in the food processor make sure you chop the mushrooms enough but not too much.  You still want little pieces of mushrooms in there for texture. 

Now, the second part of the recipe includes transferring this concoction to a bowl and mix in whole grain oats and water. And you might be thinking “didn’t we just remove the water while cooking the mushrooms? Why are we then adding water back?”. Well, there’s two reasons for this: 

  1. The cooking of the mushrooms with the spices gives a better texture and flavor to the recipe than just adding them raw with the spices. 

  2. Adding the needed water (or liquid) in this second phase of the recipe gives you more control, because you know exactly how much liquid is getting into it, instead of just eyeballing every time the amount of water vs. oats that you need, which can be frustrating and lead to different results every time.

Shaping and Cooking

To shape the vegan meatballs it helps to wet your hands a bit before shaping each meatballs as the oats they contains get very sticky.
 
To cook you can either fry or bake.
 

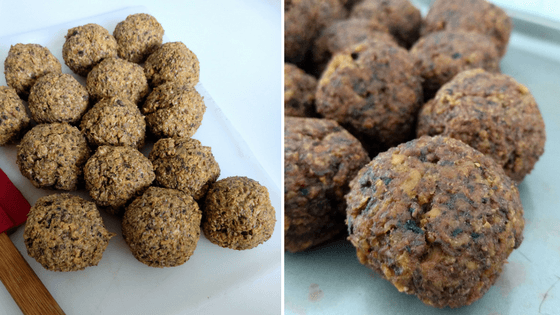
IF FRYING: make sure the oil is well heated before you start, or the meatballs can lose the shape. Fry until hey are golden brown on both sides, and transfer to paper towel to drain the excess oil.

Fried Vegan Meatballs
Baked Vegan Meatballs

IF BAKING: Make sure you use a silicone mat or baking paper to line the baking tray. Using just oil or butter won’t work (I’ve tried). Bake them for about 30 minutes or until you see they are firm to the touch, thoroughly cooked and with a nice brown color. Get them out of the oven and let them cool down a bit before you attempt to take them off the silicone mat or the parchment so they don’t break. Once they cool down, they should peel off esily from the baking paper.

If they are not peeling easily is because they are still a bit too wet. Stick the tray for a few more minutes in the oven and then remove them from the baking tray.

You can finish The Ultimate Vegan Meatballs by cooking them in your preferred tomato sauce (Check out our Sweet Potato & Tomato Pasta Sauce) for 5 minutes or so, on low heat. This last step is important to give the meatballs a meaty texture. 

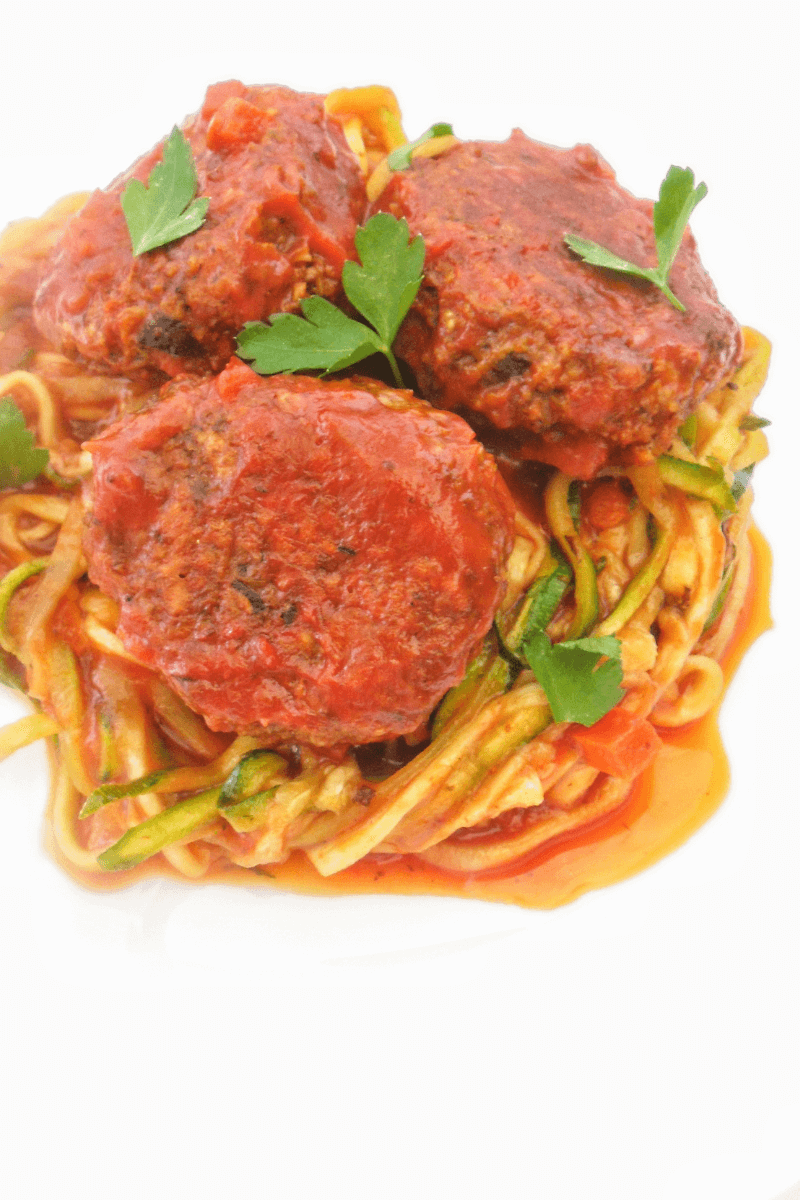
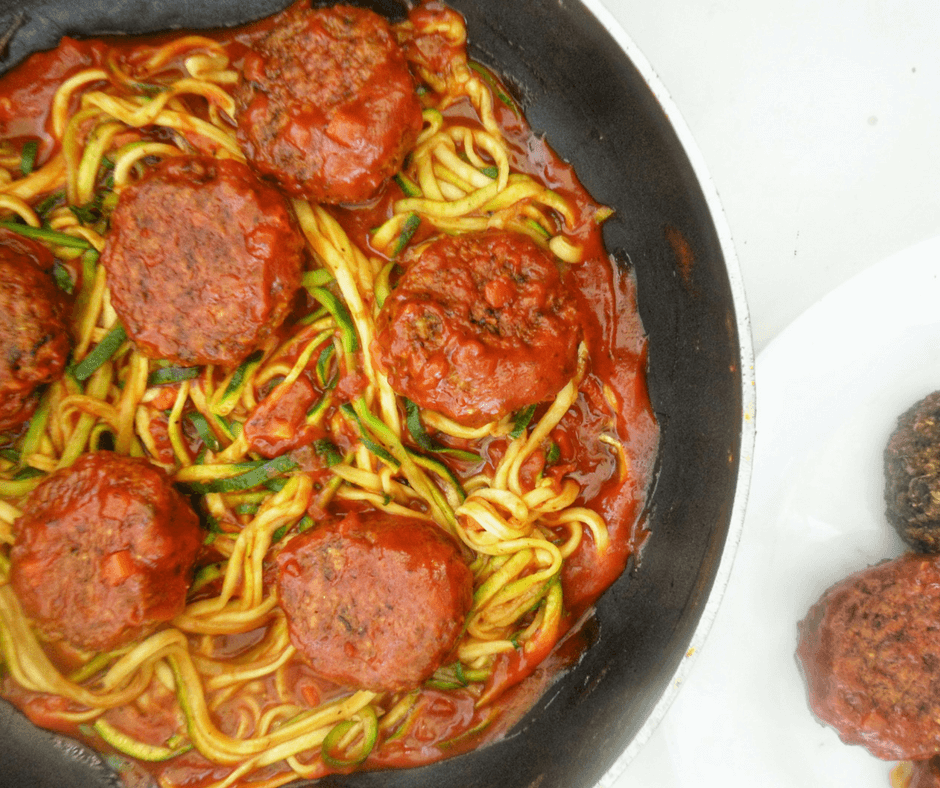
Serve them with regular pasta, or try them over zucchini noodles! Delicious! 🙂

The Ultimate Vegan Meatballs

Mushrooms and oats based vegan meatballs perfect for your pasta dishes
Prep Time 15 minutes
Cook Time 35 minutes
Total Time 50 minutes
Course Dinner, Lunch, Main Course
Servings 4 people

Ingredients
  

  • 450 gr Portobelo Mushrooms
  • 200 gr 100% Whole Grain Oats
  • 180 ml Water
  • 1/4 Cup Dried Oregano (It's not a typo, it's 1/4 Cup of dried Oregano)
  • 3 Tbsp Extra Virgin Olive Oil
  • 1.5 Tbsp Sweet Paprika
  • 1.5 tsp Salt I use Himalayan or Sea salt
  • 1 tsp Garlic powder
  • 1/2 tsp Turmeric
  • 1/4 tsp Ground cinnamon
  • 1/4 tsp Ground black pepper
  • Pinch Nutmeg

Instructions
 

  • Clean mushrooms by soaking in cold water for a few minutes, then rubbing gently paper towel or soft brush. Roughly chop.
  • Heat your pan on medium-high heat. Add the oil (you can skip to make oil-free if you prefer), mushrooms and seasonings. Cook until there is no excess water left and the mushrooms are cooked through.
  • Process with a food processor, add oregano and pulse to a rough paste.
  • Transfer the mixture into a bowl and add oats and water. Mix well.
  • Let the mixture rest in the fridge for 5-10 minutes so the oats absorb the liquid and bind everything together.
  • Shape with wet hands and fry (or bake for about 30 minutes in a parchment lined baking tray) until browned and completely cooked through.
  • Finish cooking in your preferred tomato sauce for 5 minutes or so, on low heat for the perfect melt-in-your-mouth texture.
Keyword dinner, vegan

Have you make the Ultimate Vegan Meatballs already? Use the tag #kasheribbean to share your pictures on social media and don’t forget to follow on instagram and pinterest for more easy recipes! 

The Ultimate Vegan Meatballs {Vegan, Gluten Free} Read More »
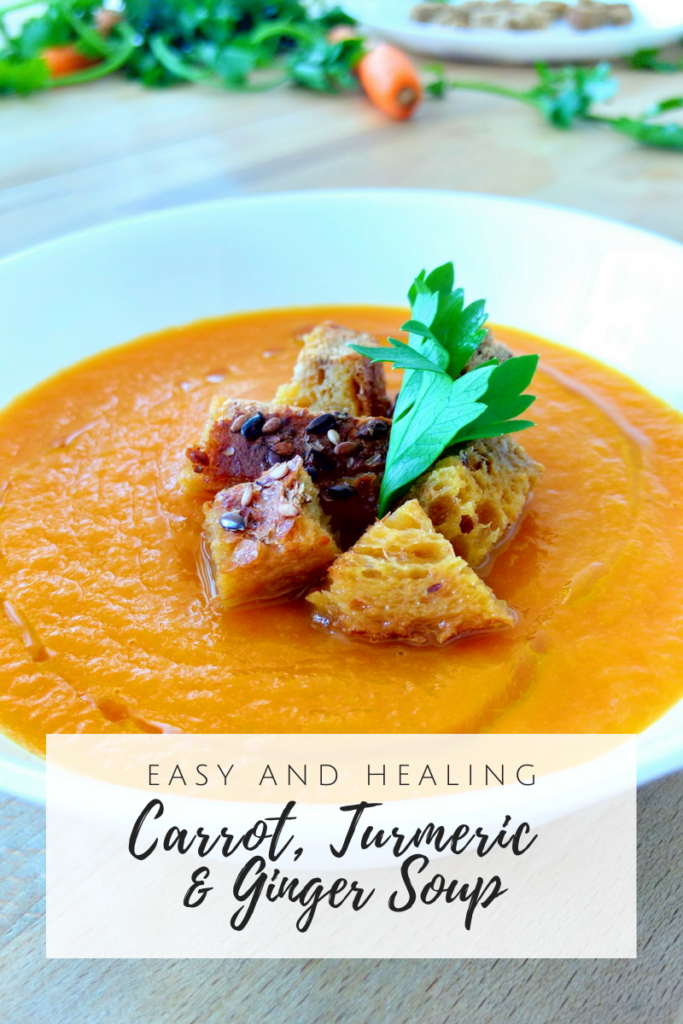
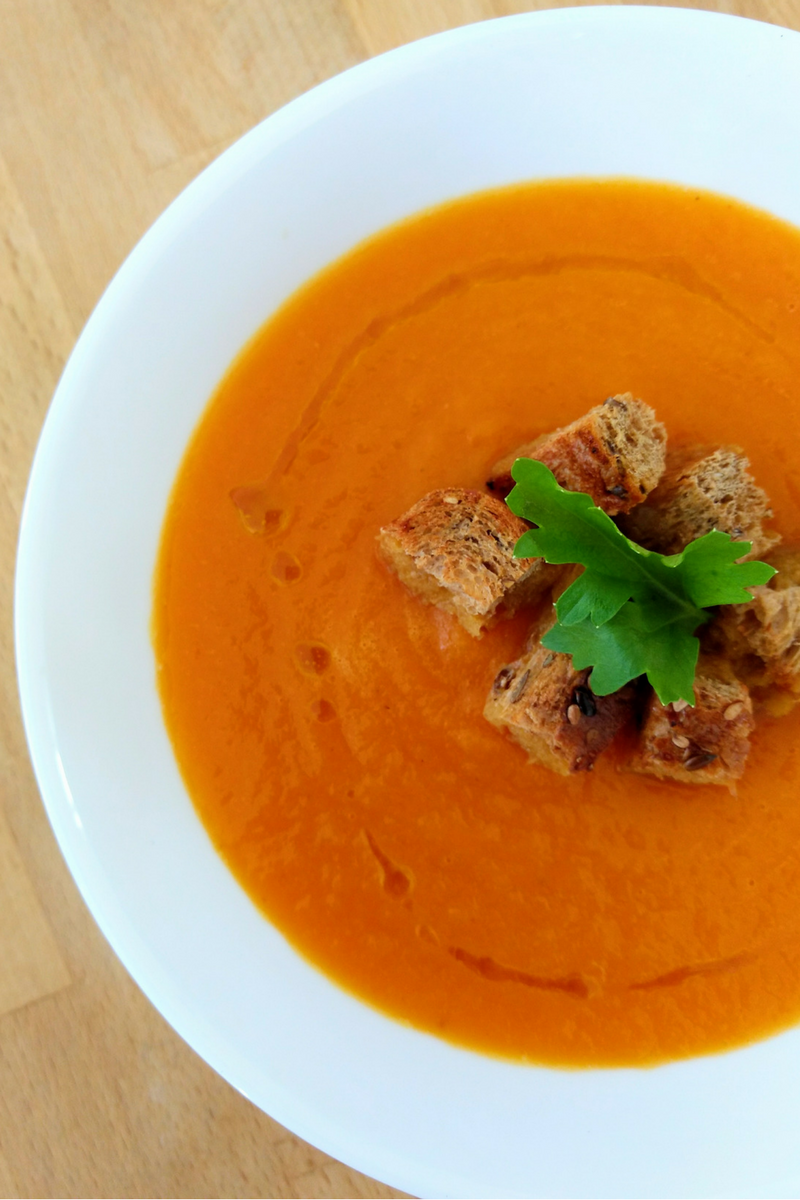
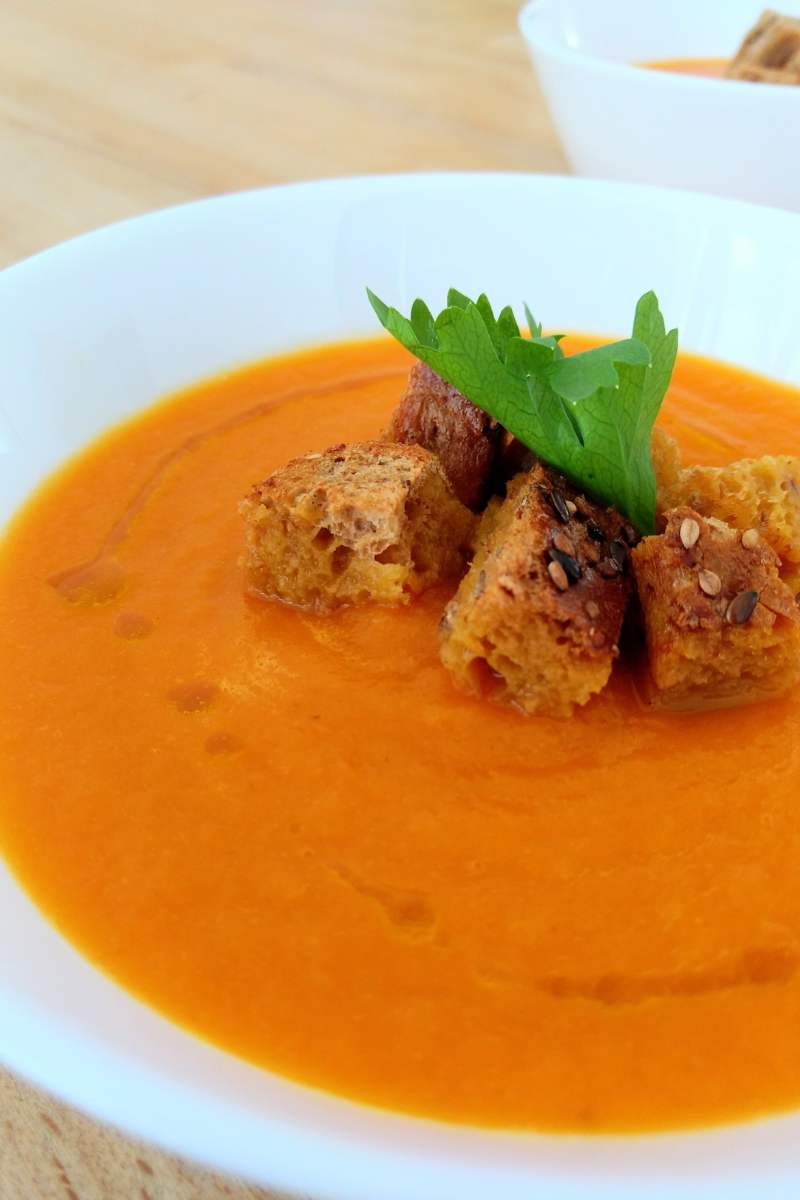
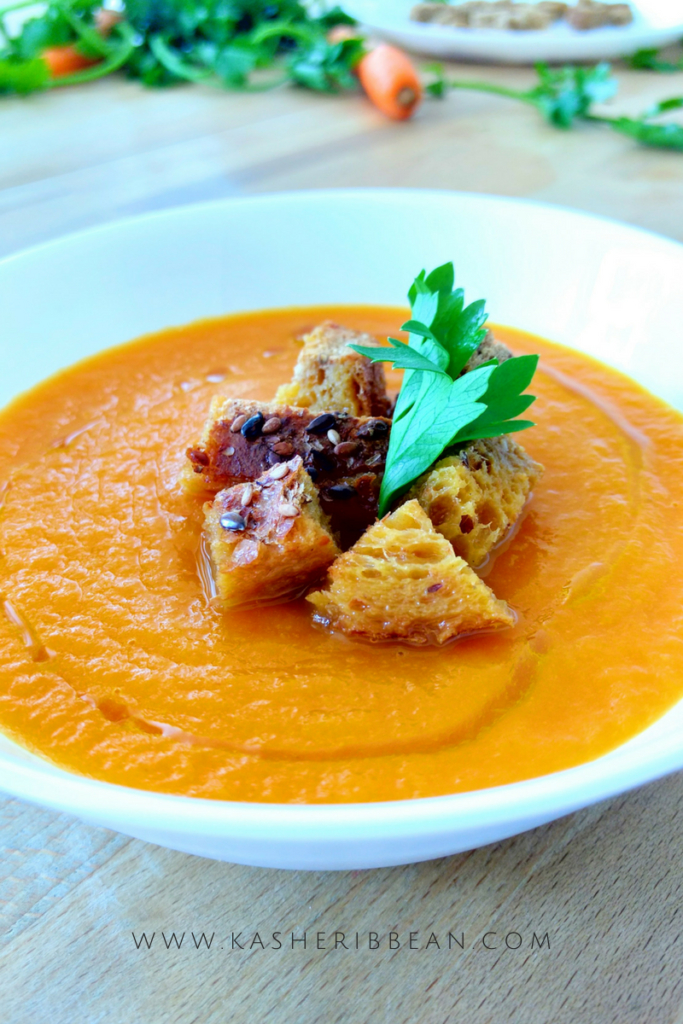
Carrot, Turmeric & Ginger Soup

Carrot, Turmeric & Ginger Soup {Vegan, Gluten-Free}

Carrots are a very versatile and nutritious vegetables, commonly used around the globe, raw and cooked, in a wide range of dishes, adding both taste and nutritional value. This particular recipe, Carrot, Turmeric and Ginger soup, is also a great opportunity for you to use those carrot tops and bottoms left behind after grating carrots. Turmeric and ginger are added for a kick, and because of their nutritional value as well. 

When buying carrots, look for firm, smooth, and brightly colored ones. They can be stored in the refrigerator, either loose or in a perforated reusable plastic bag, for up to a few weeks. To maintain their freshness, it better to remove the green tops before storing as they can draw moisture from the carrot roots. But don’t worry, you don’t have to throw them out. Use the green carrot tops for salads, pesto, pastas or garnish. 

If you forget a few carrots in the fridge, and they become soft, you can always revive them by soaking them in ice water and leave in the fridge for a few hours.

How to make Carrot, Turmeric Ginger soup

To make this Carrot, Turmeric and Ginger Soup is really easy. First, you need to create a flavorful base, which you’ll make by the sautéing the vegetables until they are somewhat caramelized. This process will provide deeper flavor than if you just add the broth right away. So, taking a little time with this step is worthy. 

Since the carrot soup has to cook for a bit, hence evaporating some of the liquid added and concentrating the flavors, I advise you to add the salt once the cooking process has finished, and specially if you used regular store-bought vegetable broth, which is often rich in sodium. 

Easy Carrot Soup

Carrot, Turmeric & Ginger Soup

Course Appetizer, Soup
Cuisine Dominican Republic

Ingredients
  

  • 100 gr Yellow onion, roughly chopped {about 2 medium onions}
  • 1 Celery stalk, chopped
  • 500 gr Carrots, chopped
  • 500 ml Vegetable broth { up to 700 ml of homemade or pre-made}
  • 10 gr Ginger root, peeled
  • 3 tsp Turmeric powder {or to taste}
  • 2 Garlic cloves, chopped {or 2 tsp of garlic powder}
  • 1 ½ tsp Salt

Instructions
 

  • To your pot add the oil and sauté the onion with a pinch of salt, until they are a nice light brown color. Be careful not to burn them or they will give an aftertaste to the soup.
  • Add the celery, carrots, ginger root, garlic, turmeric, and sauté on medium high for about 5 minutes or until you get some caramelization in the veggies.
  • Add the broth (start with 500ml. After the soup is blended you can add more if you want it thinner). Put the lid on and cook on medium low until all the veggies are cooked through. About 20 minutes.
  • Lower the heat to a minimum and using an immersion blender blend the soup until smooth. Finish by adding salt to taste.
  • Serve with a splash of olive oil or cream, and croutons.

Notes

If you use store-bought vegetable broth, make sure to buy low-sodium, and don't add your salt until the end of the cooking time.
Keyword carrots, soups
Carrot soup

Have you make this Carrot, Turmeric & Ginger Soup or any other recipe from the blog? Use the tag #kasheribbean to share on social media and, don’t forget to follow on instagram and pinterest to keep up with our easy recipes from us and the blogosphere!


Carrot, Turmeric & Ginger Soup Read More »
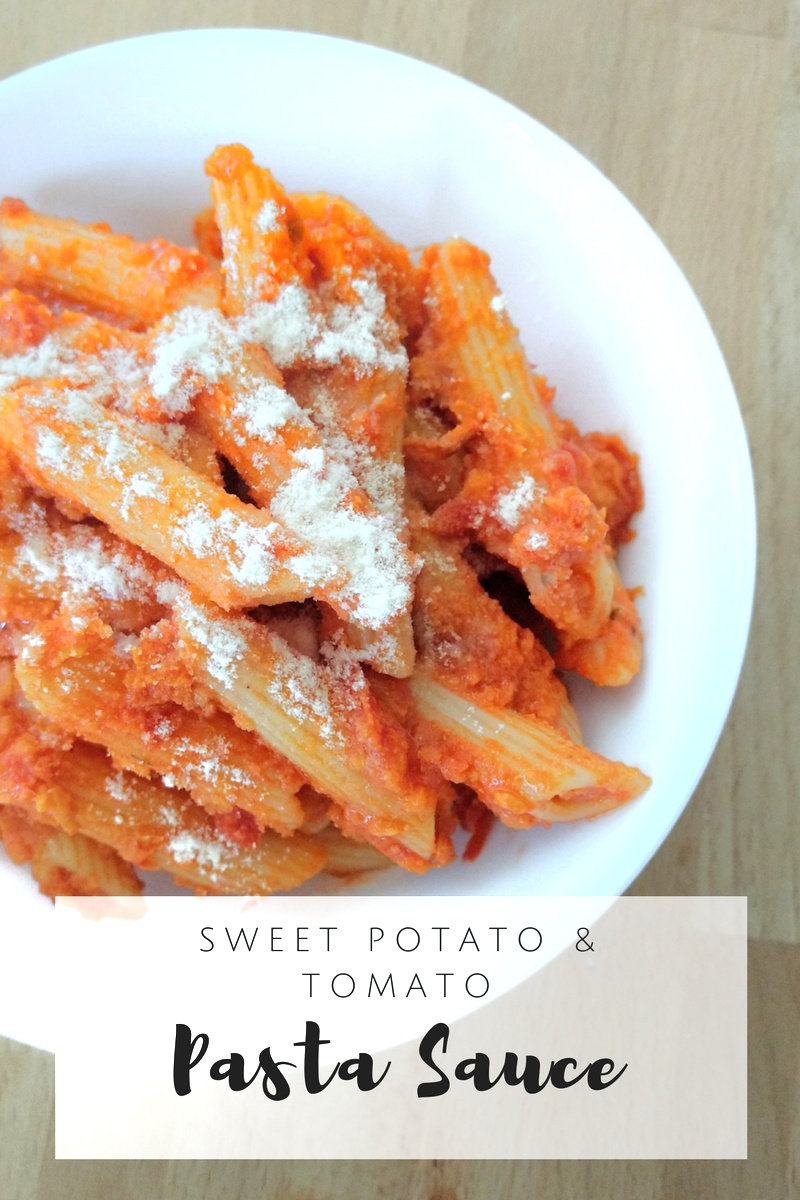
Sweet Potato & Tomato Pasta Sauce

Sweet Potato & Tomato Pasta Sauce

This creamy, slightly sweet pasta sauce combines roasted or sautéed sweet potatoes with classic tomato sauce for a comforting, nutrient-packed twist. Vegan, simple, and full of flavor—perfect with pasta, zucchini noodles, or as a base for other dishes.

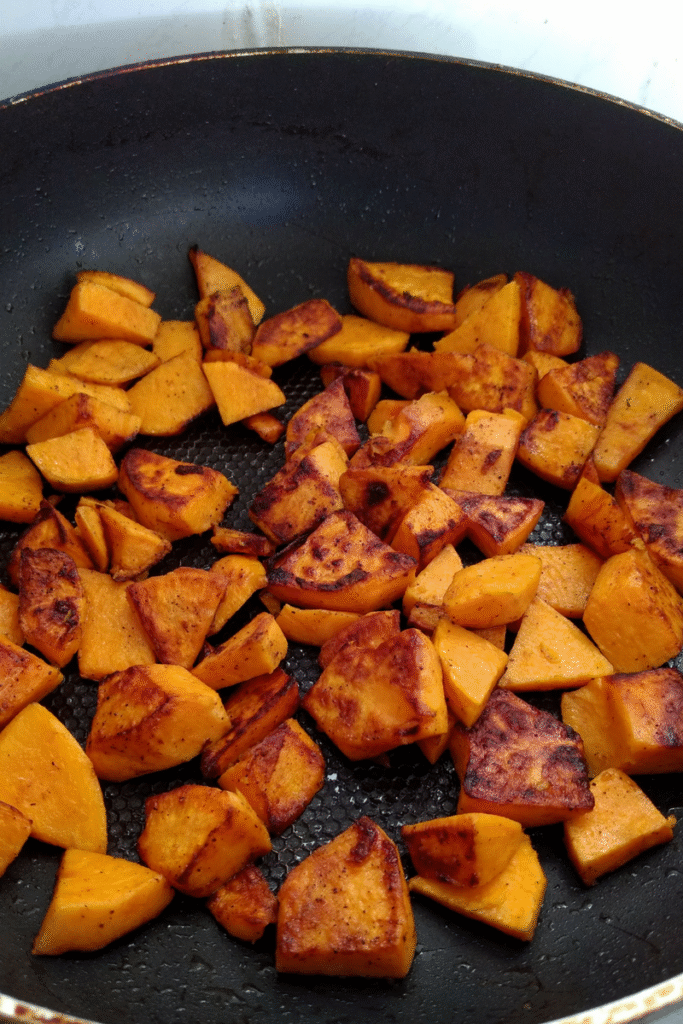
sweet potato cooking on a frying pan
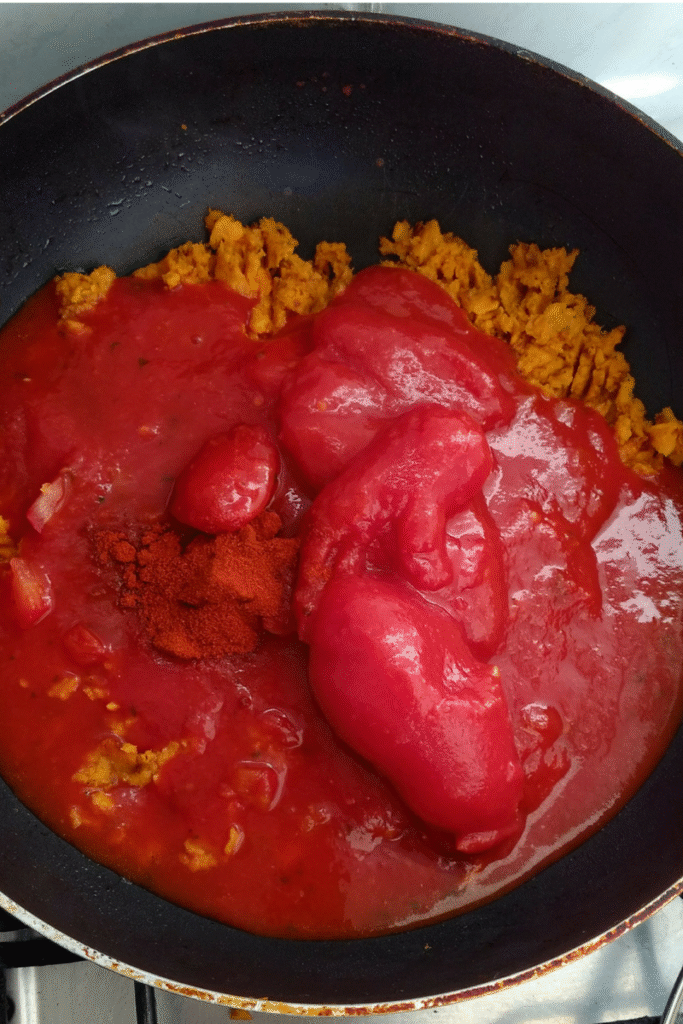
sweet potato on a frying pan with canned tomatoes and seasonings tomato sauce2

Sweet Potato & Tomato Pasta Sauce

Creamy, slightly sweet pasta sauce that blends sweet potato with tomato for a comforting, budget-friendly, vegan dinner. Great with any pasta or veggie noodles.
Prep Time 5 minutes
Cook Time 45 minutes
Total Time 49 minutes
Course Main Course, sauce
Cuisine International
Servings 6 servings

Equipment

  • 1 Large skillet or saucepan
  • Potato masher, fork or blender for smooth texture
  • Silicone spatula
  • Measuring cups & spoons
  • Cutting board & knife

Ingredients
  

  • 45 ml Olive Oil 3 Tbsp
  • 100 g onion, finely chopped
  • 300 g sweet potato, peeled and chopped (or leftover roasted)
  • 800 ml Canned tomatoes 2 standard cans
  • 1 Tbsp tomato paste
  • 3 dried bay leaves
  • a pinch of sugar
  • salt and pepper to taste

Instructions
 

  • Heat 1 tbsp olive oil in a skillet over medium heat. Add sweet potato, a pinch of salt, and cook until tender and lightly browned (15–20 minutes). Remove and mash (or leave chunky).
  • In the same pan, add remaining olive oil and onion. Cook until translucent and fragrant (about 5 minutes).
  • Return the sweet potato to the pan. Stir in the tomatoes and tomato paste, bay leaves, sugar (if using), salt, and pepper.
  • Simmer on medium-low for 15-20 minutes, stirring occasionally.
  • Taste and adjust seasoning. Remove whole bay leaves before serving.
  • Serve warm with pasta or zucchini noodles.

Notes

  • For a smoother sauce, blend sweet potato with part of the tomato sauce before simmering.
  • Refrigerate up to 4 days or freeze up to 2 months.
  • Delicious with penne, spaghetti, or veggie noodles.
Keyword dairy-free, dinner, easy, pasta, pasta sauce, sweet potato, vegan

This Sweet Potato & Tomato Pasta Sauce is proof that simple ingredients can create something amazing. It’s creamy, filling, and perfect for any pasta night. If you give it a try, don’t forget to tag me on Instagram or Pinterest—I’d love to see your version!

Did you try this recipe?
Share your photos with us on social media by using the hashtag #kasheribbean. We want to feature you!  And don’t forget to follow along on instagram and pinterest for more tips, recipes and inspiration.

WhatsApp
Facebook
Pinterest
Telegram
Email
Print

Sweet Potato & Tomato Pasta Sauce Read More »
emergency biscuits

Emergency Biscuits (Super Easy, No Milk, No butter)

Emergency Biscuits (Super Easy, No Milk, No butter)

emergency biscuits

Sometimes the simplest recipes come from unexpected moments. These emergency biscuits were born on a day when I couldn’t find bread at the store, and I didn’t have milk or butter at home. With just flour, water, oil, and a pinch of salt, I whipped up these quick biscuits—and to my surprise, they turned out soft, fluffy inside, and slightly crisp on the outside. Now they’ve become a family favorite, ready in just 12 minutes whenever we need fresh bread in a hurry.

emergency biscuits

Emergency Biscuits (No Milk, No Butter)

These quick biscuits, born out of necessity, turned out so good, they’ve become a go-to recipe. Soft inside, slightly crisp outside, and ready in just 10 minutes. Perfect for when you need bread in a hurry!
Prep Time 2 minutes
Cook Time 10 minutes
Total Time 12 minutes
Course bread, Breakfast, Side Dish
Cuisine International
Servings 8 Biscuits

Equipment

  • 1 Mixing bowl
  • 1 Fork or whisk
  • Measuring cups & spoons
  • Bench scraper or knife for cutting
  • Baking sheet

Ingredients
  

  • 250 g self-rising flour see notes below
  • 110 ml water
  • 70 ml vegetable or Olive oil
  • a pinch of salt

Instructions
 

  • Preheat oven to 220ºC (450ºF).
  • In a mixing bowl, combine self-rising flour and a pinch of salt.
  • Add water and vegetable oil. Mix with a fork until the dough comes together (do not overmix).
  • Transfer dough to a lightly floured surface, gently flatten with your hands, and cut into rounds or squares
  • Place biscuits on a baking sheet.
  • Bake for 10 minutes, until lightly golden.
  • Remove from oven, let cool slightly, and enjoy warm.

Notes

  • If you don’t have self-rising flour: for every 125 g (1 cup) flour, add 1 ½ tsp baking powder + ¼ tsp salt.
  • Best eaten fresh, but can be stored in an airtight container for up to 2 days.
  • Add herbs, garlic powder, or nutritional yeast for extra flavor.
Keyword biscuits, bread, dairy-free, easy bread

Who knew that a kitchen “emergency” could turn into such a reliable go-to recipe? These biscuits are perfect for busy mornings, last-minute dinners, or anytime you need something quick and satisfying on the table. I hope you give them a try and love them as much as we do. If you make them, don’t forget to share your creations with #kasheribbean on Instagram—I’d love to see your take on these simple, no-fuss biscuits!

Did you try this recipe?
Share your photos with us on social media by using the hashtag #kasheribbean. We want to feature you!  And don’t forget to follow along on instagram and pinterest for more tips, recipes and inspiration.

WhatsApp
Facebook
Pinterest
Telegram
Email
Print

Emergency Biscuits (Super Easy, No Milk, No butter) Read More »