Shabbath

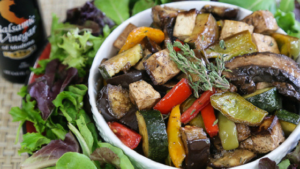
Grilled Eggplant & Avocado Salad {Vegan, GF}

Today is the day for a scrumptious Grilled Eggplant Avocado Salad; so flavorful and fresh; perfect for summer days.

Creamy, fresh and delicious, this easy Grilled Eggplant Avocado Salad is the perfect companion during any hot-humid summer day. Click here to grab this easy recipe.

When I was a kid, I pretty much hated eggplants. and it wasn’t until I was like 15, when I discovered middle eastern cuisine, that I started to eating different eggplant recipes with certain enthusiasm.

Quickly I wanted to start to experiment by myself. I had big expectations but I was quickly disappointed, specially because I used to compare my poor skill to those of my mom, who is an eggplant master. This is one of the reasons why, when someone asked me if I like eggplants, I would literally say: “I don’t like eggplants except for the recipes my mom prepares”.

I was so intimidated by those weird creatures. To my eyes they were flavorless and gross, until that magical day I tried babaganoush for the first time. I was hooked by the smoky flavor. From that day on, I started to love smoky and grilled eggplants. (yes, I don’t love other methods 😛 For example, I don’t know if I would be able to swallow sweet eggplants in syrup (a middle eastern sweet delicacy), but I am willing to try at least once.

Ingredients for Grilled Eggplant Avocado Salad

Creamy, fresh and delicious, this easy Grilled Eggplant Avocado Salad is the perfect companion during any hot-humid summer day. Click here to grab this easy recipe.

When I made this salad for the first time a couple of weeks ago; it was so hot!  That particular day was so incredibly hot and humid that I couldn’t think about eating what I normally eat. Things like rice and beans, plantains, yuca, or even a piece of bread, seemed so heavy; so I decided to make either salad or eat plain watermelon the whole day.

This Grilled Eggplant Avocado Salad (or salsa) ended up being the perfect companion for some Spicy Roasted Potatoes. So, light and fresh. Or if you prefer, you can eat as salsa over some toasted bread slices.

This Grilled Eggplant Avocado salad can be done in a few minutes and with minimum and cheap ingredients, which is a real plus. The ingredients are so humble, but don’t let this fool you, because this salad is full of flavor.

Creamy, fresh and delicious, this easy Grilled Eggplant Avocado Salad is the perfect companion during any hot-humid summer day. Click here to grab this easy recipe.

I looked into my fridge and tried to think in a fresh combo. Quickly I chose the ingredients in my head: tomatoes, cucumber, lettuce, onions, lemon, lots of parsley… but, I didn’t want a plain old green salad…

What could I add to make it more interesting?… Since grilled food is the theme of the summer, and I had two lonely eggplants on the fridge starring at me, I decided to add grilled eggplants to the mix, to get into the summer theme.

Creamy, fresh and delicious, this easy Grilled Eggplant Avocado Salad is the perfect companion during any hot-humid summer day. Click here to grab this easy recipe.

The avocado came in last, as I was considering to add some creaminess. An avocado dressing would be an interesting dressing for this salad (super easy, I will share in another post!), but I was lazy. This hot-humid weather has me like “I just want to be under cold water 24/7!!, lol. If you are like me you can just add chopped avocados.

Creamy, fresh and delicious, this easy Grilled Eggplant Avocado Salad is the perfect companion during any hot-humid summer day. Click here to grab this easy recipe.

How to make Grilled Eggplant Avocado Salad

As you can see, this Grilled Eggplant Avocado Salad comes together in a blink. I know, you think it doesn’t because you have to cook the eggplants, but they actually cook pretty fast.

I like to remove just a little bit of the skin from the eggplants so they hold their shape and don’t become a puree.

While the eggplants are grilling, chop the rest of the ingredients. Chop and let cool down a bit befofre adding to the rest of the ingredients as you don’t want the other fresh veggies become mushy.

You can add some finishing touches to this Grilled Eggplant Avocado Salad, like extra virgin olive oil and other spices or herbs if you prefer. Check out the recipe below.

Grilled Eggplant Avocado Salad

Love this recipe? Let us know across social media with your delicious pictures and by sharing with your friends and family!! Follow on instagram and pinterest where we share our favorite quick and easy recipes from the blogosphere! We appreciate your support!

Grilled Eggplant & Avocado Salad {Vegan, GF} Read More »

Spicy Roasted Potatoes {Vegan, GF}

Hello there! Today, I am sharing with you the most amazing Spicy Roasted Potatoes. Super easy to make and super flavorful. Spicy Roasted Potatoes are the best side dish for any occasion and team up really well with any dip or even salad.

Let me start by saying, I LOVE Roasted Potatoes! They are so versatile and can be paired with pretty much anything you please, and even though, potatoes have to deal with some criticism for being “high” in carbs, in the end they are not so different than sweet potatoes!

Let me continue by saying that even though I am not a person who loves (or even can eat) spicy food, this spice blend bring the whole potato game to a whole new level!

Check out other side dishes from the blog: Stuffed Onions with Kale & Onions,  Moroccan Carrot Salad & Ripe Plantains and Eggplant Casserole.

I went to a Morrocan shop

The other day, I went to a Morocco shop and while looking for za’atar, I found a shawarma blend.

This blend has chili powder, onion powder, garlic powder, all spice, oregano, cinnamon, nutmeg and cloves. My first thought was using it for some chicken but a few days later, it happened…

We already pointed out, I am a fan of potatoes specially those with Za’atar (a middle eastern blend made of sumac, thyme, oregano, lemon zest and roasted sesame seeds). I usually just sprinkle the za’atar over the potatoes, drizzle with a little olive oil and salt; and to the oven they go.

But, this time, when I was about to enter the potatoes in the oven, it hit me: why not to add shawarma blend to the potatoes? So, I did. It was so incredibly good, the next day I tried again to take notes and take some pics 😛 Between those two days I certainly had a potato overdose 🙂 but it was oh-so-worthy!

The Spice Blend

To make these spicy roasted potatoes I used two blends: za’atar and shawarma mix, but don’t panic; you can always make those blends at home with the right ingredients.

As I mentioned before, za’atar is a delicious mix of sumac, thyme, oregano, lemon zest and toasted sesame seeds (at least the one I got from Israel). I haven’t personally made this myself as I haven’t had the opportunity to find sumac but, you can easily find za’atar seasoning already prepared in middle eastern shops or in the ethnic section of some supermarkets.

The shawarma mix, is easier to make as the ingredients are more common. I found this recipe for shawarma mix with similar ingredients of the blend I bought, although it doesn’t contain garlic or onion powders, but you get the idea.

I also added some paprika for color sake, some dill weed I dried myself, just because 😉 and, of course, some salt.

What potatoes to use?

To be honest, I don’t know much about potatoes. The most I know is that I want these spicy roasted potatoes to hold their shape well, be crusty on the outside (this is one of the reasons I leave the skin on) and soft (but not mushy) on the inside.

For those reasons mentioned above, I usually go for Yukon potatoes for  roasting or I will just pick up any kind of potato as long as is not russet (because I find those too starchy, and the final texture is too mushy, so not the best for roasting).

Once you’ve got your potatoes, you know how it goes: mix in some spices and herbs, add some olive oil and bake.

I added a great deal of spices, so the potatoes ended up with spice “clusters” all over so to speak, but it was awesome because they were like little bombs of flavor in your mouth. So good.

Do you love recipes like this? Let us know across social media! We are on instagram and pinterest sharing our favorite quick and easy recipes!. Don’t be shy and also share with your friends and family. We really appreciate it!

Until next time!


Spicy Roasted Potatoes {Vegan, GF} Read More »

Garlic Hummus with Black Beans puree {Vegan, GF}

Hello, everyone! Today I want to share with you this yummy hybrid: The super creamy, thick and luscious Garlic Hummus with Black Beans Puree as an interesting addition. Finally, another hummus post! Yay! 😀 Alongside our classic hummus, this combo will go well with any chips, toast, veggies or anything crunchy really, plus, you’ll get an extra protein boost!

This is a child or grandchild of hummus with ful 🙂

I remember, when we were in Israel last year, specifically when we went to Yerushalayim for the first time, we bought hummus with ful. It was super yummy! and, of course I knew I wanted to make this recipe at home so I asked about the details about it to the vendor, but, back at home and I couldn’t find the dried broad beans for the ful, so this draft has been sitting there, in the blog dashboard for over a year.

When I decided I wanted to make hummus with ful, for shabbath, I went to the turkish shop and couldn’t find it either. Probably, being late and with a hungry child were factors! But I wanted to dress up the hummus anyways do I picked up the nearest thing I could think off: black beans and make delicious hummus with black bean puree.  Obviously, I don’t want to pretend I made the “original stuff”, we will end up with more hummus recipes on the blog when I get my hands onto the dried broad beans! 😛

That hummus with black bean puree ended up being a hit and can be a meal all by itself (protein bomb baby!) And the best part? There is no real secret about this hummus with black beans puree. Only thing you need to do really and nail the classic hummus which is not that difficult anyways! So you have a super easy, relatively quick recipe and oh, so delicious!

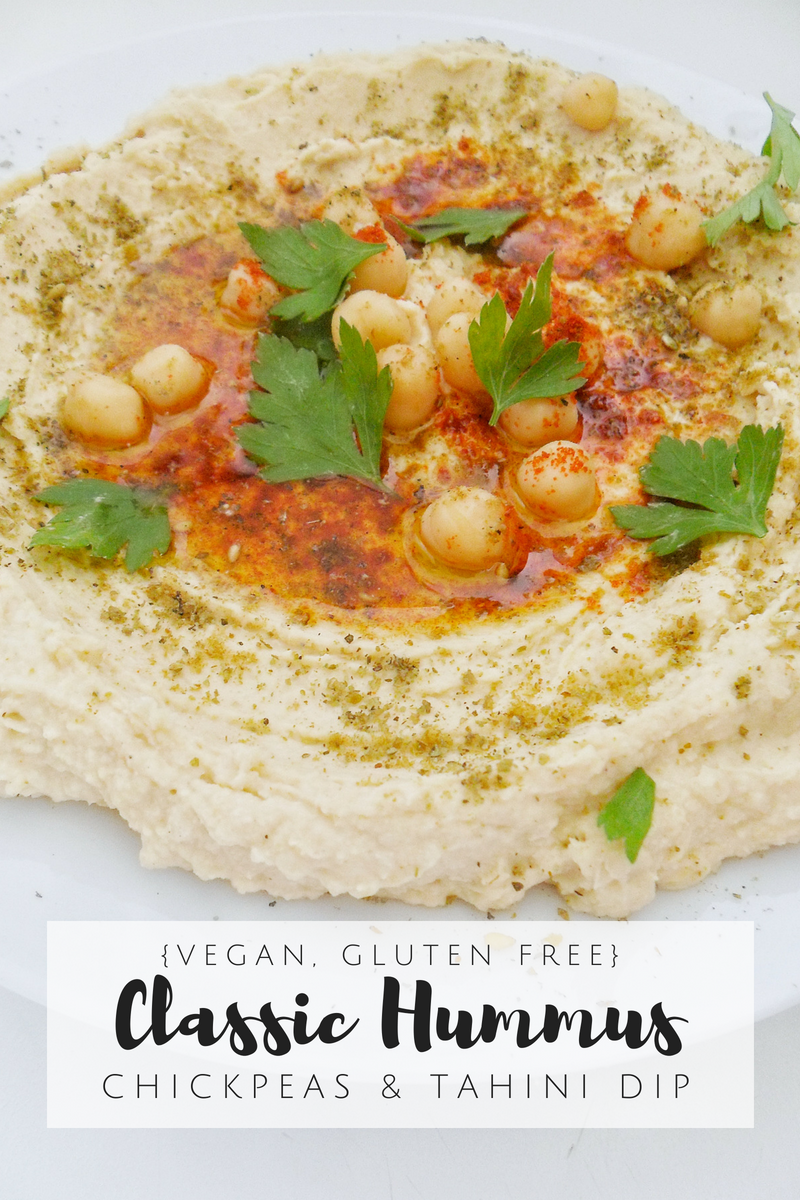
I don’t want to fill this up with the classic hummus recipe so, for more information on how to make it go to this page

Making Hummus with Black Beans Puree

For this obviously, you’ll need black beans. To make the puree I just sauteed some garlic cloves and cumin until fragrant, then adding 200grs of very soft black beans that can be either homemade or canned, and finishing up with some lemon juice and some sea salt before pureeing with an immersion blender.

Easy right?

Do you love hummus?Like the idea of adding black beans to the king? What other toppings you add for your hummus? Let us know in the comments section below!And, don’t be shy and follow on  instagram and pinterest (we don’t bite, yet!)

If you love this recipe and other recipes from the blog, spread the love by sharing with your friends and family! It really means a lot to us!

Happy cooking! ?

Garlic Hummus with Black Beans puree {Vegan, GF} Read More »

Cucumber Salad {Vegan, GF}

Easy and refreshing Cucumber Salad; perfect for these sunny days!

Easier Salad Ever

Growing up when I heard or thought about the word “salad” in my mind I always saw a bowl full of variety of vegetables. Maybe that is the reason way I used to think salads were kind of “complicated”. That was until I met my husband.

We were recently married and for our first Shabbath dinner I made a boring salad of lettuce, tomatoes and cucumber (up to that point that would be “a green salad” for me). Next Shabbath, he made the salads and this was one of them. I couldn’t believe such a yummy salad can be made with just 5 ingredients!

He also made Moroccan Carrot Salad, Creamy Carrot Salad, Tomato Salad, Beets Salad and others. I couldn’t believe my eyes! So easy to make and you can level up a very simple meal, and fill up your shabbath table with a variety of foods without even notice! I love it!

If you love this recipe, you may be interested in Grilled Eggplant & Avocado Salad & Lemony Potato Salad

How to make Cucumber Salad

For this Cucumber Salad you just need 4 ingredients: cucumber, onions, fresh dill, lemon juice, and salt. Optional you can add extra virgin olive oil.

Even though this recipe won’t take more than 5 minutes to mix up, I personally like to mix onions with the lemon juice, olive oil and salt and rest for like an hour in the fridge, before adding the sliced cucumber. That way the onion is less sharp and a bit softer. I add in the cucumbers and dill right before serving so the cucumbers are crunchy and the dill is fresh, green and beautiful.

You can also mix all ingredients and let them rest altogether in the fridge. The cucumbers soften up a bit, and the dill doesn’t look as green but also have a milder flavor, which some people may prefer.

We usually have the “crispier version” for Shabbath dinner, and the second version for shabbath lunch (because we usually have leftover that has rested overnight on the fridge). Either way is still delicious.

When you make this recipe or any other from the blog, use the tag #kasheribbean to share on social media and, don’t forget to follow on instagram and pinterest to keep up with our easy recipes from us and the blogosphere!

Until next time! ?

Cucumber Salad {Vegan, GF} Read More »

Coconut Brioche with Chocolate Chunks {Easy, Dairy-Free}

The day before my last trip, I wanted to make some brioche to take to the airport (When traveling with kids you just have to be creative) but I realized I didn’t have butter or milk as the original recipe call. I thought, why not to substitute those ingredients with coconut milk and coconut oil and make a brioche with coconut flavor? I love coconut so the answer was “Let’s do it!”. Let me show you how how to make Coconut Brioche with Chocolate Chunks.

Want more coconut + chocolate flavor in your life? Check out Vegan Chocolate Ganache Ice Cream & Vegan Chocolate Chunks Cookies

Ingredients & Tools

For this recipe you will need: bread flour, yeast, sugar, salt, coconut milk, coconut oil and some chocolate.
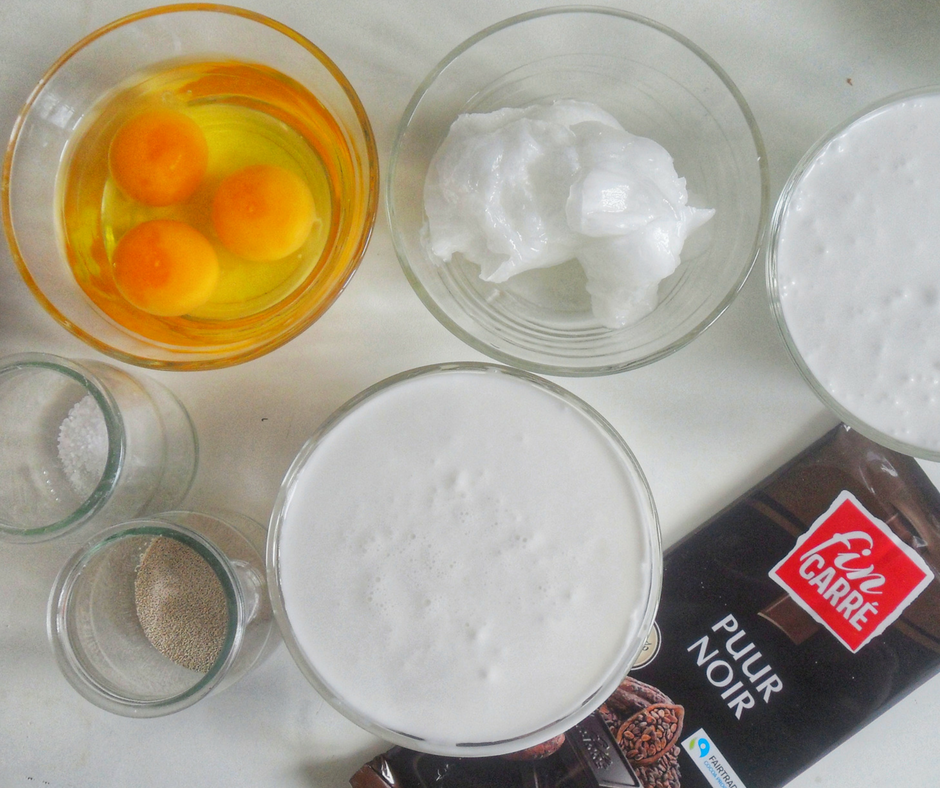
Bread baking is a therapy for me; specially when I knead the dough by hand. But because we are talking about coconut brioche and this dough can be super sticky, you’ll need a stand mixer.

I haven’t made this specific recipe by hand, but as soon as I do I will post an update. Let me know if you do it first!

Bread flour, Yeast & Chocolate

The most important ingredient here is the bread flour. Bread flour is very different from other flours (aka. all purpose, cake flour, etc) because it has a higher protein contain (gluten) which means that once you have mixed the dough, and the fermentation process begins, your dough will be more stable and trap more air, resulting in a better crumb and fluffy bread.

You’ll also need yeast. For this recipe I used instant yeast that is widely available in the supermarket. The difference between “instant” and “dry yeast” is simple: you don’t need to proof instant yeast in warm liquid, you can add it directly to your flour. On the other hand, dry yeast (aka: granulated dry yeast) needs proofing in warm water that helps to activate and dissolve the bigger granules.  Instant yeast is usually also marketed as rapid rise yeast. 

Keep in mind that there is another type of yeast, most commonly used by professional bakers which is called baker’s yeast and this is usually sold in blocks. If by any chance you have baker’s yeast at hand, you can use that, just triple the amount of yeast called in the recipe and, dissolve it in a tiny bit of warm coconut milk, before adding to the dry ingredients.

I personally love dark chocolate (74%) and is what I used for this recipe to balance the little sweetness of the bread, but feel free to use whatever chocolate you like (semi sweet, milk chocolate or even white)

Dry ingredients: Bread flour, sugar, salt & instant yeast.

Liquids: Coconut milk, Eggs & Coconut Oil

For this Coconut Brioche I substitute the milk in the original recipe with coconut milk. Because I wanted a more strong coconut flavor, I also added Unrefined (Extra Virgin) Coconut Oil. I guess you can use the refined version of coconut oil, but in that case I will add some coconut flavoring.

Because fats in the coconut milk tend to solidify when cooled, warm the milk a little in the microwave or stovetop and then cool to room temperature, before adding to your dry ingredients. The same applies to the coconut oil. Weight it and leave at room temperature until has a spreadable consistency. You don’t want the coconut oil to be hard or melted.

Eggs should also be a room temperature.

Liquids in: lukewarm coconut milk and eggs

Mixing & Kneading

Once you start mixing the ingredients you will see the dough foming into a hot mess. Don’t worry. At this point the main goal is to incorporate dry and wet ingredients the best that you can. Make sure to use an spatula to mix in any dry flour that may be at the bottom of the bowl and continue to mix on low speed until there is no big lumps of dry flour.

Add the coconut oil, and knead for 5 to 7 minutes, until you have a silky smooth beautiful dough.

Liquids mixed in, before coconut oil.
Coconut mixed in. Dough ready for bulk fermentation.

Once the coconut oil is mixed in and the dough is kneaded, I added some chocolate chunks but forgot to take the pic. Arrg! Add the chunks and pulse for a few times until the chocolate is incorporated.

Bulk fermentation & Shaping

Transfer this baby dough to a lightly oil bowl, cover in plastic wrap and let it rest for at least one hour, or until is double in size.

Ready to Roll!

The bulk fermentation can also be achieved in the fridge, it will just take a little longer for the dough to double in size; but this comes in handy if you need to go out for an hour or two. I don’t recommend more than that because the dough can suffer and deflate.

Once the bulk fermentation is done, punch the dough and start dividing the dough into your different baking pans.

From this dough I’ve got 1 medium loaf (500 gr) and 22 buns (30 gr)

Once you divide the dough, brush some egg wash and, you can also sprinkle the top with some fine shredded coconut (optional).

Don’t make the same mistake I did of preparing my muffin tin with paper cups because I was out of baking paper. That went so horribly wrong! They stuck to the bottom of the buns and were a complete pain to peel off. Avoid the pain by greasing your pan generously.

Second fermentation & Baking

Your loaf and buns are ready for the final fermentation and then baking.

Cover the pans with a light wet towel and let rest until double in size. As in bulk fermentation, this can vary depending on the weather and your kitchen temperature, but it should be around 1 hour. If so, Once the dough has rested for 40 minutes, turn on the oven to 180°C (350°F) so that it can reach the correct temperature by the time the dough is ready to bake.

The loaf is ready after 30-35 minutes and the buns in 20-25 minutes, or when the top is golden brown and the bread has registered an internal temperature of 85°C-88°C (185°F-190°F).
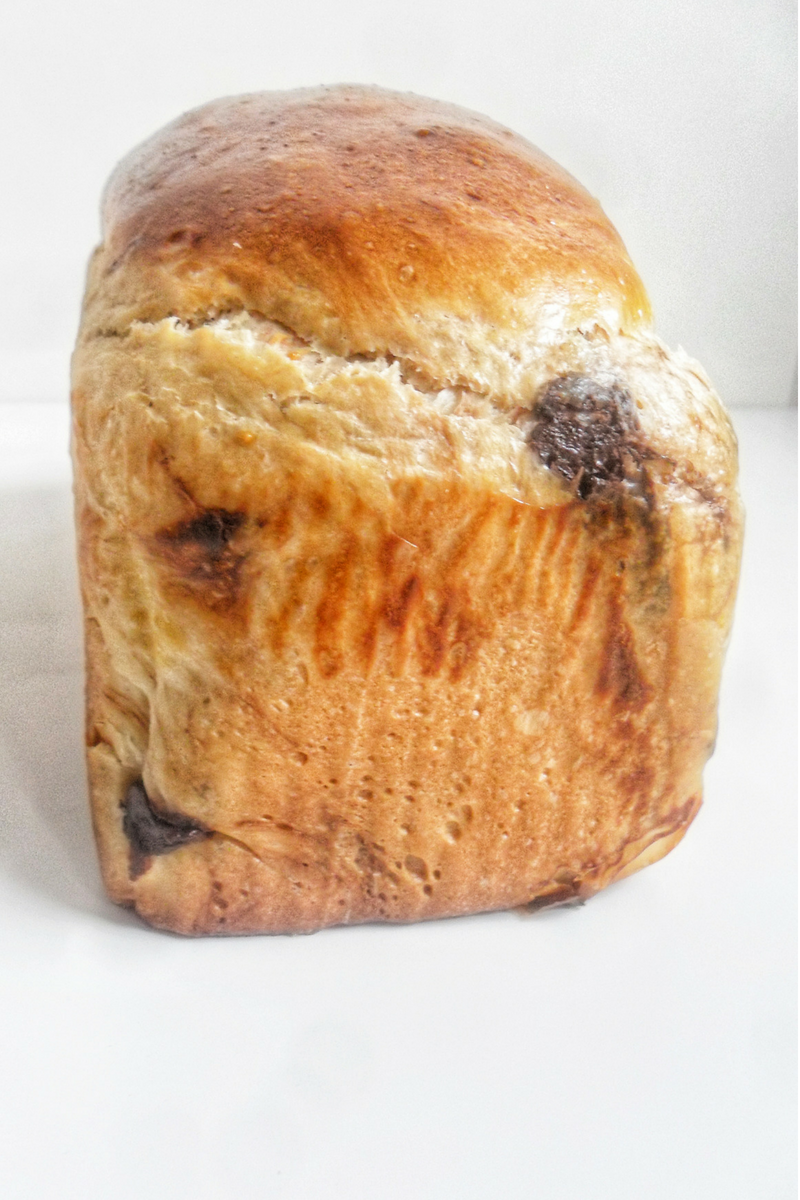
You did it! You are now ready to devour your homemade Coconut Brioche with Chocolate Chunks!

If you have any question regarding this recipe let us know in the comments section below. We love to hear from you!

Finally, don’t be shy and show your Coconut Brioche with Chocolate Chunks on instagram with the hashtag #sisterblissdiary. If you love this recipe don’t forget to follow on instagram and pinterest to keep up with our lastest recipes, and of course, share with your friends and family! It really means a lot to us!

Happy Baking! ?


Coconut Brioche with Chocolate Chunks {Easy, Dairy-Free} Read More »