Recipes

Cauliflower Mash {Low Carb, GF}

Hello dear readers! Today I want to share with you how to make a delicious and mega easy Cauliflower Mash!

I have to confess, I am not a huge fan of puree, but when I heard about this I had to give it a try! I ended up making this yummy puree countless times in the first 3 weeks after, because I couldn’t believe how much it tasted like potato mash (which I love once in a while!).

Want More GF Recipes? Check out The Ultimate Vegan Meatballs, Moroccan Carrot Salad & Roasted Beets

First time making Cauliflower Mash

I would have never believed that you can get such a luscious mash out of the almost tasteless cauliflower and with such little ingredients and effort, because last time I made potato puree, it had not just plenty of butter and half pound of cream cheese, but also required an arm workout.

Obviously, I was very skeptical; but my cooking curiosity won and I am so glad I decided to try the Cauliflower mash for myself.

Cauliflower Mash is very handy on the aftermath of a “carb overload” (like when your mother in law makes for you the most delicious high-carb Caribbean food) 😛

I am not a strict calories or carbs counter, but balance is good plus, we all have some goals to achieve 🙂

Simple ingredients

This cauliflower mash is made out of 4 simple ingredients: cauliflower, roasted garlic, butter and salt. Easily substitute with your preferred buttery spread to make it vegan.

I personally love roasted garlic for this recipe and if you are looking for a mash that taste almost exactly like its potato cousin, I highly recommend you use it, instead of raw garlic.

You can easily roast a garlic head on the stove top by placing it just as is, over low flame, for about 5 minutes, until is a bit charred. Avoid high flame or roasting for too long because the garlic can dry out really quickly and you will end up with charcoal instead of roasted garlic. Wrap the garlic head with aluminum foil to avoid any mess.

How to make Cauliflower Mash

Cut the cauliflower into florets and boil or steam for 10-15 minutes, or until the cauliflower is fork tender. Reserve a few tablespoons of the liquid (you most likely won’t need it, but just in case!) and drain the florets.

At this point, you puree the cauliflower just as is, with the rest of the ingredients. Or, if you want the creamiest of cauliflower mash, take an extra step.

You’ll be surprise how much water comes out of cauliflower! So, for a better and creamier mash, sautee the florets with a tablespoon of butter on medium flame, and then, proceed to puree with a food processor or immersion blender.

Yummy…

Have you ever tried Cauliflower Mash? What do you serve it with? Let us know in the comments section below! And don’t forget to follow on  instagram and pinterest to show off your versions of this yummy low-carb luscious treat with the hashtag #kasheribbean.

If you love this recipe we appreciate you share with your friends and family! It really means a lot to us!

Happy cooking! 😉


Cauliflower Mash {Low Carb, GF} Read More »

Luscious Chocolate Ganache Ice Cream {No Added Sugar, Vegan, GF}

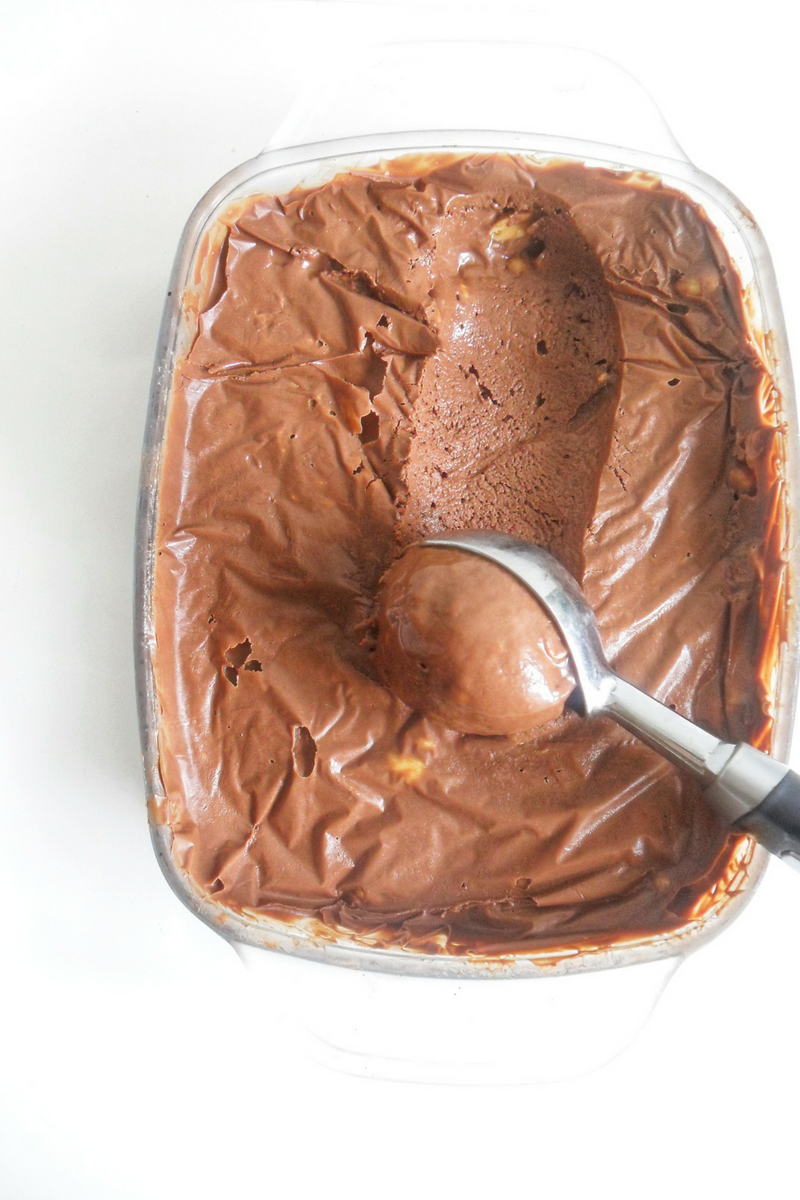
Shabuoth is coming soon and also Mother’s day in Dominican Republic and I will celebrate with this Luscious Chocolate Ganache Ice Cream. Yay!

Looking for more Shabuoth ideas? Check out 3 Full Menu Ideas for your Shabuoth Table & 20 Side Dishes to Bring more deliciousness to your Shabuoth Dinner

Chocolate Ganache Ice Cream?

Chocolate Ganache? Is that right?… Yes! In my quest to make a vegan, creamy, chocolaty ice cream, made without an ice cream maker and with minimum ingredients, this is the best version I could think of. (You tell me in the comments if there is any other that doesn’t involve frozen bananas!)

I have read about all of those methods for making ice cream without and ice cream machine, but I didn’t have the time or energy to make ice cream with such a hassle. If it wasn’t easy peasy I rather peel a banana and eat it, or would eat some grapes! (Now you see my level of laziness was really high!)

I was having a sweet tooth and also my 4yo so I needed this to be quick! And because ganache is one of the most (if not the most!) easy dessert on earth and it also has that thick, pudding like texture, I thought maybe, just maybe, it would turn into ice cream (or close enough).

The coolest thing about this recipe is that, it doesn’t require any special equipment, it is no custard based (so, no grains or eggs), doesn’t require extra bags or lots of ice cubes, or rock salt, or hours going back and forth to the fridge (unless you are actually eating it)…

I wanted to keep things very simple so I used the 2 ingredients, the basics of (vegan) ganache: Chocolate (I used 74% Cacao) and Coconut milk. That’s right! This Luscious Chocolate Ganache Ice Cream (which essentially is frozen ganache! Let’s say it! ) can be made with just 2 Ingredients. Talk about convenience!

A few notes on the ingredients

Go Full fat with the coconut milk and make sure it doesn’t have any weird ingredient, sugar, additives or gums for best results.

I used 74% chocolate so, this is a bittersweet ice cream, but you can use sweetener if you prefer. If you use granulated sugar, mix with the coconut milk and simmer until all the sugar is dissolve. Then, continue as normal.

I haven’t tested this with liquid sweeteners but I think it would work in the same way as a simple syrup added to the ice cream base. This also prevents ice crystals from forming.

If you are making for adults, feel free to add alcohol based vanilla, vodka or rum to prevent ice crystals.

How to make Chocolate Ganache Ice Cream

2 ingredients with a ratio of 1:2, Chocolate to Coconut milk. That’s it!


Mix the ingredients and let it rest until the ganache is shiny, thick and pudding-like.

Transfer to a deep container, cover with plastic wrap (making contact with the ganache) and let the freezer make some magic. Depending on your freezer this can take from 30 to 60 minutes.

Scoop the Chocolate Ganache Ice Cream with the help of a warm ice cream scoop, add your toppings and enjoy!

The Downside

This baby is made with ganache which means it melts in your mouth and everywhere fairly quick, so this is not the type of treat you will eat while chatting with that friend who you haven’t talked with for ages. Serve and you enjoy! 🙂

Tell me, what are your preferred base flavors and toppings? Let us know in the comment section and don’t forget to follow on instagram & pinterest!

If you love this recipe share it with your friends and family and if you ever make this Chocolate Ganache Ice Cream, tag us with #kasheribbean! We love to see your amazing creations!

Until next time!


Luscious Chocolate Ganache Ice Cream {No Added Sugar, Vegan, GF} Read More »
Bulgur Pilaf

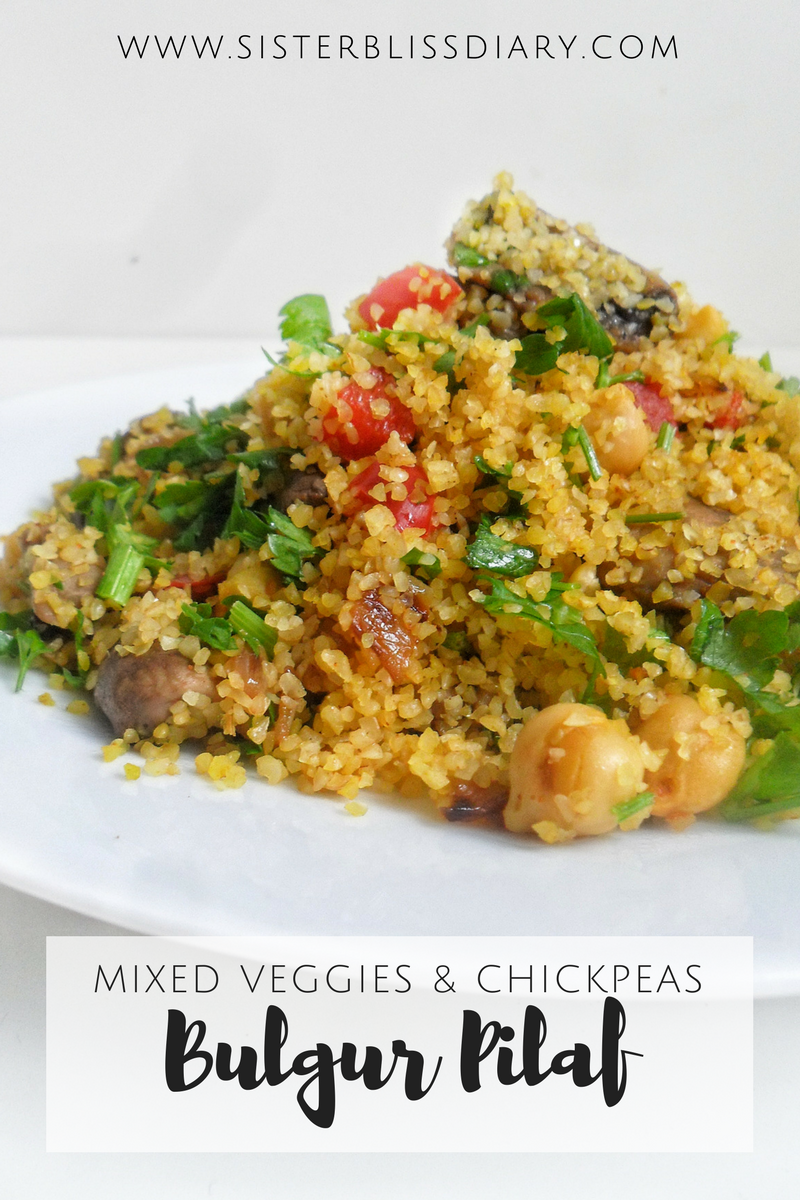
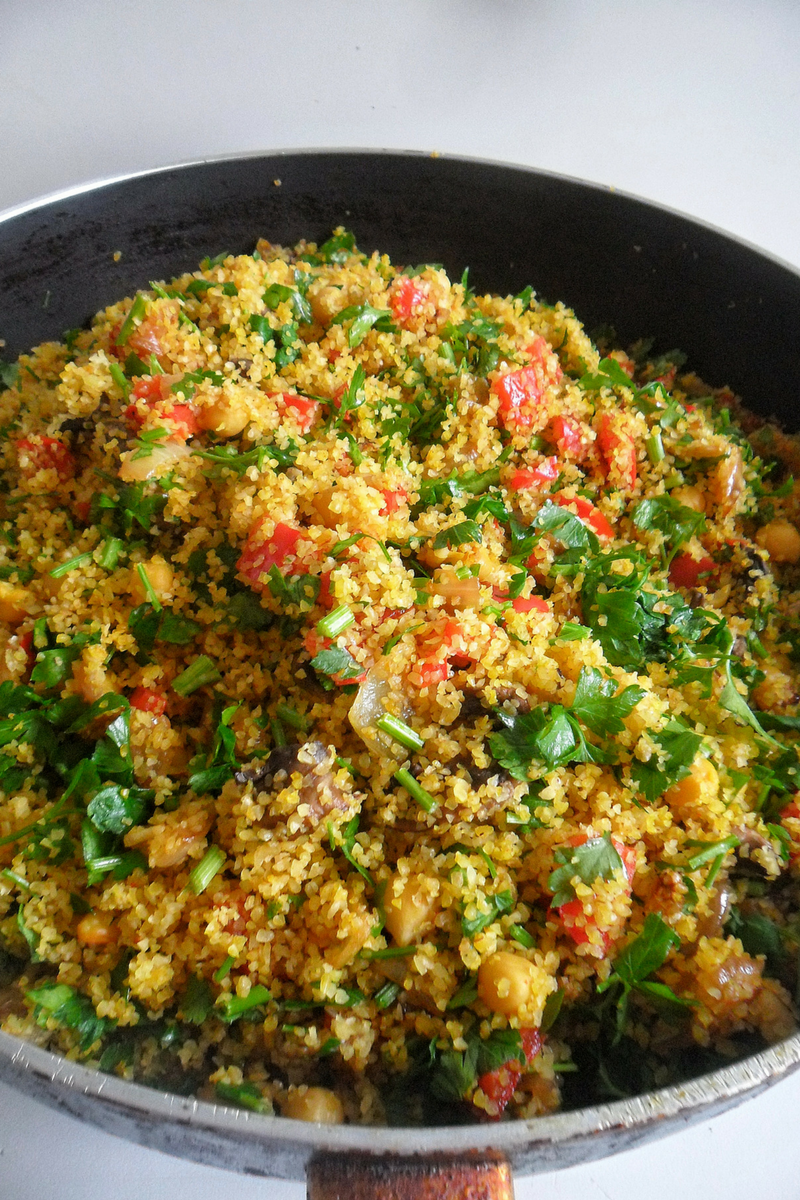
Today we are sharing with you another exciting, colorful, super easy and yummy side: Bulgur Pilaf. Full of veggies and colors, with a combo of spices that is “oh-so-yum!”. Let me show you how it is made…

Despite the simple ingredients this Bulgur Pilaf is very flavorful and colorful dish. Caramelized onions, chickpeas, mushrooms and other veggies play together to give you the perfect balance between color and flavor. Click here to grab the recipe!

The basics

Despite the simple ingredients this Bulgur Pilaf is very flavorful and colorful dish.

The parsley gives it a lemony and sharp tone, while the sweet paprika provides deep flavor.

The almost caramelized onions bring some sweetness to this dish while the chickpeas and mushrooms add texture, some creaminess and the bite. I am salivating!

Despite the simple ingredients this Bulgur Pilaf is very flavorful and colorful dish. Caramelized onions, chickpeas, mushrooms and other veggies play together to give you the perfect balance between color and flavor. Click here to grab the recipe!

How to make bulgur pilaf

To make this Bulgur Pilaf start by sauteing the mushrooms on medium-high with a bit of neutral oil (you can skip the oil entirely if you prefer oil-free, just cook with a tiny bit of water), some salt and pepper until they were completely cooked and brown in color.

Remove mushrooms from the pan and saute onions until golden brown, add bell peppers and continue to cook until onions are darker in color and the bell peppers get some charred spots.

Take veggies out, add the spices to the pan, chickpeas, raw bulgur and boiling water (1:1 ratio bulgur to water or follow the directions on the packaging). Cover with a lid and cook on the lower heat until all the water is absorbed, then go ahead and fluff with a fork.

Despite the simple ingredients this Bulgur Pilaf is very flavorful and colorful dish. Caramelized onions, chickpeas, mushrooms and other veggies play together to give you the perfect balance between color and flavor. Click here to grab the recipe!

Developing flavors

In case you are wondering, there is a reason why I cook some ingredients in the pan and then remove: I want to create layers of flavor without overcooking my veggies. When you finish cooking the bulgur you want the veggies to still hold some texture and bite (Nobody likes mushy veggies!)

When the bulgur is nice and fluffy add in the cooked veggies (peppers, onions, mushrooms) and chopped parsley.

Because I made this Bulgur Pilaf with very fine bulgur, it really cooks in a blink! Literally 3 minutes and you have a beautiful pilaf! So, if it happens that you have some veggies leftovers and some uncooked bulgur you can throw this yummy dish in a matter of a few minutes.

Looking for other sides recipes? Check out Dominican Style Spicy Rice with Sardines & the Barley, Chickpeas and Roasted Beets Salad

Despite the simple ingredients this Bulgur Pilaf is very flavorful and colorful dish. Caramelized onions, chickpeas, mushrooms and other veggies play together to give you the perfect balance between color and flavor. Click here to grab the recipe!

Despite the simple ingredients this Bulgur Pilaf is very flavorful and colorful dish. Caramelized onions, chickpeas, mushrooms and other veggies play together to give you the perfect balance between color and flavor. Click here to grab the recipe!

Despite the simple ingredients this Bulgur Pilaf is very flavorful and colorful dish. Caramelized onions, chickpeas, mushrooms and other veggies play together to give you the perfect balance between color and flavor. Click here to grab the recipe!

What other ingredients would you add to your bulgur pilaf? Let us know in the comments section below! And don’t forget to follow on  instagram and pinterest and show off your pilaf version with the hashtag #kasheribbean.

If you love this recipe we appreciate you share with your friends and family! It really means a lot to us!

Happy cooking! ?


Bulgur Pilaf Read More »

Babaganoush: Roasted Eggplants Dip {Vegan, Gluten Free}

Easy Roasted Eggplant Dip {Vegan, Gluten-Free}

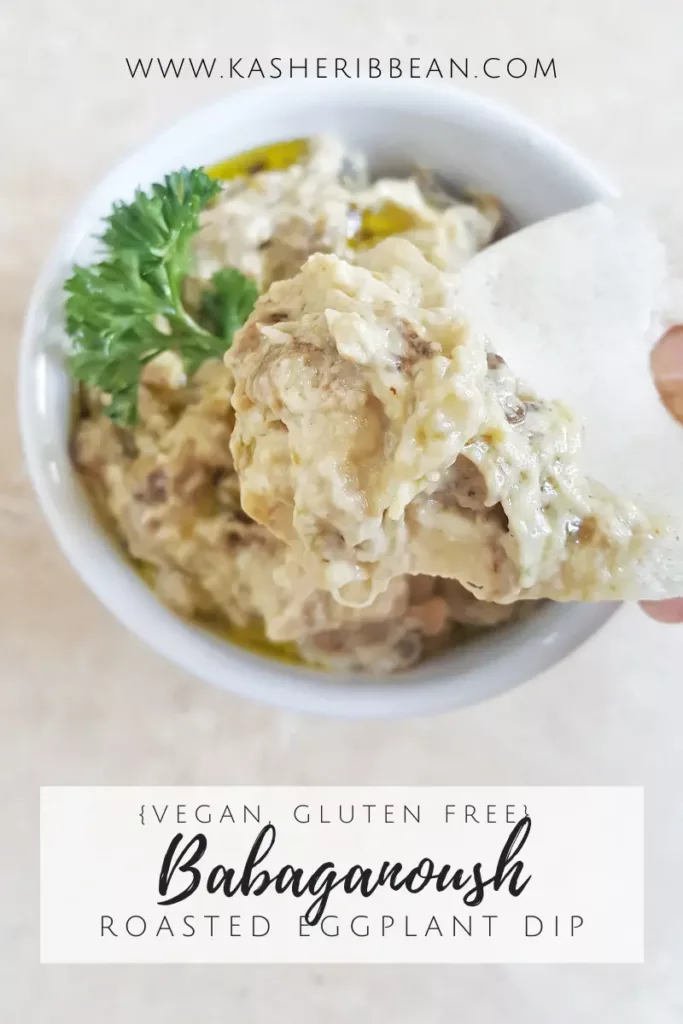
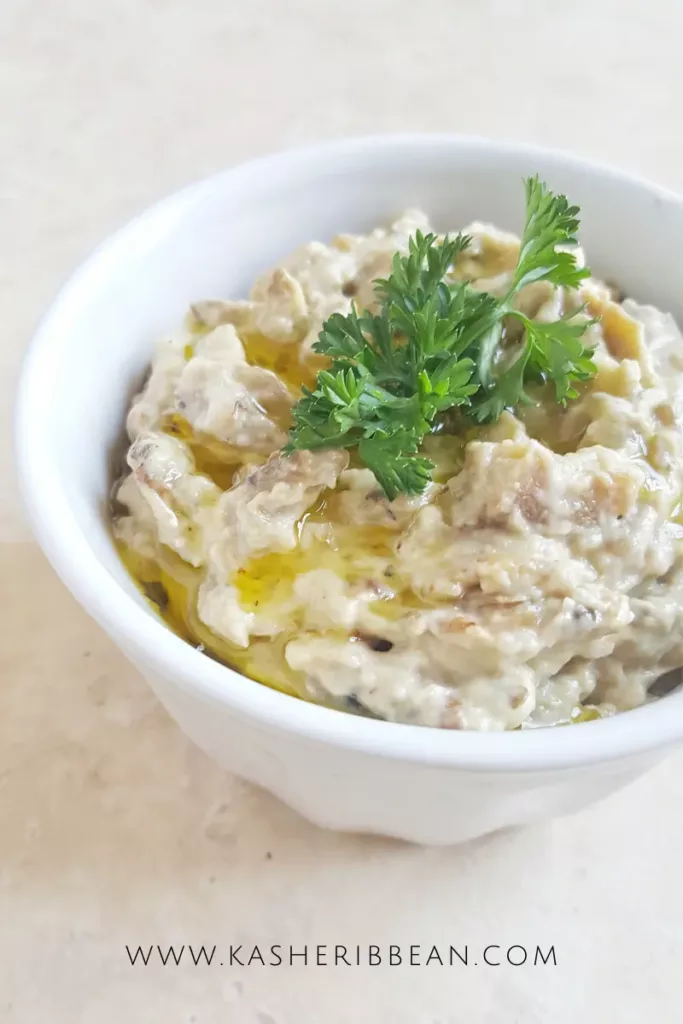
Babaganoush, also known as baba ghanouj or mutabal, is a popular Middle Eastern dip made from roasted eggplants. It’s often eaten alongside with hummus, salads, like tabouleh or roasted beets salad and pita bread; but with a distinct smoky flavor is also a perfect accompaniment to raw vegetables grilled meats or fish.

Babaganoush is traditionally make with greek yogurt. To keep it
setamí (parve) mayo is added instead. In this case I used vegan mayo, but you can go with regular mayo or greek yogurt if not vegan. Babaganoush is also often garnished with herbs, like parsley, pomegranate seeds, nuts and a drizzle of olive oil for extra flavor and visual appeal.

How to choose eggplants

Choosing an eggplant with fewer seeds results in a better texture and flavor for your eggplant dishes, and specially Babaganoush, so here are some tips for selecting the best eggplants:

  1. Look for younger eggplants: a younger eggplant has fewer seeds. You can spot them easily because they tend to be smaller, with smoother, shinier skin and have a green stem. Eggplants should have a uniform color and have no blemishes or wrinkles; if it has it’s probably overripe and have more seeds.

  2. Check the weight: Choose an eggplant that feels heavy for its size. An eggplant that feels light for its size may have more seeds and less flesh.

  3. Look for a rounded bottom: Choose an eggplant that has a rounded bottom, rather than a pointed one, which tend to have more seeds.

  4. Squeeze gently: When you gently squeeze the eggplant it must be firm to the touch, but not too hard. If it feels soft or spongy, it may be overripe.

By following these tips, you can choose an eggplant with fewer seeds, which can result in a better texture and flavor.

How to Roast Eggplants

To make babaganoush, you’ll need to start by roasting three or four medium-sized eggplants, until they are tender and all charred on the outside. It’s important that they are charred all the way through since this is what imparts the characteristic flavor of the babaganoush. 

If what you have is an electric stove, you can roast the eggplants on a grill at the highest temperature possible, or in the oven using the broiler option. 

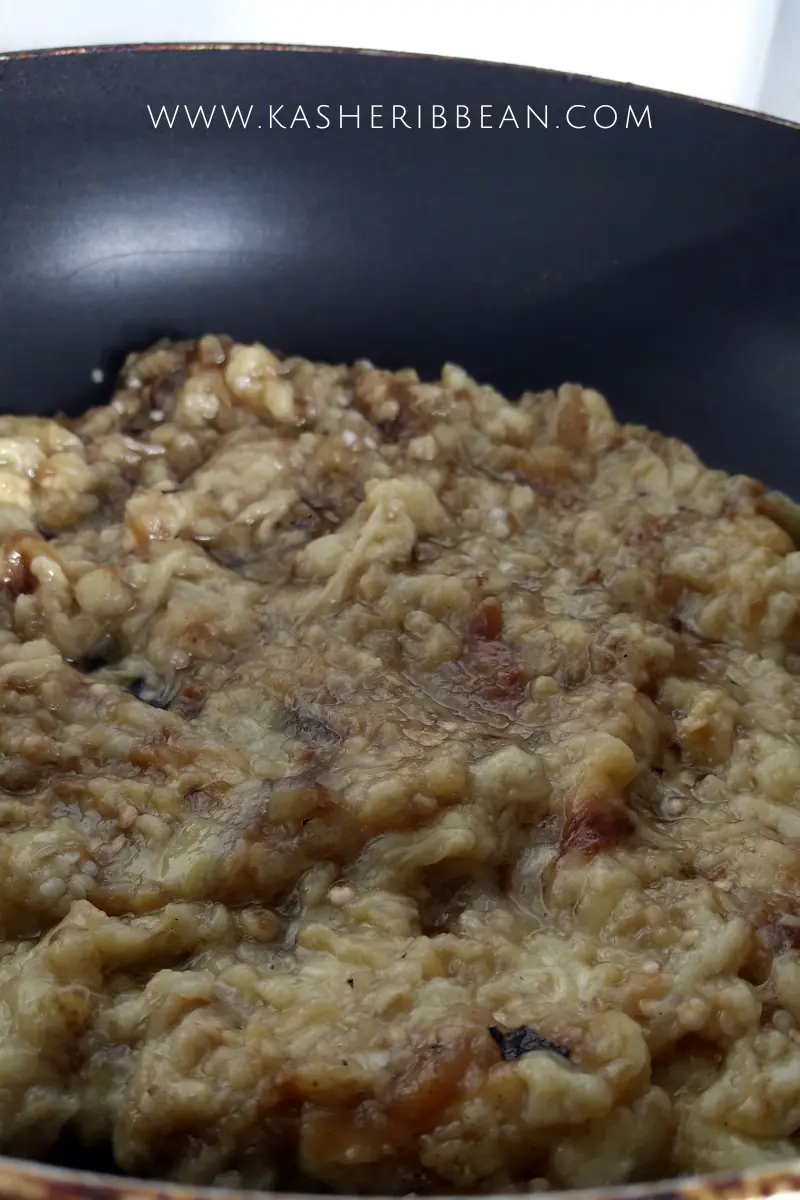
Once the eggplants are roasted, let them cool for a few minutes, then peel off and discard the skin. Then, remove the seeds, chop the eggplant flesh and transfer it to a hot skillet to remove excess moisture. 

How to make my Babaganoush less watery

Eggplants have a high water content, which makes them a great addition to dishes where you need to add moisture and a creamy texture, like pastas and even stews. However, it can water-down the flavor of our babaganoush and give it a soupy consistency after a while. To avoid this, it’s important to dry out as much liquid as possible from the roasted  eggplants before making our dip, so the end result is thick and creamy instead of watery.  

Another way you can remove excess moisture is by draining the roasted eggplants in a colander, and press a couple of times with a spoon for the liquid to drain. 

Babaganoush: Roasted Eggplant Dip {Vegan, Gluten-Free}

Course Appetizer, Salad

Ingredients
  

  • 500 gr Eggplants (about 3-4 medium, roasted)
  • 3 Garlic cloves roasted
  • 2 Tbsp Tahini
  • 2 Tbsp Extra Virgin Olive Oil
  • 2 Tbsp Vegan mayo (can use regular or greek yogurt if not vegan)
  • 1/4 tsp Cumin
  • Juice of half a lemon or lime
  • Salt and Pepper to taste

To Serve:

  • Fresh parsley, finely chopped
  • Pomegranate seeds
  • Pine nuts toasted

Instructions
 

  • Roast the eggplants over the flame top, turning regularly until is completely charred and cooked through. Transfer to a plate to cool down.
  • Peel the skin off, remove the seeds and chop the eggplants
  • Add the eggplants to a skillet and cook on medium high to remove excess moisture.
  • Add roasted eggplants to a bowl and mix in the remaining ingredients. You can always adjust to your taste.
  • Serve with a drizzle of extra virgin olive oil and some fresh parsley. Enjoy!
Keyword dip, eggplant, Gluten-free, salad, vegan

Have you made Babaganoush already? Use the tag #kasheribbean to share your photos on social media and, don’t forget to follow on instagram and pinterest for more easy recipes and and inspiration!

Babaganoush: Roasted Eggplants Dip {Vegan, Gluten Free} Read More »

Vegan Challah

Have you ever wanted to make Challah and then realized you are out of eggs? No need to go last minute shopping anymore thanks to this easy Vegan Challah.

Making bread at home

Bread is made with 4 basic ingredients: Flour, water, yeast and salt; so essentially “bread” has been made vegan for generations.

If you are allergic to eggs or, you just ran out of eggs at 10 pm, right before starting baking; don’t worry, you have come to the right place.

The recipe I use was originally created by Rachel Orenstein Packer. In her recipe she uses a combination of oil, water and baking powder which she mixes separately to create an egg replacement (so the original recipe calls for 2 amounts of water and 2 amounts of oil).

I wanted to make this easier for me so I mixed together my dry ingredients (flour, yeast, sugar and salt) and, in another container, all the liquids plus baking powder, and after making it both ways, I honestly don’t see a difference.

Kneading by hand or not?

I like to knead my dough by hand because this is how I learned and it is so therapeutic!! so this is how I made this Vegan Challah initially, but you can use an stand mixer if you prefer.

When using a stand mixer, adjust the kneading time and speed as it is easier to overheat or overwork the dough using one. To avoid any issues with the quality of your bread, and to avoid burning your stand mixer, knead at low speed.

What you are looking for when kneading, either by hand or stand mixer is to have a stretchy and smooth dough.

Note on the ingredients

I converted the original recipe in grams in order to achieve consistent results, so for this recipe you obviously will need a digital scale. I know it can sound a little tedious at the beginning, but honestly is the best you can do, specially when baking. (For the recipe in cups, visit here)


Make sure you buy bread flour when making a bread recipe, It has a higher protein content (gluten) and will result on a more elastic dough and better final product.

Also make sure the yeast you are using is fresh. For this recipe I use instant yeast for convenience, but if you are using fresh baker’s yeast (the one that comes in blocks), you’ll need to double or triple the amount. (to be safe I will double the yeast and increase the time for fermentation).

When adding the yeast to the dry ingredients make sure you add the salt far away from the yeast so that it doesn’t make direct contact because the salt kill the yeast.

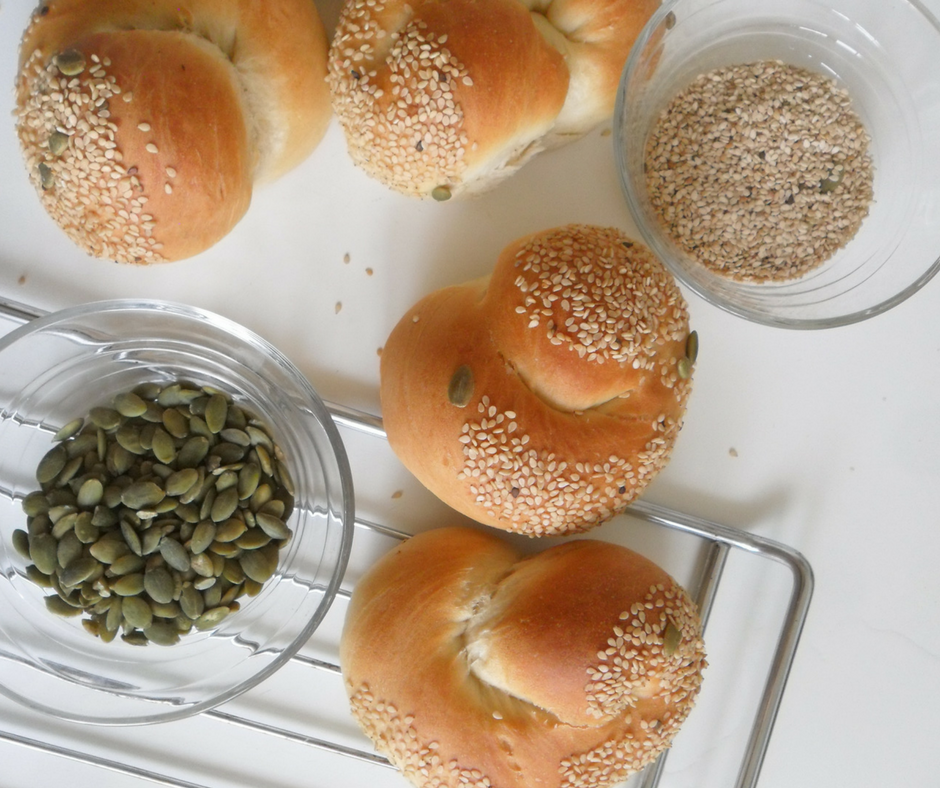
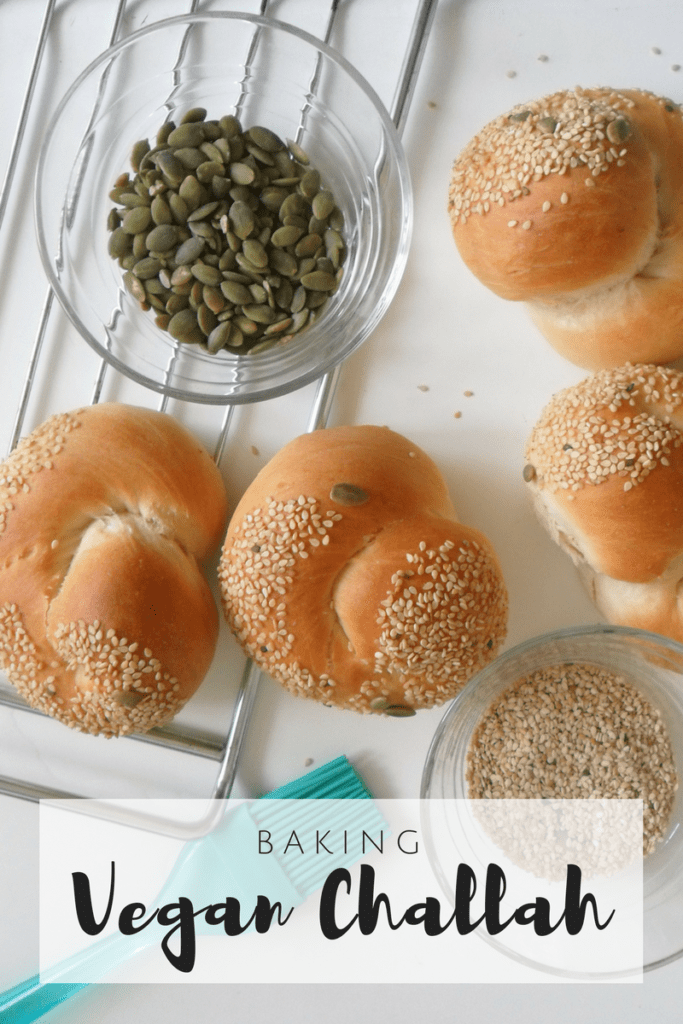
To add the seeds to the top, I just dip the top in a little bit of water and then dip in a bowl with seeds/seed mixture. You can also just brush the top with maple syrup if you like the flavor and want the shine, but this is not necessary.

A dough in the making

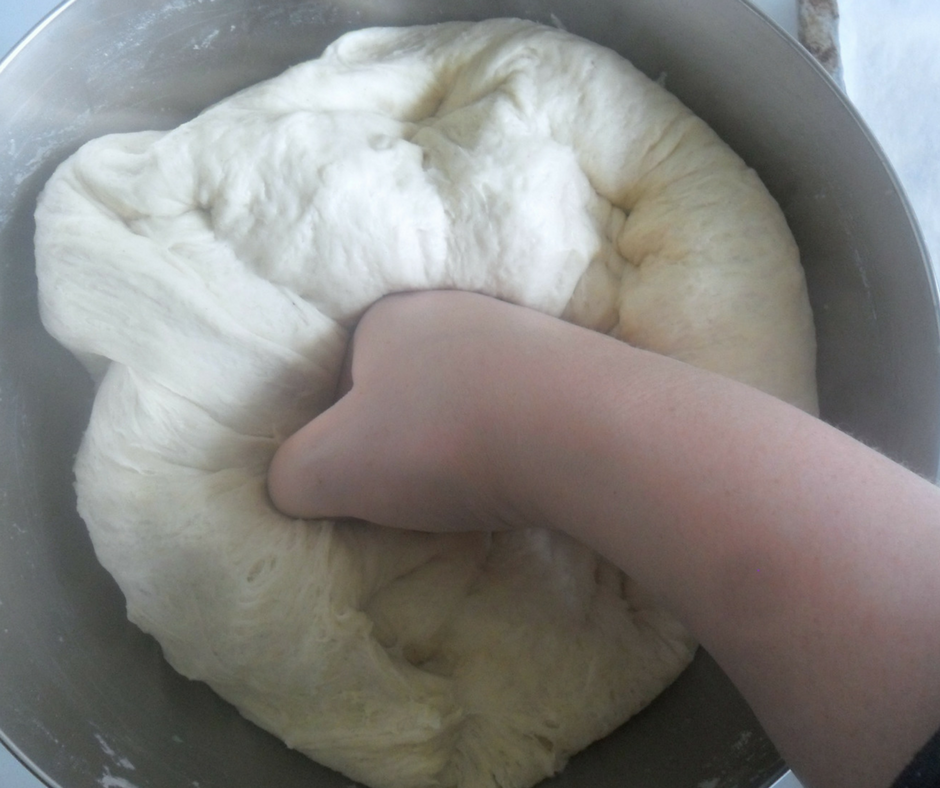
Once you poured wet ingredients into the dry, start mixing with a fork and then, continue to mix with your hands, still in the bowl, until the dough comes together (See picture below)

Once this point have being achieved, transfer the dough to a lightly floured surface. As you can see in the picture below, the dough looks messy and a bit crumbly, so you will knead unto the point where you see the dough is smooth and elastic. This will take about 10 minutes.

When transferring to your work surface, don’t go crazy about the flour or you will dry out the dough. I find 2 Tbsp is enough. Knead the dough for 10 minutes straight and when time is over, place it on a bowl lightly coated with oil and let the dough rest for and hour or until is doubled in size. Time here will depend on the temperature and humidity of your kitchen. If in one hour or so, the dough hasn’t rise enough, the place might be too cold or the yeast might be old.

If the place is too cold, alternatively you can place your dough in a warm oven with warm water inside (just turn on your oven to warm it up a little bit). Turn off the oven before placing your dough inside and let your dough rest until doubled in size.

Once the dough has finished its first rise (also called “bulk fermentation”), punch it down and start portioning and shaping the dough.

Portioning & Shaping

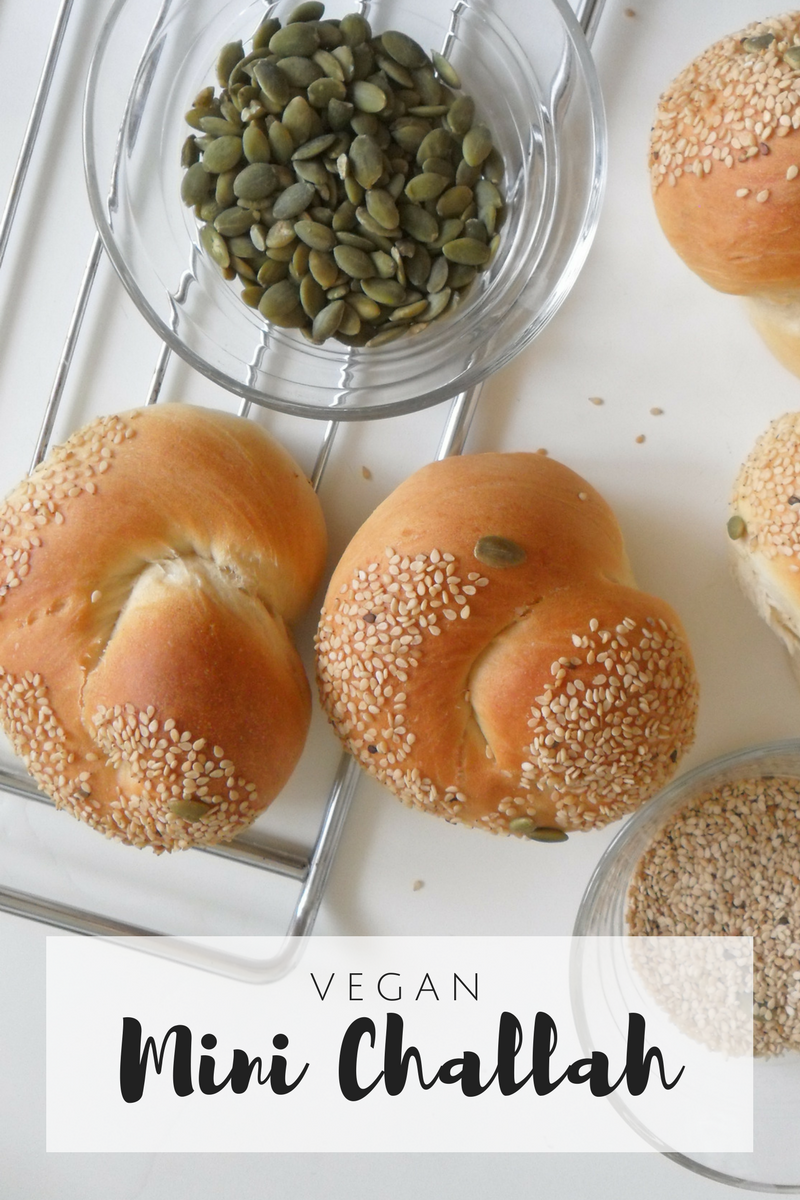
The final dough should be 1900 grams or so. I made 6 spiral round challahs, each weighing 110grs. With the remaining dough I made buns/rolls (usually these weigh between 20-30 grams and you’ll get 18 to 20).

Dip the top of your challah in a bowl of water and inmediately dip in your favorite seed or seeds mixture (for these ones I used pumpkin and sesame seeds). Place your shaped challah or buns in a baking sheet lined with baking paper and let rest for a second time, to achieve the second rise (another hour or so, or until doubled in sized).

15 or 20 minutes before the second fermentation is over, start preheating your oven to 180ºC (350ºF).


Baking

Once your Vegan Challah is ready to be baked, place it in your preheated oven and bake for 30-35 minutes for the spiral round mini challoth or 20-25 the smaller buns. Baking time will vary if your oven lies to you.

Get the bread out of the oven, and transfer immediately to a cooling rack (if you can actually wait for them to cool down, lol, because they are so good straight out of the oven!!)

Ta-Da! You officially made handmade Vegan Challah! 😀 😀 Good job! Tap yourself on the back and enjoy yourself (and your homemade Vegan Challah!) for this accomplishment 🙂

If you have any question regarding this recipe let us know in the comments section below. Also, if you make changes, we want to hear from you! We love experiments!

Also, don’t be shy and show us your challoth and buns on instagram with the hashtag #kasheribbean. If you love this recipe don’t forget to follow on instagram and pinterest and share with your friends and family! It really means a lot to us!

Happy Baking! 😉

Vegan Challah Read More »

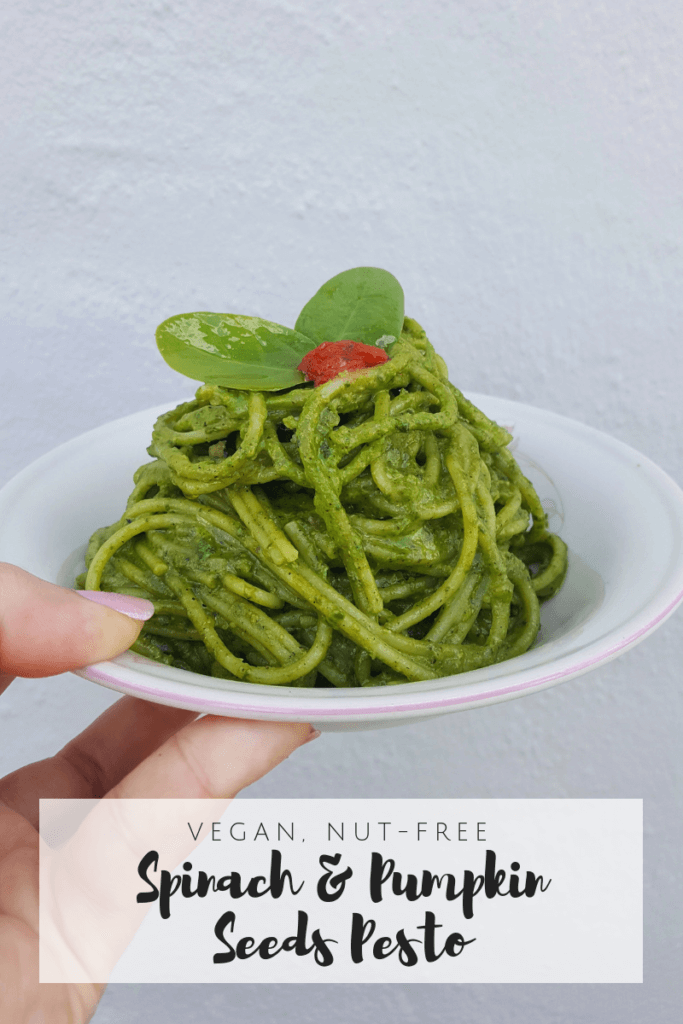
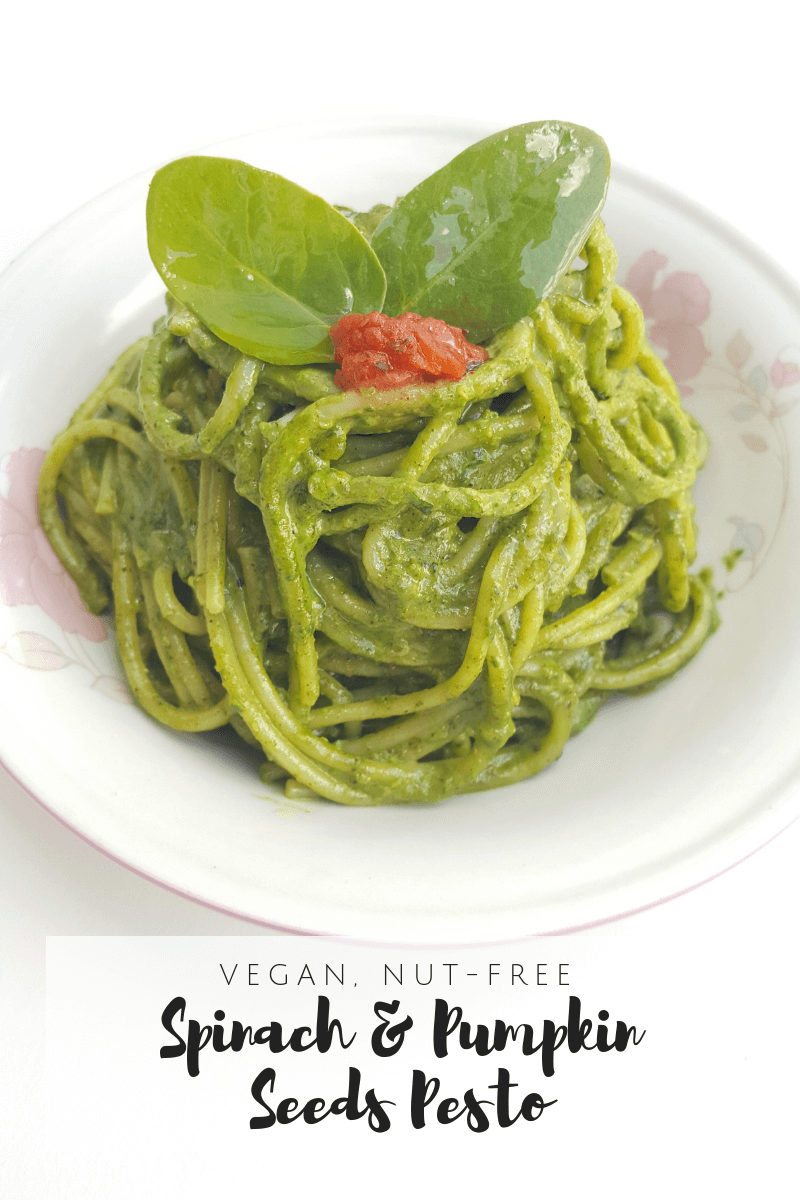
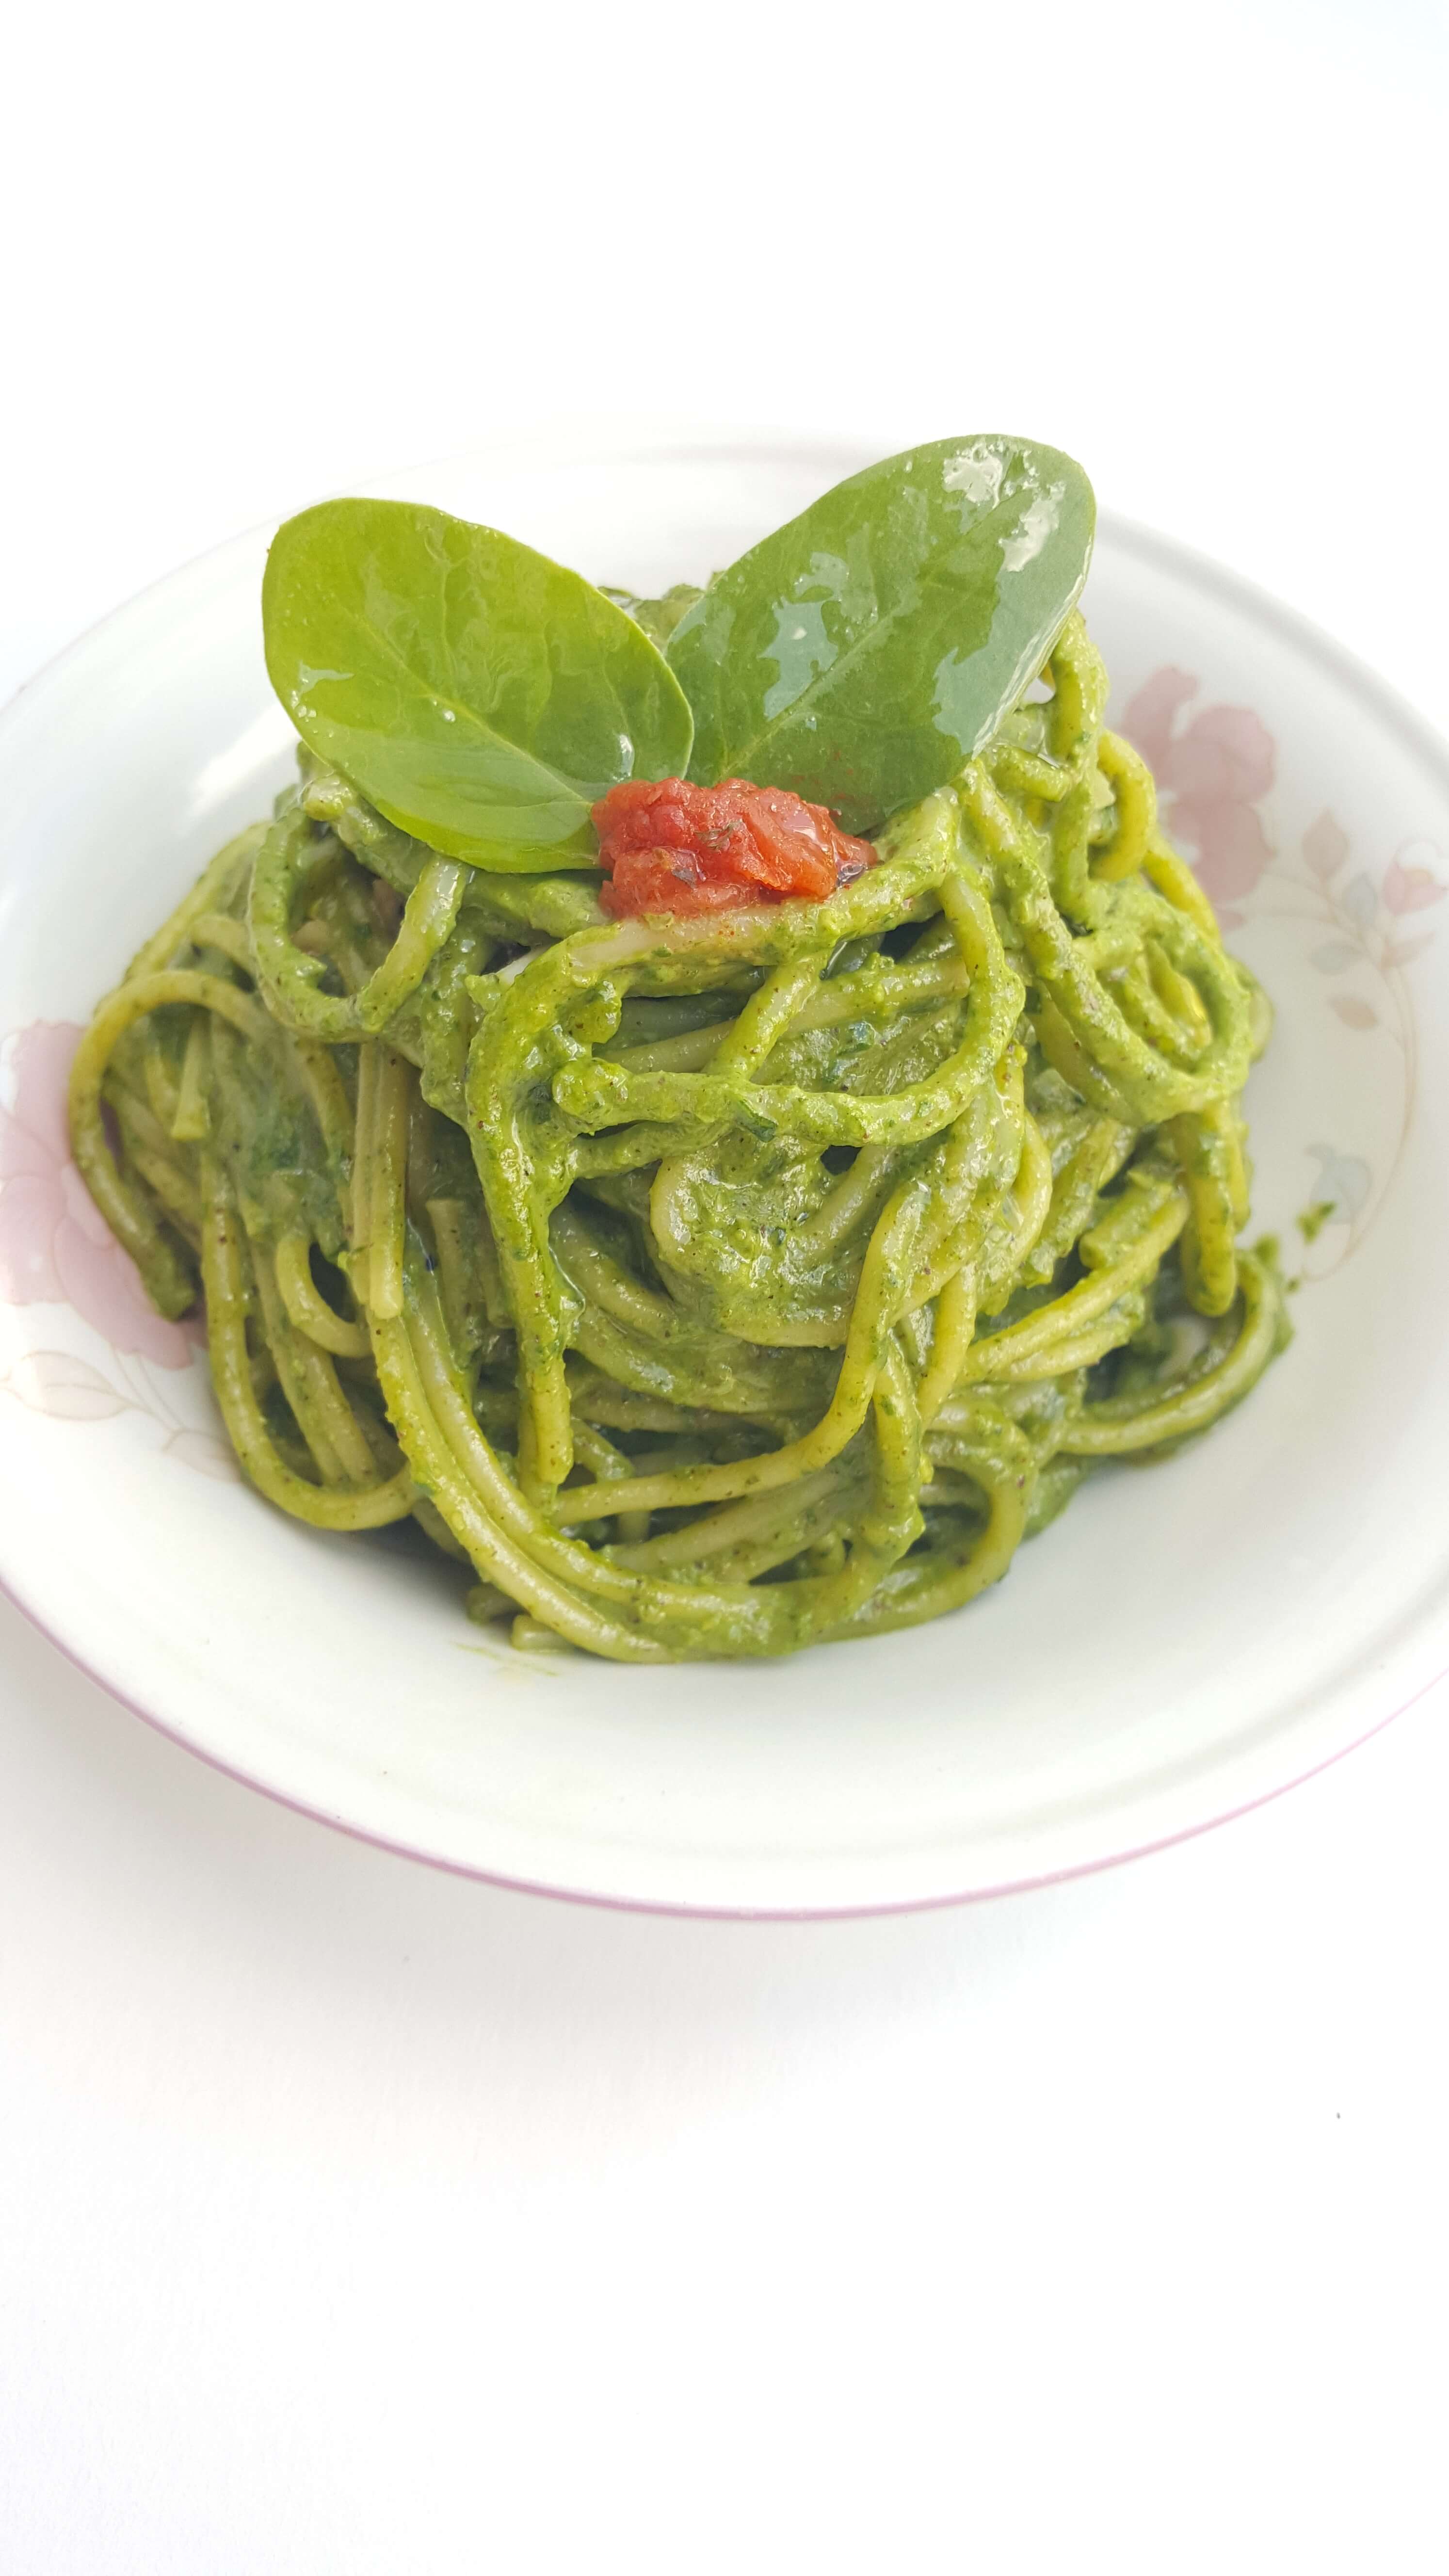
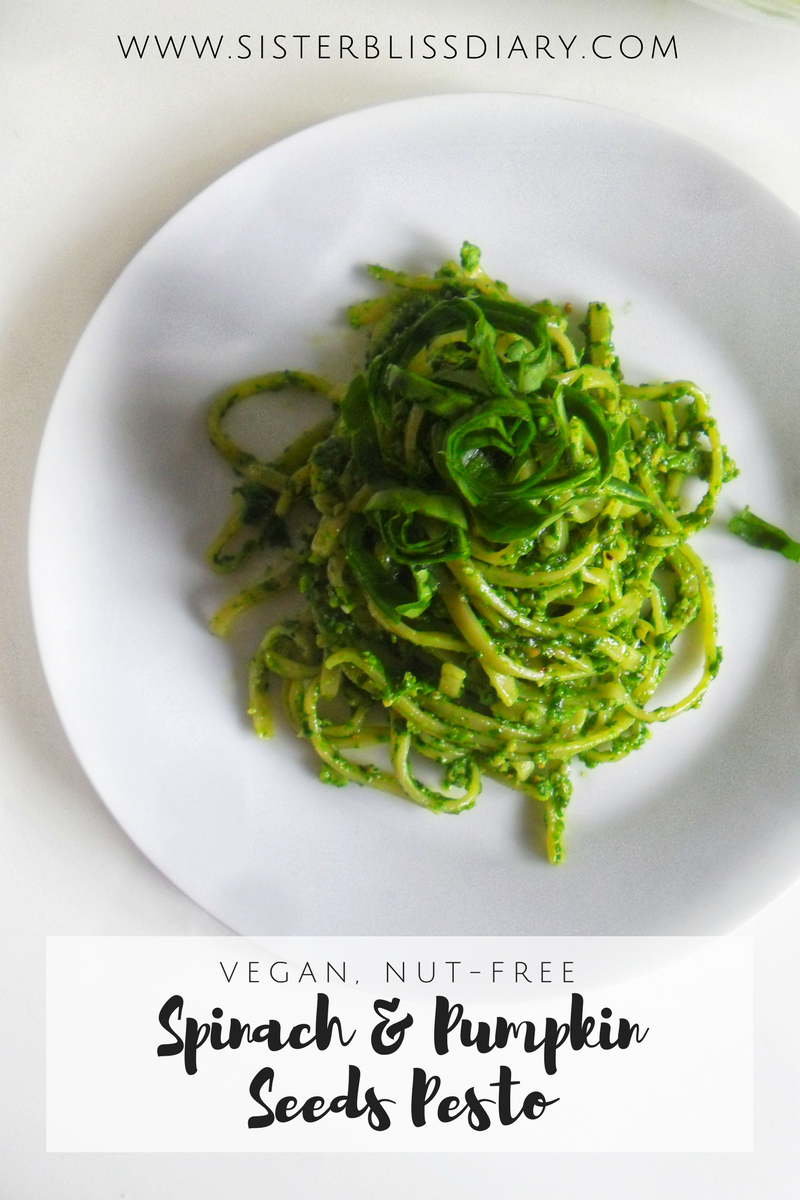
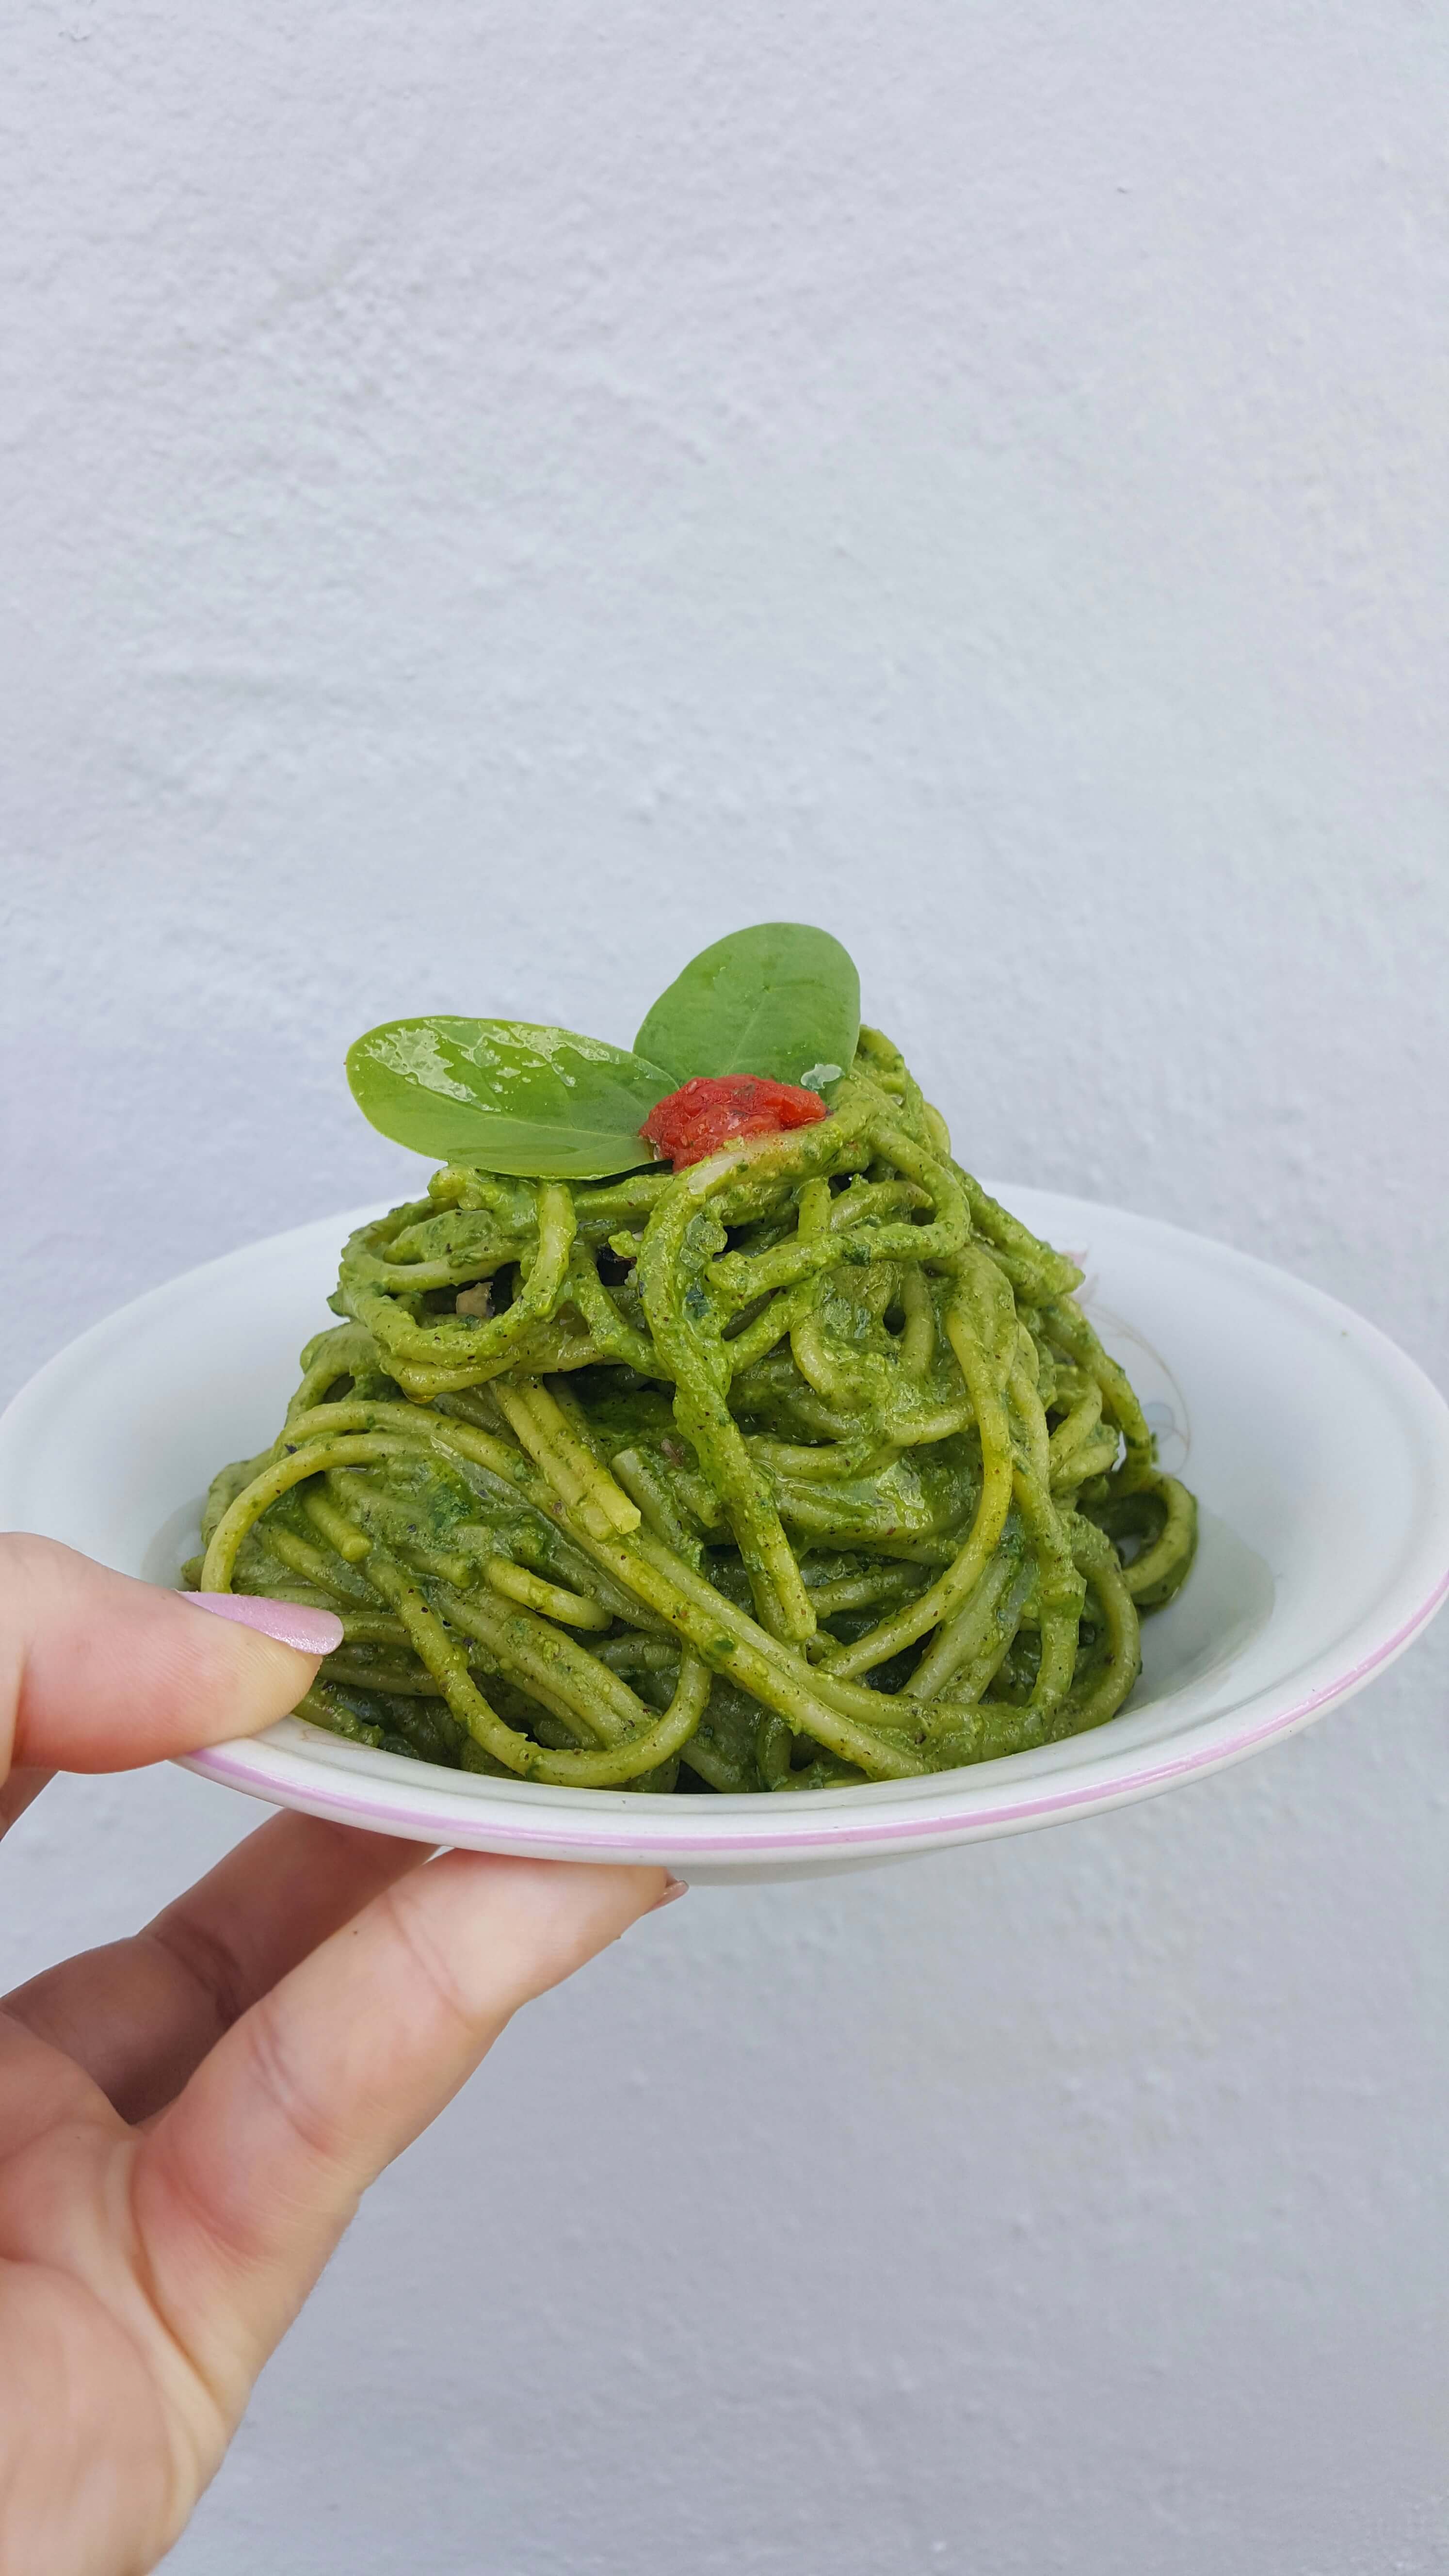
Spinach & Pumpkin Seeds Pesto {Vegan, Nut-Free}

Now that Pesach is over, we can indulge with this super green, easy and flavorful Spinach & Pumpkin Seeds Pesto. #Happyhametzweek 🙂

Looking for more pasta posts? Head over our Vegan Mushrooms Spinach Pasta, Avocado Pesto or the mega yummy Sweet Potato and Tomato Pasta Sauce!

I love pesto so much! Made with fresh basil and roasted pine nuts, pesto must be one of the easiest and yummiest sauces of the whole pasta world.

But, what happen if you run out of basil or you just don’t want to break the bank buying pine nuts?

Here it comes: Spinach & Pumpkin seeds Pesto

This is where Spinach and Pumpkin seeds come to play. This duo is awesome because with it you can make salads, rice, soups, sauces, snacks and, of course, pesto 🙂

It is also a great solution when you are traveling and need some greens boost in the form of lunch or dinner before heading to the airport 😀 Plus, it is satisfying, vegan and nut-free for those who have nut allergies.

Ready in no time

This Spinach & Pumpkin Seeds Pesto (or any pesto really) needs literally no work and is ready in no time. You just need to dumb a handful of ingredients in a food processor and pulse until the desired consistency.

Because all I have is a mini food processor I did this in 2 batches which was actually a good thing because I processed my roasted seeds separately and get some lovely texture at the end from the bits of roasted seeds. You can also do this with a traditional blender or immersion blender. Use what you have.

If for any reason you don’t like the flavor of pumpkin seeds, you can substitute with more or less roasted sunflower seeds (I find they have a more subtle flavor)

With this pasta we bring to a full circle another year of Pesach memories and say adeus to a wonderful Pesach in Portugal.


If you love this recipe don’t forget to share with your friends and family and tag us #kasheribbean on social media when you make it.

We love to see your creations. Don’t forget to follow on Instagram and Pinterest to keep up with other easy recipes we share just there. Have a wonderful week ahead.

Until next time! 🙂


Spinach & Pumpkin Seeds Pesto {Vegan, Nut-Free} Read More »

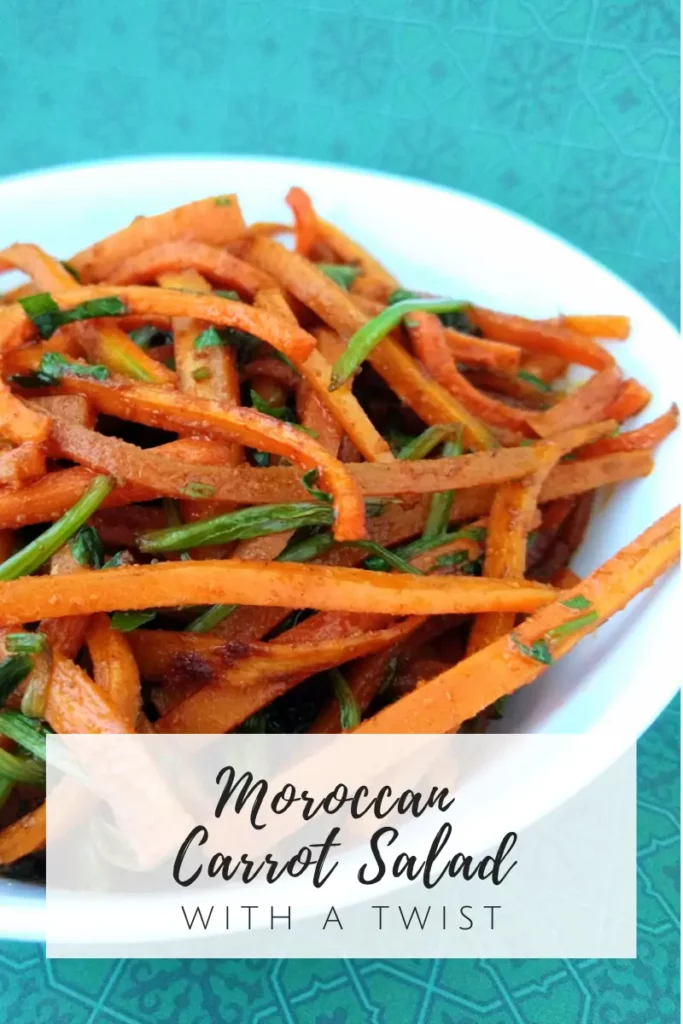
Moroccan Carrot Salad

Moroccan Carrot Salad with a Twist

There are a few things I always include in my Shabbath and Holidays’ table and that’s it Moroccan Carrot Salad, a popular refreshing simple dish from the Morrocan cuisine, featuring carrots, a variety of spiced and fresh parsley. 
This time I went for the julienne cut to add some visual interest to this humble salad, and also used some spinach stalks that were sitting in the fridge, to avoid throwing them . Feel free to use sliced carrots if you prefer, and use only parsley for a more simple yet delicious side dish. 

Carrots are root vegetables that belong to the Apiaceae family, widely known for their vibrant color, sweetness and earthy flavor. Carrots are not only a versatile ingredient, but are also packed with nutrients like antioxidants, vitamin C, potassium, and dietary fiber, and known to be an excellent source of beta-carotene, which once converted into vitamin A in the body helps maintain good vision, promotes healthy skin, and supports the immune system

Always wash and scrub carrots thoroughly to remove any dirt or residues before using. If you buy organic, you can always save the skin, chop it up and add to soups, stews or sauté and sprinkle over rice or salads. Although orange carrots are the most common, you can also find it in other colors as well. Try them on for a kick of flavor and color. Now, let’s get cooking Moroccan Carrot Salad.

Moroccan Carrot Salad

Course Dinner, Salad, Side Dish
Cuisine Middle East, moroccan

Ingredients
  

  • 2 Tbsp Extra Virgin Olive oil
  • 1 Garlic clove, Crushed {or 1 tsp. Garlic powder}
  • 1 tsp Paprika
  • 400 gr Carrots, cut into julienne
  • ½  tsp Ground cumin
  • ¼ cup Fresh pasrley, finely chopped {Can use fresh cilantro instead}
  • Freshly squeezed lemon juice {add to taste}
  • Salt and Pepper {add to taste}

Instructions
 

  • Start by preheating your pan on low heat.
  • Add your oil, chopped garlic, cumin and paprika, and cook for a few minutes until the garlic and paprika are fragrant.
  • Add the carrots, about 1 teaspoon of salt, and pepper to taste and let this cook with the lid on for about 5 to 7 minutes or until your carrots are al dente (meaning that they still have a little crunch on the center. Turn off the heat.
  • Add parsley and lemon juice and adjust the salt and pepper if necessary.
  • Mix everything well and let it cool to room temperature before storing in the fridge.

Notes

Do you have fresh spinach in the fridge that need some love? Add them also to this recipe to avoid food waste. 
Keyword carrot salad, moroccan salad

Have you make this Moroccan Carrot Salad or any other recipe from the blog? Use the tag #kasheribbean to share on social media and, don’t forget to follow on instagram and pinterest to keep up with our easy recipes from us and the blogosphere!


Moroccan Carrot Salad Read More »
Dairy-Free Flan with Coconut Milk

Extra Creamy Dairy-Free Creme Caramel {Passover-friendly}

Extra Creamy Dairy-Free Creme Caramel {Kosher for Passover}

If you dream of making a super creamy dessert for your next gathering or holiday, today is your lucky day because I am sharing with you my recipe for an Extra Creamy Dairy-Free Creme Caramel (also known as “Flan”). Creme Caramel is naturally Gluten Free so, it is also perfect dessert for Pesach too. 

Another bonus of making flan is that is literally one of the easiest desserts on the planet, and it is made with very simple ingredients you probably have at home right now: coconut milk, eggs, milk, sugar and some flavoring. Vanilla is traditionally used, but rum extract or emulsion also adds a nice touch. 

Need more Pesach inspiraion and recipes? Check out other Pesach-friendly recipes from the blog over here and our Pesach Ingredients Swap List right here!

Another thing that I love about Creme Caramel is that it is a very forgiving dessert. If you are looking to reduce the sugar, you can cut in half the amouts for the caramel and the custard. At this time I haven’t yet tried with sugar substitutes, but the ones that are a cup-for-cup replacement for sugar should work with no problem. 


Thanks to the viscosity of the evaporated and condensed milk used in traditional Creme Caramel, the end result tends to be very silky and creamy. To make up for this,
I added 10 grams of cornstarch. Cornstarch is a thickening agent that can set about 4 times its weight. With this little addition of cornstarch we balance the creaminess of the custard, making it less “eggy” (which can be an issue when working with plant based milks). 

If you don’t eat kitniot during Pesach, you are welcome to leave the cornstarch out. You will still end up with flan, but since the cornstarch helps the custard set firmly and faster, I’d recommend you add and extra egg, and bake for a little longer, let’s say an extra 10-15 minutes if doing so.

A very important step when making creme caramel, is to bake it on a bain marie, which helps with even distribution of heat, and with the slow cooking of the egg, which in return gives you a more silky creamy custard. 

Dairy-Free Flan with Coconut Milk

A common mistake when making flan, is to overcook the custard. Don’t do it! But how do you know the custard is ready?? Wiggle the pan or ramekins. When the edges are set and the center jiggles a little, then is ready. The heat from the pan is hot enough to continue cooking the center of the flan, even when taken out of the oven. Once done, remove the creme caramel from the oven, and cool to room temperature completely before storing in the fridge overnight. 

If you are impatient, you can refrigerate for 4 hours before serving, but beware, chilling these babies overnight does make a difference in the texture of the final product (more creaminess, anyone?!) and also intensifies flavor. My recommendation for you is to plan ahead, and make this the day before serving. 


Dairy-Free Creme Caramel with Coconut Milk
Dairy-Free Flan with Coconut Milk

Extra Creamy Dairy Free Creme Caramel

Prep Time 10 minutes
Cook Time 1 hour
Rest time 12 hours
Course Dessert
Cuisine Dominican Republic

Ingredients
  

For the Caramel:

  • 30 gr Water
  • 100 gr Granulated Sugar 

For the Creme Caramel:

  • 800 gr Full Fat Coconut milk
  • 300 gr Eggs
  • 100 gr Granulated Sugar 
  • 10 gr Corn Starch
  • 1/2 Tbsp Vanilla Extract You can also use Rum Extract. If using emulsion of any kind, add 1/2 teaspoon.
  • 1/4 tsp Salt 

Instructions
 

  • Preheat your oven to 180°C (350°F)

For the caramel:

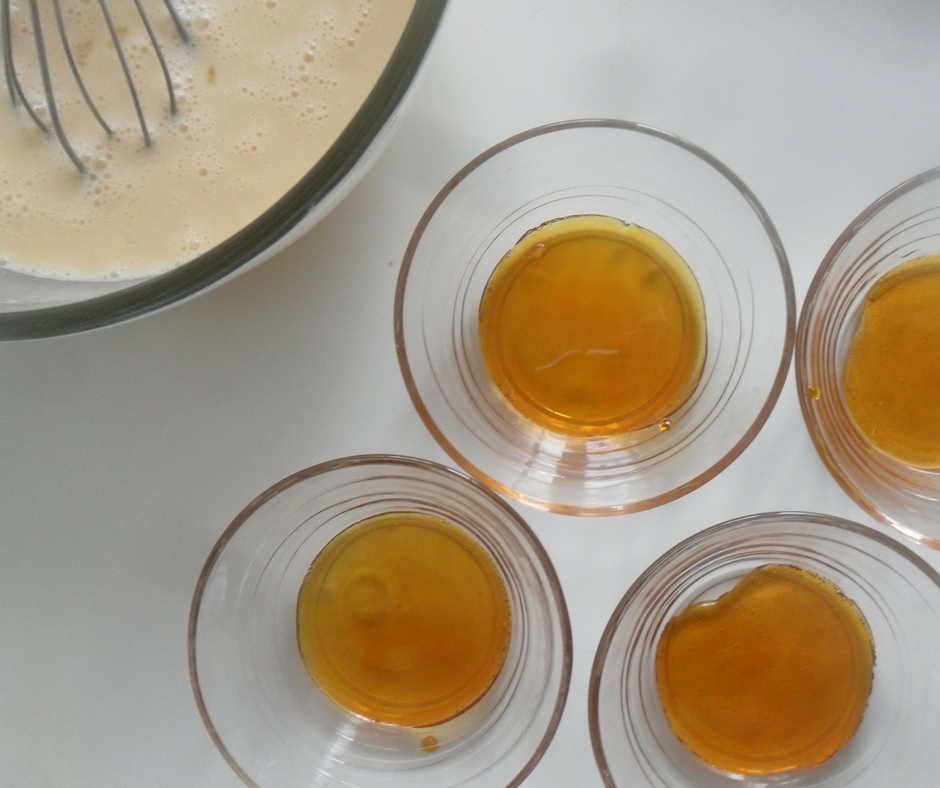
  • Combine water and sugar and melt over medium heat until it gets a deep amber color.
  • Take the caramel off the heat and coat with it 6 ramekins or 1 - 9" (inches) round cake pan.
  • Set aside to cool down and harden, before adding the custard.

For the Creme Caramel:

  • In a bowl, mix corn starch and 2-3 Tablespoons of coconut milk and mix well.
  • In bowl, mix all of the ingredients for the custard, including the previous mix of corn starch+coconut milk.
  • Pass the custard mixture through a fine sieve to discard any egg residue.
  • Equally divide the mixture into the ramekins or the 9 inches baking pan.
  • Fit the custard ramekins or cake pan into a bigger ovenproof dish (like Pyrex, a roasting pan, etc).
  • Place the ramekins or baking pan in the oven, and then carefully pour water into the bigger baking dish. The water should be 1½ to 2 inches deep.
  • When using ramekins, bake for 30-35 minutes. If using a 9 inches baking pan, bake for 60 minutes or until edges are firm but the center still jiggles a little.
  • Once ready, take out of the oven, and let it cool down completely before placing in the refrigerator for at least 4 hours; but preferably (and recommended) overnight.
  • When is time to serve, run a knife around the edge of the creme caramel and invert it into a bigger dish, preferably with slightly tall sides. The creme caramel will drop and you can see some caramel sauce flowing. Cut into slices and serve.

Notes

  • You can easily increase or decrease this recipe to fit your needs.
  • If you ever find yourself with leftover raw custard mixture, store it in an air-tight container and freeze. When ready to use, thaw completely, whisk really well or mix with a blender, just to make sure everything is well combined, pass through a sieve and then pour into the prepared ramekins or baking pan and bake.
 
Keyword custard, dairy-free, desserts, sweet treats

Have you made this Dairy-Free Creme Caramel already? Use the hashtag #kasheribbean to share with us on social media and, don’t forget to follow on instagram and pinterest for more easy recipes.

Extra Creamy Dairy-Free Creme Caramel {Passover-friendly} Read More »

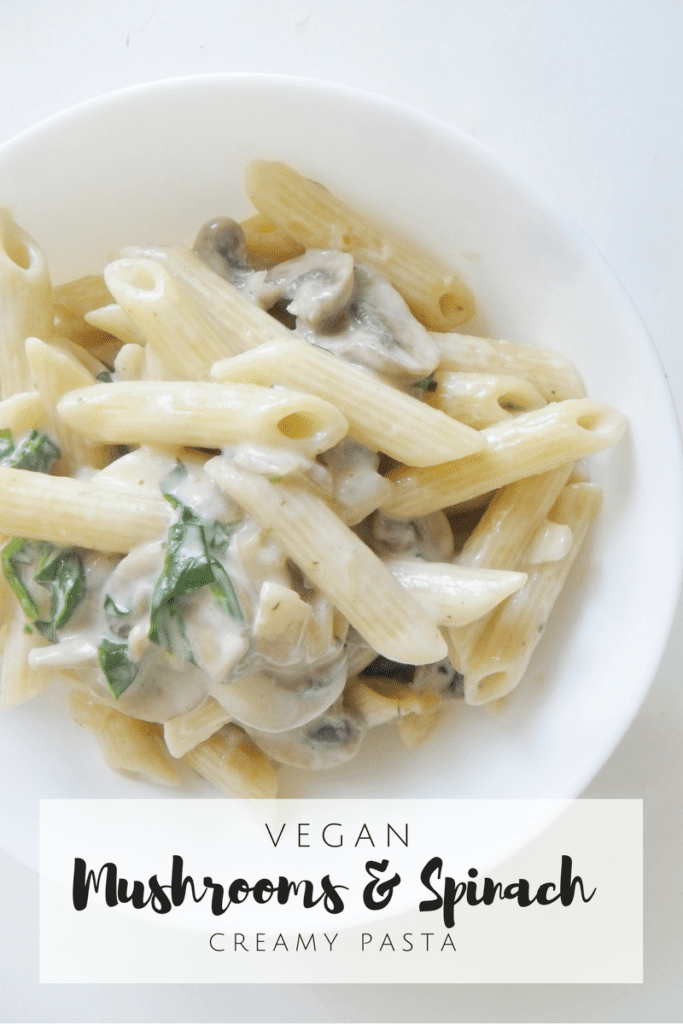
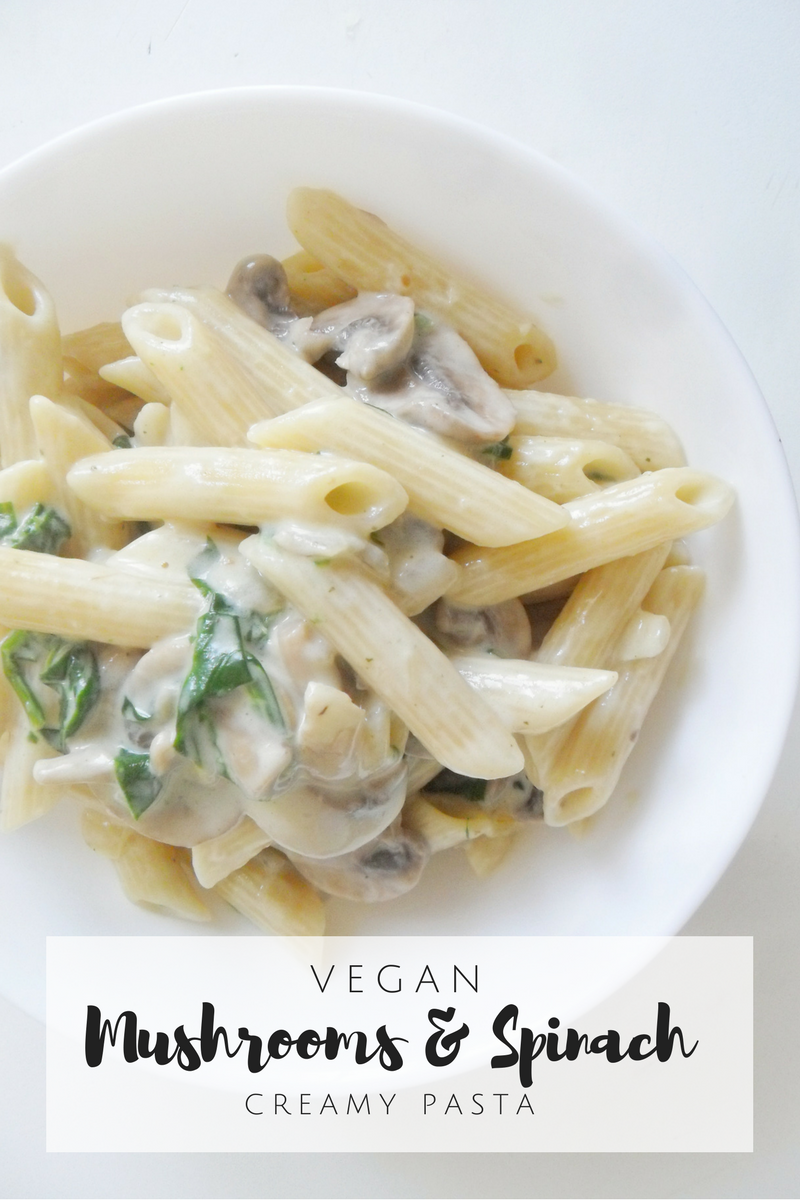
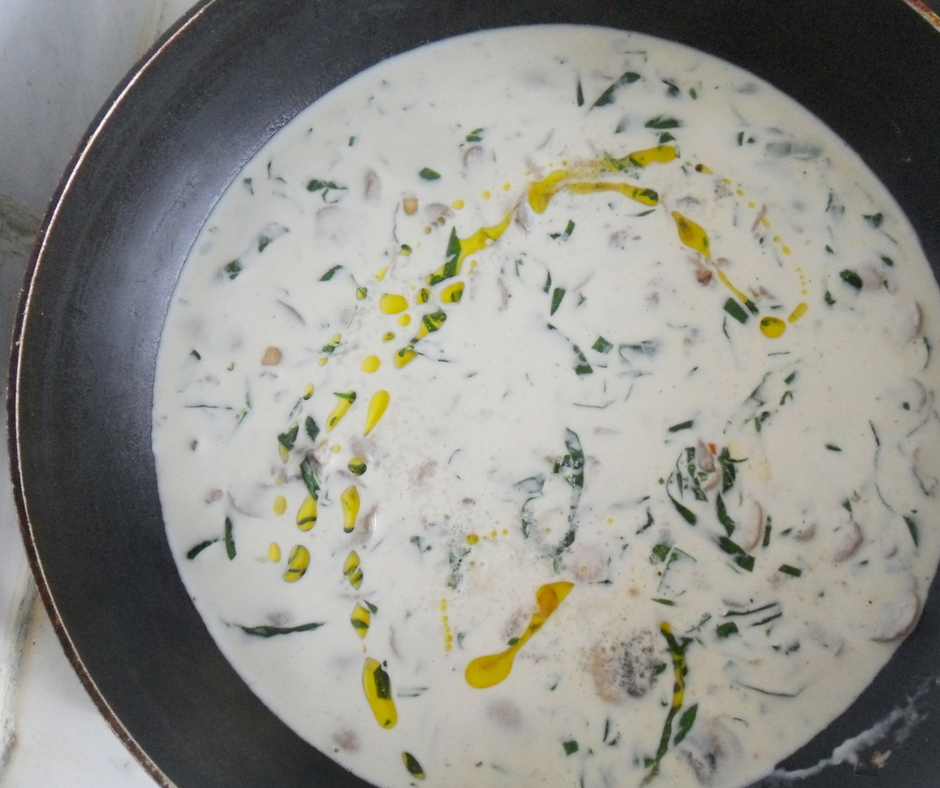
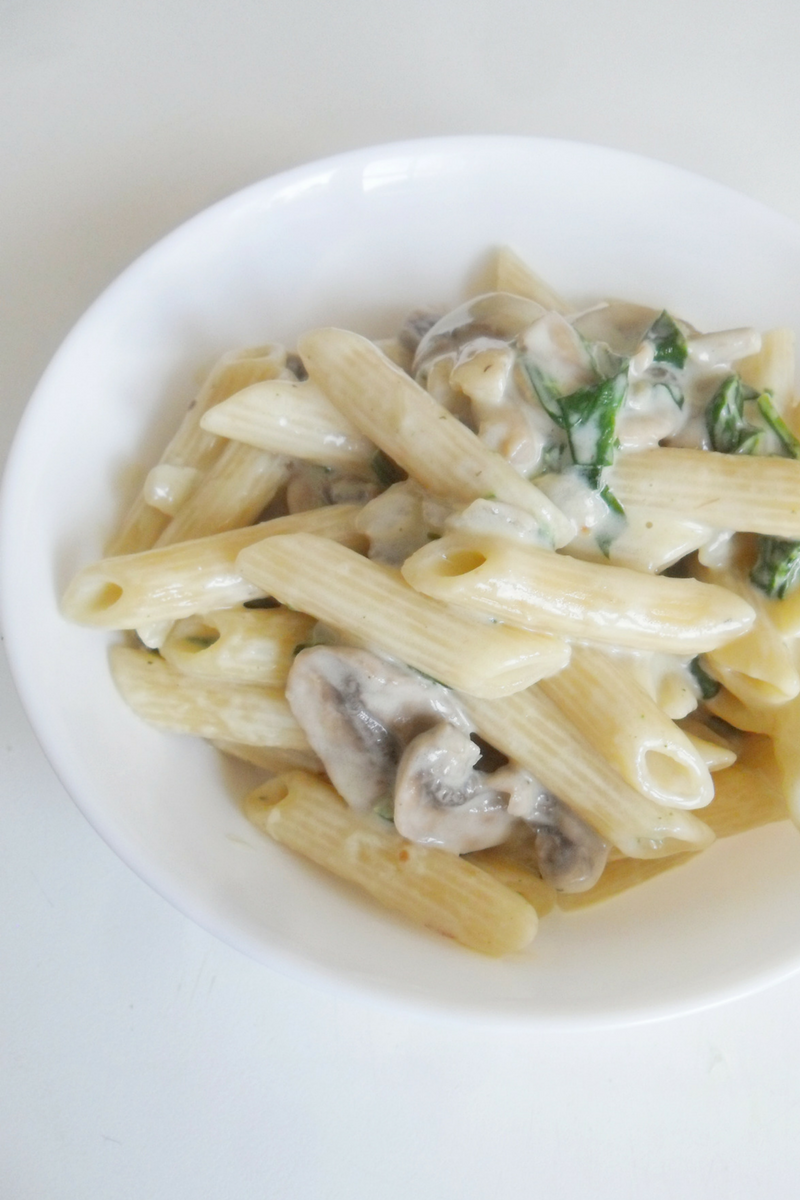
Vegan Mushrooms Spinach Alfredo

I love pasta because it is so versatile and easy to make. You can literally please a crowd with a few ingredients and simple preparation, for the most past it is kids-friendly and also you don’t need to break the bank. Need another reason? Now that Purim is over, the pasta frenzy has started (aka. Pesah is around the corner!), so this nice easy recipe is all you need to cook that bit of pasta hidden in your pantry in time for Pesah.  Take note on the simply luscious Vegan Mushrooms Spinach Alfredo before Pesah cleaning drives you nuts.

There are a few staple pasta dishes I do at home, mainly because it is just easier to make family members eat what they already know, and within that repertoire I have pasta with dairy-free cream and smoked salmon, that hubby certainly love but, I had some reasons to twist things for this occasion (first, I am trying to incorporate more vegan food into our meals. Second, I had a whole bunch of mushrooms sitting on the fridge and third, I was having a lazy day; enough reason right here, lol…

… And, well, we all agree that sometimes you just need that creamy luscious bowl of pasta no matter what it brings, right? lol so, I added the mushrooms while I crossed my fingers and prayed hubby will like it… oh, oh! 😛

No Cream? No Problem!

For this pasta I used Alpro Cuisine Soy Cream but if you can’t find dairy-free cream you can substitute with some dairy-free bechamel. You can easily make the bechamel as follows: Heat 2 Tbsp of olive oil over low heat, add 2 Tbsp of All Purpose flour and cook the flour for 1 to 2 minutes, stirring constantly so the flour doesn’t burn, until it has a nutty smell. Still stirring, pour 2-3 cups of soy milk and stir vigorously until the sauce has the desired consistency.

Stirring it is very important because this will prevent your sauce from getting all clumpy but, if for some reason you were distracted and your sauce ended up with clumps, you can strain through a fine sieve once it is finished.  Season with salt, pepper and a pinch of nutmeg and it will be ready to go!

That’s it! Vegan Mushrooms Spinach Alfredo! Mega easy right? And not just easy but very flavorful thanks to the umami of the mushrooms. This Vegan Mushrooms Spinach Alfredo proved to be the real deal that day! And, my 3yo, who doesn’t normally eat mushrooms, liked it and asked for more 😀

Have you tried Vegan Mushrooms Spinach Alfredo yet? What are you waiting for?! If you love this recipe don’t forget to share with your friends and family and, of course, head to instagram and pinterest to say hi! We always love to hear from you!

Until next time!
Hannah

Vegan Mushrooms Spinach Alfredo Read More »